A dull drill bit is every maker’s silent productivity killer. If your drill starts smoking, squealing, or leaving rough holes, it’s time for maintenance.
In this guide, ToolCraftz walks you through simple, effective ways to clean, maintain, and sharpen your drill bits so you get smoother cuts and longer tool life.
Why Drill Bit Maintenance Matters
Sharp bits mean cleaner holes, faster work, and less wear on your drill motor.
A well-maintained set can last years, saving you money on replacements and reducing frustration in the workshop.
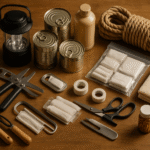
If you’re setting up your workspace for the first time, read our Workshop Setup Guide for layout and tool organization tips.
1. Cleaning Your Drill Bits
Before sharpening, remove residue, rust, or debris.
What you’ll need:
- A wire brush or soft steel wool
- Mild detergent and warm water
- WD-40 or light machine oil
Steps:
- Wipe off dust and grease.
- Soak in warm, soapy water for a few minutes.
- Scrub with a brush to remove build-up.
- Dry thoroughly and apply a thin oil coat to prevent rust.
Pro Tip: Keep a small maintenance kit near your drill station for quick cleanups — see our Top 10 Must-Have Tools for Every Modern Workshop in 2025 for ideas.
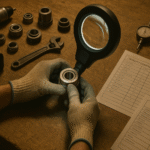
2. Inspect for Damage
Before sharpening, check for:
- Chips or cracks on the cutting edge
- Bent or uneven flutes
- Blue discoloration (a sign of overheating)
If the damage is severe, it’s safer to replace the bit. You can compare quality replacements in our Tool Reviews Section.
3. Sharpening Methods
There are several ways to sharpen drill bits depending on what you have available.
A. Using a Bench Grinder
This is the classic, most efficient way for standard twist bits.
Steps:
- Hold the bit at a 60-degree angle to the wheel.
- Gently press the cutting edge while rotating the bit evenly.
- Avoid overheating — dip the bit in water after each pass.
B. Using a Drill Bit Sharpener
If precision matters, invest in a sharpening tool like the Drill Doctor series.
These are beginner-friendly and ensure the correct angle automatically.
For details on choosing sharpeners, visit Home Depot’s Drill Bit Care Tips.
C. Using a File or Sandpaper
For small touch-ups on soft metals, a fine metal file or 400-grit sandpaper works in a pinch.
Use light strokes following the bit’s cutting edge until it regains sharpness.
4. Checking Your Work
After sharpening:
- Test the bit on scrap wood or metal.
- If the hole is clean and the bit doesn’t wander, you’ve got the angle right.
- Apply cutting oil for metal drilling to reduce friction and extend tool life.
Learn more about choosing proper drill speeds in our Tool Operation Guide.
5. Proper Storage and Care
Even sharp bits dull quickly if stored poorly.
Keep them in a dry, organized case and label sizes clearly.
If you’re looking for durable cases, Bob Vila’s Storage Tips offer smart organization ideas for any workspace.
When to Replace Your Drill Bits
If sharpening doesn’t restore performance or the bit repeatedly overheats, it’s time to replace it.
Higher-end cobalt or titanium-coated bits, like those reviewed in our DeWalt vs. Milwaukee Comparison, last much longer under heavy use.
Final Thoughts
Keeping your drill bits sharp isn’t just about saving money — it’s about working smarter, safer, and cleaner.
With just a few minutes of regular maintenance, you’ll extend the life of your tools and improve the precision of every project.
For more practical DIY insights, visit our Guides Section or explore our latest Tech Updates for innovations that make maintenance even easier.