
If you’ve ever found yourself pondering the question, “What size drill bit for the M6 tap?” you’re not alone. Selecting the appropriate drill bit size for tapping M6 threads is a common concern, especially for those venturing into machining or DIY projects.
We’ll demystify the process, providing you with a clear and easily digestible answer to the question of what size drill bit to pair with an M6 tap. Whether you’re embarking on a home improvement journey or working in a machine shop, understanding this crucial tool pairing is paramount for achieving precise and secure threaded connections.
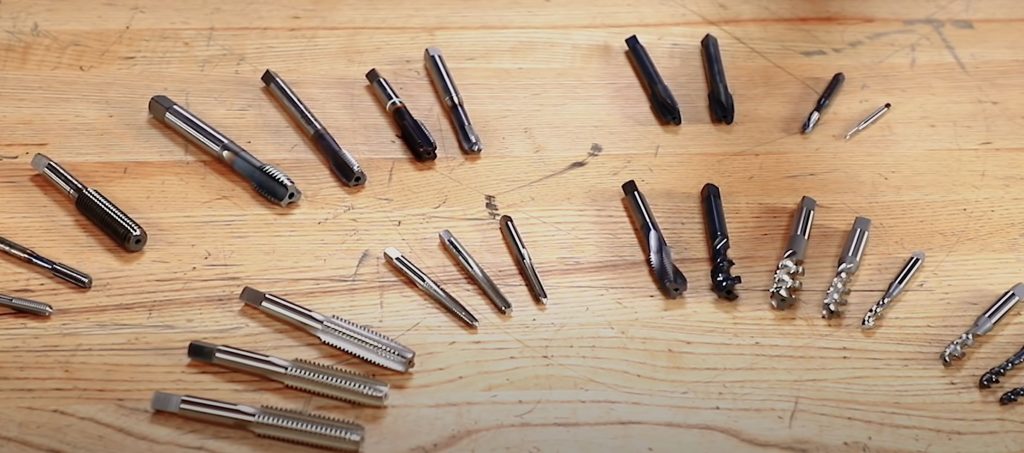
Understanding M6 Taps
An M6 tap is a specialized tool used primarily in threading operations, particularly in the realm of metalworking and machining. The “M” in M6 stands for “metric,” indicating its adherence to the metric system, widely adopted for fasteners and threads worldwide. T
he number “6” signifies the nominal diameter of the tap in millimeters, representing the size of the hole it’s intended to thread.
Here are some key takeaways to grasp about M6 taps:
Metric System: M6 taps are an integral part of the metric system, responsible for creating metric threads. In the case of an M6 tap, it’s designed to generate an M6 thread.
Nominal Diameter: The nominal diameter of an M6 tap is precisely 6 millimeters, signifying that it creates threads with a primary diameter of 6 millimeters.
Thread Pitch: In addition to the nominal diameter, threads have a pitch, indicating the distance between adjacent thread crests. For M6 taps, the standard thread pitch usually stands at 1.0 millimeter, meaning each thread is spaced 1.0 millimeter apart.
Versatile Use: M6 taps find their utility in an array of applications, from assembling machinery and securing components to crafting threaded holes for bolts or screws with M6 threads.
Tapping Process: The typical procedure for using an M6 tap involves first drilling a hole into the material, slightly smaller than 6 millimeters, and then inserting the M6 tap into this hole. By turning it clockwise (often aided by a tap handle), threads are meticulously crafted within the hole. Achieving successful tapping hinges on the proper application of lubrication and technique.
Tolerance and Fit: The fit of threads produced by an M6 tap depends on factors like tolerance class and the type of fit essential for the specific application. Different projects might necessitate varying thread fits, including loose fit, standard fit, or interference fit.
Material Compatibility: M6 taps are available in various materials, encompassing high-speed steel (HSS) and carbide, with the choice contingent on the material being threaded. More complex materials may demand taps constructed from sturdier materials such as carbide.
Thread Direction: M6 taps can feature either right-hand (clockwise) or left-hand (counterclockwise) threads, contingent on the precise threading requirements of the project.
Factors to Contemplate
When you’re on the quest to determine the ideal drill bit size for tapping M6 threads, several critical factors come into play. Here’s a breakdown of what you need to consider:
Material of the Workpiece
The material of your workpiece significantly influences the selection of the appropriate drill bit size for tapping M6 threads. Different materials possess distinct characteristics that impact the choice of drill bit size and the overall tapping process.
Material-Dependent Drill Bit Sizes
- Metal: When working with metal workpieces like steel, aluminum, or brass, the hardness of the material necessitates specific drill bit sizes. For instance, when tapping M6 threads in steel, a drill bit sized around 5mm or slightly smaller may suffice. A slightly larger drill bit might be appropriate for softer metals such as aluminum. High-speed steel (HSS) or cobalt drill bits are the go-to choices for metal drilling.
- Wood: Woodworkpieces are generally softer compared to metals, and consequently, the drill bit size for tapping M6 threads in wood might be smaller. A 4mm or 4.5mm drill bit could fit the bill. Woodworking typically involves standard twist drill bits.
- Plastic: Plastic materials tend to be softer and more forgiving than metals. For tapping M6 threads in plastic, a 4mm or 4.5mm drill bit can prove suitable. Standard twist drill bits or specialty bits designed for plastics are apt choices.
Commonly Tapped Materials Using M6 Threads
- Metal: M6 threads find extensive use in metal applications, spanning machinery assembly, automotive components, and metal fabrication. Common metal materials include steel, aluminum, stainless steel, and brass.
- Wood: M6 threads can be tapped into wood for purposes like furniture assembly, cabinetmaking, and woodworking projects. Opting for the right drill bit size is paramount to prevent splintering or oversizing the hole.
- Plastic: Electronics, consumer products, and plumbing applications often involve plastic workpieces that require M6 threads. Precise selection of drill bit size guarantees secure threading without causing damage to the plastic.
Importance of Drill Bit Size
The significance of drill bit size is far-reaching in various drilling applications. Fundamentally, the size of a drill bit dictates the diameter of the hole it creates, and this seemingly simple factor holds profound implications.
It ensures that the hole’s diameter aligns precisely with the intended purpose, whether it’s for securing fasteners, maintaining precise alignment in woodworking or metalworking projects, or upholding load-bearing capacity in construction and engineering endeavors.
Choosing the right drill bit size guards against loose connections, compromised structural integrity, and the frustration of ill-fitting components. Moreover, it acts as a preventative measure against over-drilling, which can jeopardize materials and structures.
The correct drill bit size is not just about functionality and safety; it also prolongs the lifespan of your tools by averting excessive wear and damage. Ultimately, the proper drill bit size stands as the key to achieving professional-grade results and adhering to industry standards across a spectrum of drilling projects.
Calculating the Correct Drill Bit Size
Determining the correct drill bit size for a specific application hinge on a comprehensive consideration of multiple factors. These include the size of the fastener, the material type, and the depth of the hole. Here’s a systematic guide on how to calculate the correct drill bit size:
1. Determine the Fastener Size: Commence by identifying the fastener size you intend to use, whether it’s a screw, bolt, or anchor. This typically entails knowing the fastener’s nominal diameter and the type of thread it possesses, be it metric or imperial.
2. Select the Material Type: Factor in the type of material you’ll be drilling into, encompassing wood, metal, concrete, plastic, or any other substrate. Different materials necessitate varying drill bit types and sizes for optimal results.
3. Refer to a Drill Bit Size Chart: Drill bit size charts are readily accessible online and at hardware stores. These charts offer recommendations for the suitable drill bit size based on the fastener size and material type. Simply match the fastener size and material to identify the recommended drill bit size.
4. Adjust for Pilot Holes: In certain instances, it may be necessary to create a pilot hole before using a larger drill bit to create the final hole. The pilot hole’s size should be smaller than the intended final hole size. Consult the chart to ascertain the appropriate pilot hole size.
5. Consider Depth and Shank Length: Take into account the required depth of the hole you’re drilling. Ensure that the selected drill bit possesses a shank length (the unfluted portion of the bit) that accommodates the desired hole depth.
6. Check Manufacturer Recommendations: For specific projects or materials, the manufacturer of the fasteners or drilling equipment may provide precise recommendations for drill bit sizes. Always adhere to these guidelines if they are available.
7. Test on Scrap Material: When in doubt or when working with unique or unfamiliar materials, it’s a prudent practice to test the selected drill bit size on a scrap piece of the same material. This guarantees that the hole fits the fastener properly.
8. Verify Fit: After drilling the hole, verify that the fastener fits snugly without any excess play. The fastener should thread into the hole smoothly and securely.
9. Prioritize Safety and Precision: Prioritize safety throughout the drilling process, ensuring that the hole’s dimensions align impeccably with your project’s specifications. When working on critical applications such as structural tasks, consult with professionals or engineers to ascertain precise hole sizing.
In essence, calculating the correct drill bit size necessitates accounting for the fastener size, material type, hole depth, consultation of drill bit size charts, and adherence to manufacturer recommendations. Precision is the linchpin, as the right drill bit size guarantees a secure and accurate fit for fasteners while contributing to the triumph of your drilling project.
Choosing the Right Drill Bit
The selection of the correct drill bit is foundational to the attainment of accurate and efficient drilling results. The journey begins by identifying the material you intend to drill into, spanning wood, metal, concrete, masonry, or even delicate substances such as glass and tile.
Each material demands a specific drill bit type. For instance:
- Twist Drill Bits: These are versatile and suitable for wood, metal, and plastic.
- Masonry Drill Bits with Carbide Tips: Ideal for concrete and brick.
- Spade Bits: Excel at drilling large holes in wood.
- Forstner Bits: Perfect for intricate woodworking projects.
Consider the diameter of the hole you need to create, ensuring that the drill bit size aligns with your intended fastener or component. Compatibility with your drilling tool’s shank is pivotal, as is the selection of the appropriate drill bit material and type to ensure optimal performance.
Using the Drill Bit and M6 Tap
The collaboration between a drill bit and an M6 tap is the standard procedure for crafting threaded holes in various materials. Here’s a step-by-step guide to navigate this process effectively:
Materials and Tools Needed
- Drill
- Drill bit (sized for pilot hole)
- Lubricating oil or cutting fluid
- M6 tap
- Tap wrench or T-handle
- Safety glasses
- Work gloves
Procedure
Mark the Drilling Location: Identify the precise location where you intend to create the threaded hole. Mark it with a center punch or any sharp instrument to ensure pinpoint accuracy.
Pilot Hole: Begin by creating a pilot hole using a drill bit slightly smaller than the core diameter of the M6 tap. The core diameter of an M6 tap hovers around 5 millimeters, so initiate with a 4.5mm or 4mm drill bit, depending on the material.
Secure the Material: Prevent movement of the material during the tapping process by securely clamping or stabilizing it.
Apply Lubricating Oil: To minimize friction and heat generation during tapping while prolonging the tap’s lifespan, apply a modest amount of lubricating oil or cutting fluid to the pilot hole.
Insert the M6 Tap:
- Carefully insert the M6 tap into the pilot hole.
- Ensure that it’s precisely aligned and perpendicular to the surface.
- Employ a tap wrench or T-handle to securely hold and turn the tap.
Commence Tapping: Turn the M6 tap in a clockwise direction (right-hand thread) into the hole. Maintain steady and even pressure to craft threads within the material. The lubricant facilitates a smooth cutting process.
Periodic Backing Off: After a few turns, partially retract the tap to break and clear any chips or debris. This practice prevents clogs and ensures seamless progress.
Continue Tapping: Turn the tap clockwise until you reach the desired depth. You can employ a depth gauge or mark the tap itself to indicate the required depth.
Test Fit: Upon completing the tapping process, remove the tap and meticulously clean the threads. Test the fit with an M6 screw or bolt to confirm that it threads smoothly and securely into the newly created hole.
Final Checks: Inspect the depth and alignment of the threaded hole. If necessary, use a countersink bit to chamfer the opening, ensuring a flush fit with the fastener head.
Clean and Store: To prevent rust or damage, ensure thorough cleaning of the tap and drill bit, and store them meticulously.
Common Mistakes to Avoid
Despite the clarity of guidelines, several common mistakes may still arise when selecting drill bit sizes for M6 taps. These errors can potentially lead to undesirable consequences. Here’s an exploration of some of these mistakes, their potential repercussions, and guidance on how to evade them:
Common Mistakes:
- Choosing the Wrong Drill Bit Size: This ranks among the most prevalent mistakes—selecting a drill bit size either too small or too large for the M6 tap.
- Neglecting Material Considerations: Failure to factor in the type of material being drilled can result in erroneous drill bit selection. Different materials demand distinct drill bit types and sizes.
- Skipping Pilot Holes: Omitting the creation of a pilot hole before employing the M6 tap can render initiating the tap challenging, potentially leading to off-center or misaligned threads.
Potential Consequences:
- Improper Fit: The wrong drill bit size can yield an improper fit between the M6 tap and the threaded hole, resulting in either loose fasteners or difficulty threading them.
- Thread Damage: An incorrectly sized drill bit can cause thread damage, including stripping or cross-threading, jeopardizing the connection’s strength and the threaded hole’s integrity.
- Tapping Difficulties: Skipping the creation of a pilot hole can make it challenging to commence tapping, often resulting in off-center or misaligned threads.
Guidance on Avoiding Mistakes:
- Refer to Size Charts: Consult drill bit size charts or manufacturer recommendations to ascertain the appropriate drill bit size for your M6 tap. These resources offer size recommendations for various materials and fastener types.
- Consider Material: Always factor in the material you’re drilling into. Different materials necessitate different drill bit types and sizes. For instance, metals may require different sizes than wood or plastic.
- Use a Pilot Hole: It’s a non-negotiable practice to create a pilot hole before employing the M6 tap. This ensures proper alignment and minimizes the risk of misaligned or damaged threads. The pilot hole’s size should be slightly smaller than the core diameter of the tap.
Maintenance and Care
Proper maintenance and care of your drill bits and M6 taps are indispensable for preserving their longevity and sustaining their performance. Here are some guidelines for maintaining and caring for these invaluable tools:
Drill Bit Maintenance:
- Clean After Use: Following each use, diligently remove debris, chips, or residual material from the drill bit. Utilize a brush or compressed air to clean the flutes and cutting edges.
- Inspect for Damage: Routinely inspect your drill bits for any signs of damage, wear, or dullness. Damaged or worn bits can produce subpar drilling results and should be replaced.
- Sharpen or Replace: Should you observe dullness or bluntness in the cutting edges, contemplate sharpening the drill bit using an appropriate sharpening tool. If the bit is beyond repair, consider replacing it.
- Store Properly: Store your drill bits in a clean, dry environment. It’s advisable to employ a dedicated drill bit case or organizer to keep them organized and shielded from moisture and contaminants.
- Lubricate High-Speed Steel Bits: If you possess high-speed steel (HSS) drill bits, apply a thin layer of lubricating oil to protect against rust and corrosion.
M6 Tap Maintenance:
- Clean After Use: Similar to drill bits, meticulously clean your M6 taps after each use. Eliminate metal shavings, chips, or any residue using a wire brush or compressed air.
- Inspect for Wear: Conduct regular inspections of the tap’s cutting edges and threads, keeping an eye out for signs of wear or damage. Worn-out taps may yield threads of inferior quality and should be swapped out.
- Store Properly: Store your M6 taps in a dry, clean location, preferably within a protective case or holder. Prevent them from being exposed to moisture or contaminants.
- Apply Lubricant: Before embarking on your M6 tapping journey, apply an appropriate cutting fluid or lubricant. This reduces friction and heat generation during tapping, prolonging the tap’s operational life and ensuring smoother cutting.
- Use Proper Technique: When using the M6 tap, ensure it maintains a perpendicular alignment to the workpiece, and apply steady, even pressure. Avoid excessive force, which can lead to tap breakage.
- Reverse Tapping: From time to time, reverse the tap’s direction during tapping to disrupt and clear any chips or debris. This practice contributes to the preservation of thread quality.
- Sharpen or Replace: Taps are not immortal; their cutting edges can dull over time. If you notice a substantial decline in performance or thread quality, consider either replacing the tap or having it professionally sharpened.
Conclusion
Deciphering the ideal drill bit size for an M6 tap holds paramount importance in the pursuit of successful threading and fastening across a spectrum of projects. The recommended drill bit size for an M6 tap typically stands at 5.0mm.
Nevertheless, it’s imperative to take into consideration factors such as material type, desired thread engagement, and specific project requisites, as variations may be necessary in certain cases.
Always defer to manufacturer guidelines, consult charts, or seek the counsel of experts when faced with uncertainty to guarantee precise and dependable results.
The selection of the correct drill bit size for an M6 tap constitutes a fundamental facet of any machining or DIY endeavor, and it stands as a linchpin in determining the overall quality and longevity of the final product.