
Crafting your track saw may sound like a daunting task for many, but fear not, for we are about to embark on a journey through the step-by-step process of how to make a track saw. This guide will unveil the secrets of transforming ordinary materials into a precision tool that will elevate your woodworking projects to a new level.
Whether you’re a seasoned woodworker or just starting, the allure of a custom-made track saw lies in its ability to provide precise, straight cuts with ease. So, let’s dive into the world of DIY craftsmanship and discover the art of creating your own track saw.
Demystifying Track Saw Components: A Comprehensive Guide
The Saw
At the heart of a track saw system is, of course, the saw itself. Here’s what you need to know about this critical component:
- Motor: The motor is the powerhouse of the track saw. It determines the cutting capacity and power of the saw. Motors typically come in various sizes, with higher wattages providing more cutting power for thicker materials.
- Blade: The blade is where the actual cutting magic happens. Track saws use specialized blades with fine teeth for clean and precise cuts. The blade can affect the quality and speed of your cuts, so selecting the right one for your project is crucial.
- Dust Collection: Look for a saw with effective dust extraction to minimize cleanup after cutting.
- Depth Adjustment: The ability to adjust the cutting depth is a fundamental feature of track saws. It allows you to make precise cuts at different depths, making it ideal for many projects.
The Track
- The track is the guiding rail that ensures straight and accurate cuts. It is one of the defining features of a track saw system:
- Length: Tracks come in various lengths to accommodate different cutting needs. Longer tracks are useful for cutting large sheets of material, while shorter ones are more maneuverable for smaller projects.
- Material: Tracks are typically made from aluminum or other sturdy materials. Aluminum tracks are lightweight and resistant to rust, making them a popular choice among woodworkers.
- Anti-Slip Strips: Many tracks have anti-slip strips on their undersides to prevent movement during cuts. This feature enhances safety and accuracy.
- Splinter Guards: Splinter guards are often included on tracks to minimize tear-out on the edge of your work piece, resulting in cleaner, more professional-looking cuts.
Clamps and Accessories
To ensure that your track stays securely in place and your cuts are precise, clamps and accessories play a pivotal role:
- Clamps: Clamps secure the track to your work piece, preventing it from shifting during the cutting process. Quick-release clamps make setup and adjustments more accessible and more efficient.
- Track Connectors: For longer cuts or when you need to join multiple tracks together, track connectors are essential. They ensure a seamless and straight extension of your track.
- Track Dogs: Track dogs are handy accessories that can be used to secure the track to your workbench, providing stability and accuracy.
Essential Materials and Tools for Your DIY Project
Materials
Lumber or Building Material
The type and amount of lumber or building material you need will depend on your project. Choose the appropriate wood, plywood, drywall, or other materials that suit your project’s requirements.
Fasteners
Nails, screws, bolts, and nuts: Ensure you have the correct sizes and types for your project. Consider the material you’re fastening and any weight-bearing requirements.
Paints and Finishes
If your project involves finishing or painting, gather the necessary paints, primers, brushes, and rollers. Remember to drop clothes and painter’s tape for protection.
Adhesives
Depending on your project, you may need wood glue, epoxy, construction adhesive, or other bonding agents.
Electrical and Plumbing Supplies
If your project involves electrical or plumbing work, gather wiring, switches, outlets, pipes, fittings, and other related materials.
Hardware
Hinges, knobs, handles, and other hardware components are essential for furniture and cabinetry projects.
Insulation and Sealants
Insulation materials and sealants are crucial for maintaining energy efficiency and weatherproofing. Get the right type for your project.
Flooring and Wall Coverings
If you’re working on floors or walls, choose appropriate flooring materials (tiles, hardwood, and laminate) or wall coverings (wallpaper, paint, tiles).
Safety Equipment
Safety should be your top priority. Gather safety gear, including safety glasses, ear protection, dust masks, work gloves, and a first-aid kit.
Tools
Saws
- Circular saw: Ideal for straight cuts in various materials.
- Jigsaw: Great for curved and intricate cuts.
- Miter saw: Essential for precise angle cuts in woodworking.
Measuring and Marking Tools
Tape measure, combination square, carpenter’s pencil, and a level for accurate measurements and layout.
Fastening Tools
Hammer, screwdrivers, drill, and driver bits for securing fasteners.
Clamps
C-clamps, bar clamps, and pipe clamps to hold materials securely during assembly.
Sanding and Finishing Tool
Orbital sander, sandpaper, and brushes for smoothing surfaces.
Safety Equipment
Safety glasses, ear protection, dust masks, and work gloves for personal protection.
Power Tools
Depending on your project, you may need various power tools, such as a router, electric sander, reciprocating saw, or angle grinder.
Workbench and Sawhorses
A sturdy workbench or sawhorse provides a stable platform for your work.
Tool Storage
Keep your tools organized with a toolbox or tool chest.
Personal Protective Equipment (PPE)
Depending on your project, you might need specialized PPE like a respirator or welding helmet.
Designing a Safe and Efficient Track Saw: Step-by-Step Guide
Sketching Out Your Track Saw Design
Before diving into the nitty-gritty details, you should start with a clear sketch of your track saw design.
- Track: Decide on the type of material for your track, such as aluminum or plywood. Sketch out the track’s shape, length, and width. Ensure it’s straight and rigid to guarantee precise cuts.
- Saw Mount: Create a design for securely mounting your circular saw to the track. This mount should allow for easy adjustments and ensure the saw runs smoothly along the track.
- Handle and Controls: Plan where you’ll place the handle and controls for the track saw. Ergonomics and easy access to the saw’s power switch and depth adjustment are crucial.
- Safety Features: Sketch out provisions for safety features, like blade guards and a trigger lock to prevent accidental starts.
- Dust Collection: Consider incorporating a dust collection system into your design to keep your workspace clean and protect your health.
Calculating the Length of the Track and Dimensions
Calculating the length of your track is crucial to ensure it accommodates the materials you’ll be cutting. Here’s how to do it:
- Material Length: Measure the most extended common material you’ll be cutting (e.g., 8-foot plywood sheets). This length will dictate the minimum track length you need.
- Overhang: Add a little extra length (about 6-12 inches) to your track to accommodate blade entry and exit, giving you a margin for error.
- Storage: Consider the available space in your workshop for storing the track. It should fit comfortably when not in use.
As for dimensions, ensure the track is wide enough to provide stability and accommodate your circular saw’s baseplate. Pay attention to the compatibility of your saw with the track.
Safety Features and Precautions
Safety should always be a top priority when designing and using a track saw. Here are essential safety features and precautions to consider:
- Blade Guard: Your track saw should have a robust blade guard that covers the blade during operation and retracts when unused.
- Trigger-Lock: Include a trigger lock mechanism to prevent accidental start-ups. This ensures you have complete control over when the saw operates.
- Depth Adjustment: Make sure your saw’s depth adjustment mechanism is precise and secure to control cutting depth accurately.
- Dust Collection: Design an effective dust collection system to minimize airborne particles and protect your lungs.
- Eye and Ear Protection: Always wear safety goggles and ear protection when operating the track saw. Design storage solutions for these safety gear items.
- Stability: Ensure the track is secured firmly to your work piece to prevent kickback and maintain precise cuts.
Track Construction: A Step-by-Step Guide for Clean and Precise Cuts
Cutting and Shaping the Track
Materials and Tools Before you start constructing your track, gather the following materials and tools:
- A straight and sturdy piece of lumber (such as plywood)
- Measuring tape
- Pencil
- Circular saw or jigsaw
- Sandpaper
- Clamps
- Marking and Measuring: Measure and mark the desired length of your track on the lumber. Ensure that your measurements are accurate to avoid any discrepancies in your cuts.
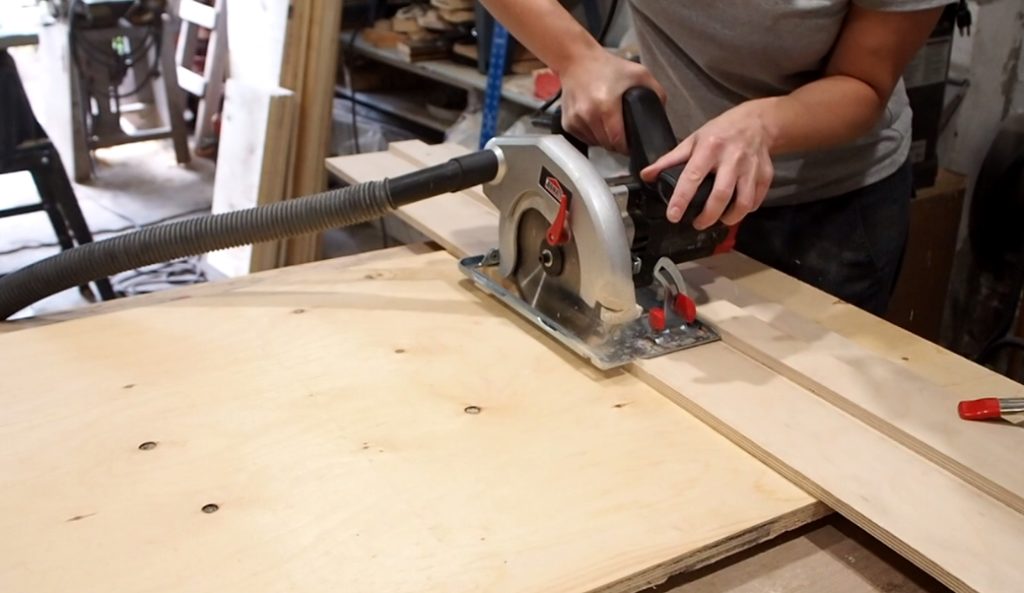
- Cutting Using a circular saw or jigsaw carefully cut along the marked line. Ensure that your cut is straight and clean. If necessary, use a guide or a straight edge to maintain accuracy.
- Sanding after cutting, sand the edges of the track to make them smooth and free from splinters. This step is crucial to ensure that your work piece misses on rough edges during the cutting process.
Adding Anti-Splinter Strips
- Choosing Anti-Splinter Strips Anti-splinter strips, often made from low-friction materials like UHMW (Ultra High Molecular Weight) plastic, prevent splintering along the cut line. Measure the width of your track and purchase anti-splinter strips that match this measurement.
- Attaching Anti-Splinter Strips Place the anti-splinter strips on both sides of your track, aligning them with the cutting edge. Ensure that they are flush with the surface of the track. Use screws or adhesive to secure the strips in place. Trim any excess strip material if necessary.
Attaching Guide Rails to the Track
- Materials and Tools to create a track that guides your cutting tool precisely, you’ll need guide rails. These rails can be made from metal or wood. For this guide, we’ll focus on attaching wooden guide rails.
Gather the following materials and tools
- Two straight and sturdy wooden boards (e.g., 2x4s)
- Measuring tape
- Pencil
- Screws
- Screwdriver or drill
- Measuring and Cutting Guide Rails Measure the length of your track and cut two wooden boards to match this length. These boards will serve as your guide rails.
- Attaching Guide Rails Position one guide rail on each side of the track, ensuring they are parallel to the cutting edge. Use screws to secure the guide rails to the track. Make sure they are firmly attached and do not obstruct the cutting path.
Mastering Circular Saw Base Construction for Precise Alignment with Track
Gather Your Materials and Tools
Before diving into the construction process, make sure you have the following materials and tools on hand:
Materials
- Plywood or MDF board (3/4-inch thickness recommended)
- Track guide system (for precise alignment)
- Screws
- Wood glue
Tools
- Circular saw
- Jigsaw
- Measuring tape
- Carpenter’s square
- Screwdriver
- Clamps
- Pencil
Measure and Cut the Base
Start by measuring the dimensions of your circular saw’s base plate. You’ll want to create a base slightly larger than the saw’s base plate to ensure stability. Mark these dimensions on your plywood or MDF board. Use a carpenter’s square to ensure straight lines.
Next, carefully cut out the base using a circular saw or a jigsaw. Take time to make precise cuts, as accuracy is critical to achieving a snug fit.
Attach the Track Guide
To guarantee precise alignment, you’ll need to attach a track guide system to your base. Position the track guide parallel to one edge of the base, ensuring it extends past the front and rear of the circular saw blade. Use clamps to hold it securely in place, and mark the whole locations for screws.
Fit Your Circular Saw
Place your circular saw on the base, ensuring it aligns perfectly with the track guide. Mark the positions of the saw’s mounting holes on the base. Remove the saw and pre-drill holes for screws at these marked positions.
Secure the circular saw to the base using screws, ensuring it’s tightly fastened. Double-check that the saw’s blade is perfectly aligned with the track guide.
Optional Anti-Slip Surface
For added safety and stability, you can attach an anti-slip material, such as adhesive-backed sandpaper or rubber, to the surface of the base where the work piece will rest.
Final Adjustments and Testing
Before putting your circular saw base to work, make any necessary adjustments to ensure it’s perfectly aligned with the track guide. Test it with a scrap piece of wood to confirm that your cuts are precise and straight.
Enhance Your Woodworking Efficiency: Must-Have Features for Your Workshop”
Dust Collection Mechanisms
Woodworking generates a substantial amount of dust and debris, which can harm your health if not properly managed. Dust collection mechanisms are essential for maintaining a clean and safe workspace. Here’s how you can integrate them into your workshop:
- Centralized Dust Collector: Invest in a centralized dust collection system with a powerful vacuum and strategically placed ductwork. This system will effectively capture dust at its source, ensuring it doesn’t disperse into the air.
- Overhead Air Filtration: Consider installing overhead air filtration units that continuously clean the air in your workshop, reducing airborne particles that could lead to health problems.
- C. Tool-Specific Dust Ports: Many woodworking tools come with built-in dust ports. Attach a high-quality hose and a dust collector to these ports to capture dust directly at the point of creation.
By implementing these dust collection mechanisms, you’ll not only protect your health but also keep your workshop clean and organized.
Adjustable Depth Stops
Achieving precise cuts and joinery is a hallmark of exceptional woodworking. Adjustable depth stops are a valuable addition to your workshop, as they allow you to control the depth and accuracy of your cuts.
Here’s how to incorporate them:
- Router Depth Stops: Router tables with adjustable depth stops are ideal for creating consistent and precise grooves, dadoes, and mortises.
- Drill Press Depth Stops: Equip your drill press with depth stops to control the depth of holes accurately, whether drilling pilot holes or creating mortises.
- Circular Saw and Jigsaw Guides: Invest in guides or attachments that allow you to set precise cutting depths for your circular saw and jigsaw.
These adjustable depth stops will significantly enhance your woodworking projects, ensuring uniformity and reducing the risk of errors.
Clamps for Secure Work piece Fixation
Stability is paramount when working with wood. Clamps are vital in securing your work pieces, and preventing slips or movements that can ruin your projects. Here’s how to make the most of clamps:
- Variety of Clamps: Acquire a variety of clamps, including bar clamps, pipe clamps, spring clamps, and bench clamps. A diverse set of clamps ensures you can handle various project sizes and shapes.
- Workbench Vises: Install sturdy vises on your workbench for secure work piece fixation while you plane, saw, or chisel.
- Parallel Clamping Systems: Consider parallel clamping systems for larger projects, as they distribute pressure evenly and prevent work piece distortion.
With a well-equipped collection of clamps, you’ll have the versatility and confidence to tackle a wide range of woodworking projects.
Conclusion
Learning how to make a track saw can be a valuable skill for any DIY enthusiast or woodworking enthusiast. Whether you’re looking to save money on a commercial track saw or customize one to fit your specific needs, the process is achievable and rewarding. Remember to prioritize safety during the construction and use of your homemade track saw, and always be mindful of the materials and techniques involved.