
If you’re a DIY enthusiast or a woodworking hobbyist, you’re probably familiar with the importance of maintaining a sharp blade on your table saw. Over time, blades can become dull or damaged, affecting the quality of your cuts.
But changing the blades can be a hectic task. No need to worry; we will reveal the step-by-step guide on How to change a Table Saw Blade? By following these instructions, you can replace your Blade safely and effectively, ensuring that your table saw continues to deliver precise and clean cuts.
Step by Step guide to change the Table Saw Blade
Safety first
Safety should always be the foremost consideration when working with power tools. Before changing the Blade of a table saw, it is imperative to follow safety measures to minimize the risk of accidents or injuries.
Clear the work area of obstacles, ensuring ample space to maneuver and work comfortably. Familiarize yourself with the manufacturer’s instructions and guidelines for your table saw model to ensure proper usage. By prioritizing safety precautions, you can proceed confidently and reduce potential hazards.
Prepare the work area
The first step in changing the Blade of a table saw is to prepare the work area. This crucial step ensures a safe and organized environment for the task at hand. Start by clearing the immediate area around the table saw, removing any debris, tools, or materials that may obstruct your movement or pose a safety hazard.
Ensure that the surface of the work area is clean, stable, and free from any potential tripping risks. It is also advisable to have adequate lighting in the area to ensure proper visibility while handling the Blade. By preparing the work area properly, you can create a safe and efficient workspace for changing the Blade of your table saw.
Locate the arbor nut
The subsequent step in changing a table saw’s Blade is locating the arbor nut. The arbor nut is vital in securing the Blade onto the table saw’s arbor. To begin, you need to find the pavilion, the central spindle-like shaft extending from the center of the saw’s Blade.
Typically, the arbor nut is positioned at the end of the arbor and is responsible for firmly holding the Blade in place. Look for a nut that has a round, hexagonal, or square shape that is designed to fit onto the arbor.
If the arbor nut is concealed, carefully remove the blade guard according to the manufacturer’s instructions to access and locate the arbor nut. Once you have successfully located the arbor nut, you can proceed with the subsequent steps of the blade-changing process.
Raise the Blade
The following step in the process of changing the Blade of a table saw is to raise the Blade. Rotate the wheel or crank clockwise to raise the Blade, gradually increasing its height. While presenting the Blade, carefully monitor the height gauge or scale on the table saw to ensure precise measurement.

Elevating the Blade to its maximum height is advisable to allow for sufficient space to work and change the Blade effectively. However, adhering to the manufacturer’s guidelines and not exceeding the specified maximum height is crucial.
Once the Blade has been raised to the desired size, ensure it securely locks in place. This step facilitates convenient access to the Blade and sets the stage for the subsequent tasks involved in the blade replacement process.
Lock the Blade
After raising the Blade to the desired height, it is essential to remain fixed throughout the blade replacement process. Locate the blade lock or arbor lock mechanism near the Blade or on the side of the table saw. Engage the blade lock by pressing a button or turning a lock lever, depending on the design of your specific table saw.
By doing so, you immobilize the Blade, preventing it from spinning or moving while you work on removing and installing the new Blade. It is crucial to confirm that the Blade is securely locked by attempting to rotate it manually. If the Blade remains stationary, you can proceed confidently to the subsequent steps.
However, if the Blade is not firmly locked, double-check the mechanism to ensure it is engaged correctly before proceeding. Closing the Blade ensures both your safety and stability throughout the blade-changing process.
Remove the arbor nut
Once the Blade has been securely locked in place, you can release the arbor nut that holds the Blade onto the arbor. Utilize an appropriately sized wrench or a dedicated arbor nut wrench and position it onto the flats of the arbor nut. Remember that certain arbor nuts may be tightly secured, so exerting some effort may be necessary to loosen them initially.
As the nut relaxes, continue turning it until you can eradicate it by hand. Ensure that you set the arbor nut aside in a safe location to prevent misplacement. With the arbor nut successfully removed, you can proceed to the subsequent step of taking out the old Blade from the table saw.
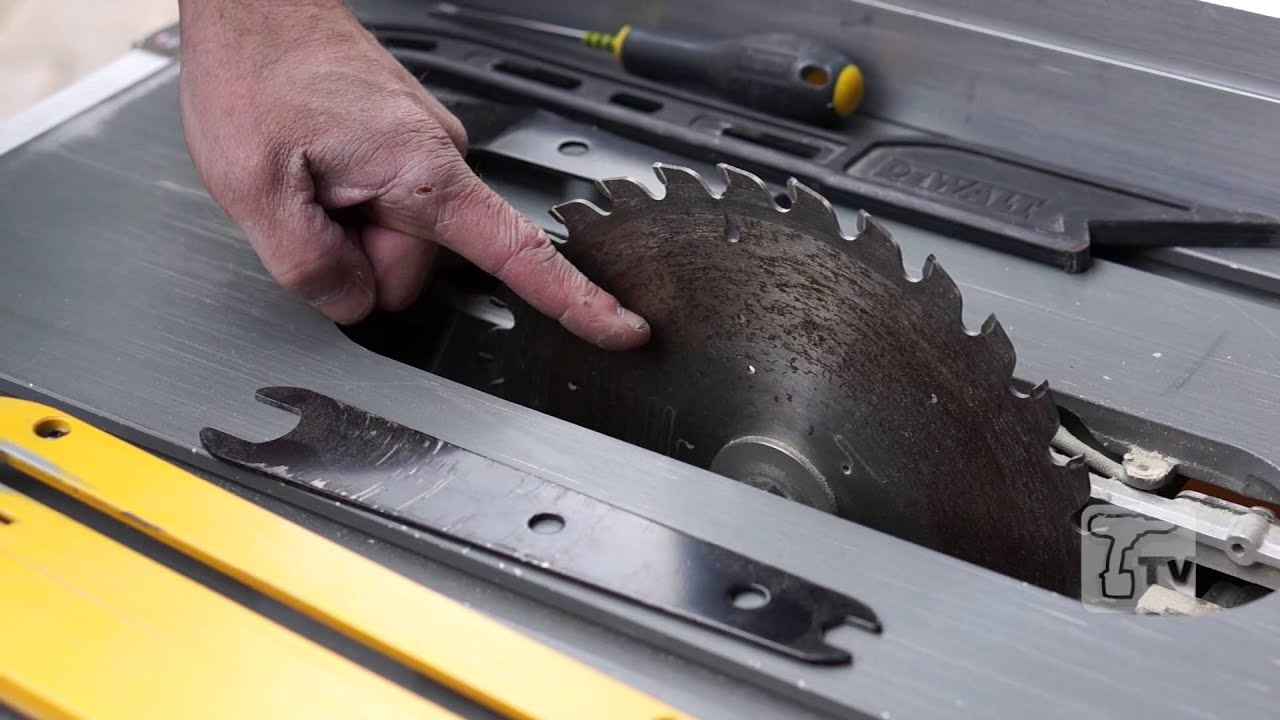
Remove the Blade
Begin by firmly gripping the Blade with one hand near the center, ensuring a secure hold. Take caution not to touch the sharp edges or teeth of the Blade to prevent any potential injuries. Carefully lift the Blade off the arbor once the Blade feels loose, maintaining control throughout the process. Handling the old Blade carefully and placing it in a designated and safe location away from your work area is essential.
Inspect the new Blade
It is essential to thoroughly examine the new Blade to ensure its quality and suitability for the task ahead. Begin by carefully removing the new Blade from its packaging and being mindful of the sharp edges. Conduct a visual inspection, paying close attention to any signs of damage, such as cracks, chips, or missing teeth.
Additionally, check for any manufacturing defects or irregularities that might impact the Blade’s performance. Verifying that the new Blade is compatible with your table saw in size, arbor hole diameter, and tooth configuration is crucial. Consult the manufacturer’s instructions or the labeling on the Blade to confirm its specifications.
Choosing the appropriate Blade for the intended material and cutting task is vital. Once the new Blade has passed the inspection and meets all the requirements, you can confidently install it onto the table saw.
Install the new Blade
After inspecting the new Blade and ensuring its compatibility with your table saw, it’s time to proceed with the installation process. Begin by aligning the mounting hole of the new Blade with the arbor on the table saw. With the Blade adequately aligned, carefully slide it onto the arbor, ensuring a snug fit.

Next, place the arbor nut back onto the arbor and start threading it by hand to prevent cross-threading. Once the arbor nut is finger-tight, use an appropriately sized wrench or an arbor nut wrench to tighten the nut securely. Rotate the twist clockwise to tighten the nut firmly, but be cautious not to over-tighten, as it may damage the Blade or the arbor.
Double-check the Blade to ensure it is centered and properly seated on the arbor. With the new Blade successfully installed, you can adjust the blade height and fine-tune it before using the table saw.
10. Tighten the arbor nut
Once the new Blade is installed correctly on the arbor, it is essential to ensure the arbor nut is tightened firmly to hold the Blade in place during operation. First, use an appropriately sized wrench or an arbor nut wrench to grip the arbor nut securely. Strive for a tightness that holds the Blade securely in place without excessive force.
After tightening the arbor nut, double-check the Blade to confirm it is centered and seated adequately. Once the arbor nut is securely tightened, you can proceed to adjust the blade height and make any necessary fine-tuning before using the table saw.
11. Lower the Blade
After securely tightening the arbor nut, it is necessary to adjust the blade height to the desired level for your specific cutting requirements. Locate the height adjustment wheel or crank on the front or side of the table saw near the Blade.
To lower the Blade, rotate the wheel or crank counterclockwise. Gradually decrease the height until the Blade reaches the desired position. Ensure accuracy by referring to the height gauge or scale on the table saw. Lowering the Blade to an appropriate height that allows for safe and efficient cutting while providing sufficient clearance is essential.
Once the Blade is lowered to the desired level, double-check that it is securely locked in place before using the table saw. Reducing the Blade to the appropriate height ensures optimal cutting performance while minimizing the risk of accidents or kickbacks during operation.
12. Test the Blade
After lowering the Blade to the desired height, it is essential to assess its alignment and functionality before proceeding with any cutting tasks. Begin by ensuring the Blade is centered and securely seated on the arbor. Gently rotate the Blade by hand to check for any wobbling or misalignment.
If you notice any irregularities or excessive vibration, stop immediately and reevaluate the installation to ensure the Blade is tightly secured and properly aligned. Additionally, examine the teeth of the Blade for any signs of damage or abnormalities that could affect its cutting performance. Pay attention to the smoothness and accuracy of the cuts.
By thoroughly testing the Blade, you can ensure its proper functioning and make necessary adjustments before utilizing the table saw for your intended cutting tasks.
Safety Tips
Disconnect the Power: Unplug the table saw from the power source before starting any blade-changing procedure. This step eliminates the risk of accidental activation and guarantees your safety.
Consult the Manual: Refer to the manufacturer’s manual for your specific table saw model. The manual contains essential information, including safety guidelines and instructions for your equipment. Familiarize yourself with the manual before proceeding.
Ensure stability: stability is vital for your safety and accurate blade replacement.
Utilize Lockout/Tagout: If your table saw has a lockout/tagout feature, engage it to disable the power switch and prevent accidental activation. This feature typically involves locking or tagging the power switch to indicate that maintenance is underway.
Use Proper Tools: Use the recommended tools provided by the manufacturer to change the Blade. These tools are designed for the task and ensure a secure and safe blade replacement.
Handle the Blade with Care: When removing or installing the Blade, handle it cautiously to avoid any potential injuries. Grip the Blade by its center hole, or use protective gloves for added safety.
Maintain a Clean Work Area: Keep your work area clean and free of debris, as a cluttered space can lead to accidents or hinder your visibility. Clear away any obstructions to ensure a safe and organized work environment.
Other Important Things to Consider when changing the Blade
Consult Your Owner’s Manual
One essential step in changing the Blade of a table saw is to consult the owner’s manual that comes with your specific model. The owner’s manual contains valuable information and instructions tailored to your table saw, ensuring you follow the manufacturer’s guidelines accurately. Here’s a breakdown of how to effectively use the owner’s manual:
Locate the manual: Find your table saw’s owner’s manual in physical form, typically provided with the purchase, or search for it on the manufacturer’s website if you need a physical copy.
Review the safety section: Begin by thoroughly reading the safety section of the manual. This section highlights vital safety precautions and warnings for your table saw model. Understanding and adhering to these safety measures is crucial for your well-being during the blade-changing process.
Look for blade-changing instructions: Look for a dedicated section in the manual that provides step-by-step instructions for changing the Blade. This section will outline the precise procedures the manufacturer recommends for your particular table saw model.

Check for specialized tools or accessories: Some table saws may require specific tools or accessories for Blade changing. The owner’s manual will specify if any additional items are necessary.
Follow the provided instructions: Carefully follow the step-by-step instructions outlined in the manual for changing the Blade. Take your time comprehending each step before moving on to the next one. This will ensure that you complete the process correctly and safely.
Pay attention to safety precautions: Take note of any safety precautions or warnings mentioned in the manual regarding Blade changing. These precautions are designed to prevent accidents and promote safe operation.
Troubleshooting guidance: The owner’s manual may include a troubleshooting section that addresses common issues or problems that may arise during blade changes. Familiarize yourself with this section so that you can troubleshoot any potential difficulties that you may encounter.
Do Not Use Too Much Pressure
Using too much force can lead to various problems and should be avoided. Here’s why it is essential not to use too much pressure:
Prevent blade damage: Exerting excessive pressure while installing or removing the Blade can cause damage to the Blade itself. Blades are precision tools designed to perform optimally under specific conditions. Applying too much force can result in bending or warping the Blade, compromising its performance and potentially creating safety hazards during operation.
Protect the arbor threads: The arbor threads on the table saw are responsible for securely holding the Blade. Applying excessive pressure when tightening the arbor nut can damage these threads. This can make it difficult to remove or tighten the nut in the future and may require costly repairs or replacement parts.
Avoid arbor flange damage: The arbor flange is a critical component that ensures the Blade is securely placed. Using excessive pressure can damage the arbor flange or its mating surfaces, impacting the Blade’s stability and alignment. A damaged arbor flange can lead to Blade wobbling or improper cutting, compromising the accuracy and safety of your table saw.
Maintain consistent tension: Blades are designed to be tightened with appropriate tension. Too much pressure can result in uneven tension across the Blade, leading to imbalanced cutting and potentially causing the Blade to vibrate or drift during operation. This can result in poor-quality cuts and an increased risk of accidents.
Preserve motor and drive system integrity: Table saws have motors and drive systems designed to handle specific loads and stresses. Excessive pressure on the Blade can strain these components beyond their intended capacity, potentially causing premature wear, decreased performance, or even motor failure.
Disconnect the Table Saw
Disconnecting the table saw from its power source is critical in ensuring safety when changing the Blade. Follow these steps to disconnect the table correctly saw:
Locate the power cord: Identify the table saw’s power cord, typically located at the back or side of the machine.
Unplug the power cord: Firmly grasp the power cord’s plug and pull it out from the electrical outlet. Ensure that you grip the plug and not the cord to avoid damage.
Verify disconnection: After unplugging the power cord, visually inspect the outlet to confirm it is no longer connected to a power source.
Disable the power switch: As an additional safety measure, it is advisable to disable the power switch even after disconnecting the table saw. Locate the power switch on the table saw and turn it to the “Off” position.
Secure the power cord: Once the table saw is disconnected, take the necessary steps to secure the power cord correctly. This helps prevent accidental reconnection while you are working on the Blade.
Use Safety Goggles
Using safety goggles is essential when changing the Blade of a table saw. Safety goggles provide eye protection and help prevent potential injuries from flying debris or particles. Here’s why it is essential to use safety goggles:
Eye protection: Safety goggles serve as a crucial barrier, shielding your eyes from hazards that may arise during the blade-changing process. Small wood chips, metal fragments, or other debris are likely released into the air when removing or installing the Blade. Safety goggles prevent these particles from reaching your eyes and causing potential injury.
Prevent eye irritation or damage: Working with a table saw involves high-speed spinning blades and the potential for materials to be ejected. Your eyes are vulnerable to irritation, scratches, or more severe injuries without proper eye protection. Safety goggles provide a protective shield, reducing the risk of eye-related accidents and safeguarding your vision.
Compliance with safety standards: Using safety goggles aligns with recommended safety standards and regulations. These standards prioritize the well-being of workers and emphasize the use of appropriate personal protective equipment (PPE) in potentially hazardous environments. Wearing safety goggles while changing the Blade demonstrates your commitment to safety protocols and ensures compliance with established guidelines.
Enhanced focus and concentration: You can focus better on the task by wearing safety goggles. Knowing your eyes are protected allows you to concentrate on the blade-changing process without concerns about potential eye injuries. Increased concentration leads to improved accuracy and helps prevent mistakes or accidents.
Cultivate a safety-conscious mindset: Making safety goggles a standard part of your blade-changing routine fosters a safety-conscious mindset. It reinforces the importance of protecting your eyes during any table saw task. By consistently wearing safety goggles, you set a positive example for others and create a workplace safety culture.
Different types of table saw blades
Several types of table saw blades are available, each designed for specific purposes and cutting applications.
Rip Blades: Rip blades are primarily used for making long, parallel cuts along the grain of the wood. These blades typically have fewer teeth, larger gullets, and a flat-top tooth design. The aggressive tooth geometry allows for efficient material removal during rip cuts. Rip blades excel at cutting through thick stock quickly.
Crosscut Blades: Crosscut blades are designed to make clean cuts across the wood grain. These blades typically have a higher tooth count and alternate top bevel (ATB) tooth configuration. The ATB tooth arrangement helps achieve smooth and splinter-free cuts on various wood types. Crosscut blades are ideal for precision work and cutting hardwoods.
Combination Blades: Combination blades offer versatility and can handle ripping and crosscutting tasks. These blades feature a combination of rip and crosscut tooth configurations. Combination blades are a popular choice for general woodworking projects.
Plywood Blades: Blades are designed to cut through plywood and other engineered wood products. These blades have a high tooth count and a low tooth angle to minimize chip-out and splintering. They produce clean and smooth cuts in plywood materials.
Dado Blades: Dado blades are specialized blades that create wide, flat-bottomed grooves or dado cuts. These blades consist of multiple adjustable chipper blades that can be stacked together to achieve the desired width of the groove. Dado blades are commonly used in joinery and cabinetry projects where precise and accurate groove cuts are required.
Specialty Blades: In addition to the types above, various specialty blades are available for specific cutting applications. These include dado sets for box joints and rabbets, molding cutter blades for decorative profiles, and fine-toothed blades for cutting plastic or non-ferrous metals.