
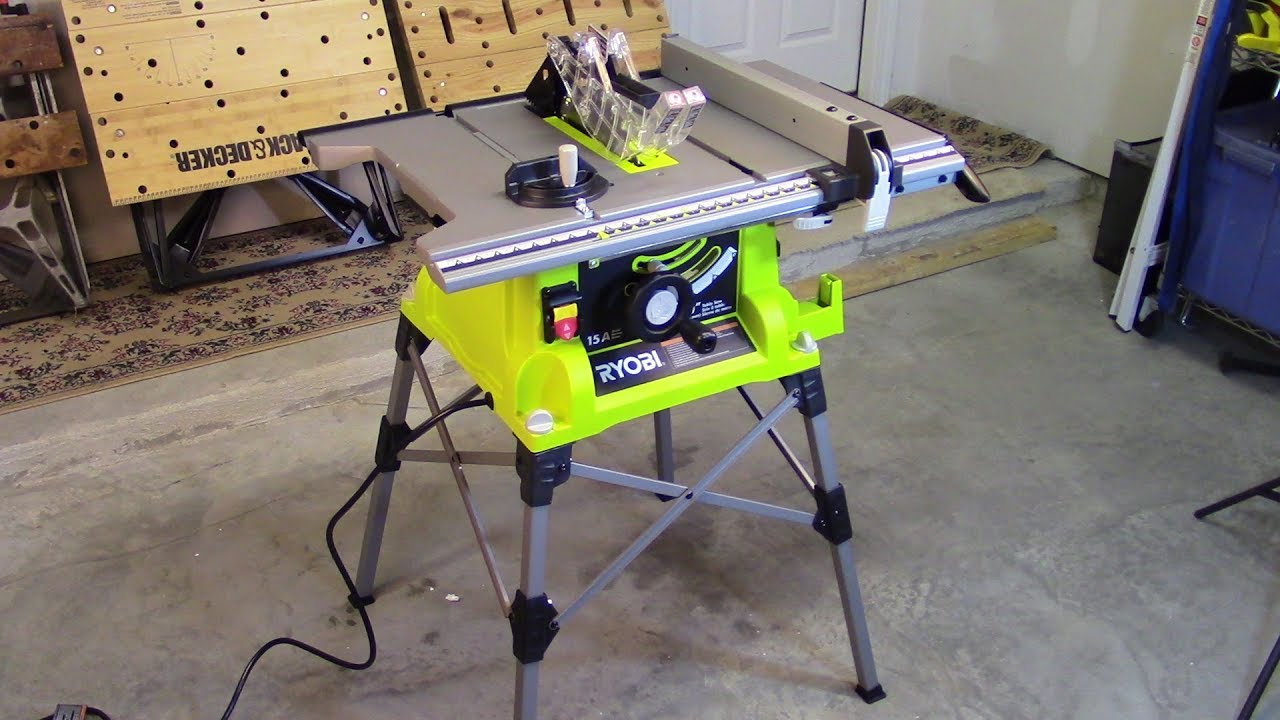
Are you seeking guidance on changing the blade on a Ryobi table saw? Below you will get details about the process of doing this. Understanding how to change the blade on a Ryobi table saw is crucial for any DIY enthusiast or woodworking hobbyist. Let’s explore the straightforward and essential steps for safely and effectively replacing the blade on your Ryobi table saw.
Step by Step Process
- Unplug the table saw
- Remove the blade guard
- Raise the saw with the lever
- Make use of the wrenches
- Use your fingers to unscrew the nut
- Remove the blade
- Install the new blade
- Fix the washer
- Screw the arbor nut using your fingers
- Tighten the arbor nut with the wrench
- Lower the blade
- Protect the blade with the guard
1. Unplug the table saw
To safely change the blade on a Ryobi Table Saw, it is essential to prioritize your well-being. The initial step involves unplugging the table saw from its power source. This precautionary measure is important as it prevents accidental activation or potential electric shocks during the blade replacement process.
By removing the power supply, you significantly minimize the risk of the saw unexpectedly starting up while engaged in the task. Prioritizing safety when undertaking maintenance or adjusting power tools is always a wise choice, ensuring a secure working environment.
2. Remove the blade guard
Once the Ryobi Table Saw is safely unplugged, the next step in changing the blade is to remove the blade guard.
The blade guard is a protective cover, preventing potential injuries from contact with the rotating blade. Locate the release mechanism to proceed with the removal, typically a lever or knob positioned near the guard assembly.
Follow the manufacturer’s instructions and depress or rotate the release mechanism to disengage the guard. Take utmost care while lifting the guard, ensuring a firm grip to prevent accidental slips. Remember that the blade guard may have sharp edges, so handle it cautiously.
Set the removed guard aside in a secure location, ensuring it does not interfere with the subsequent steps of the blade replacement process.
3. Raise the saw with the lever
To proceed with the blade replacement on your Ryobi Table Saw, the subsequent step involves using the lever to raise the saw. The lever, usually located on the front or side of the saw near the blade assembly, plays a vital role in this process.
Locate the lever and engage it by pulling or pushing, depending on the specific design of your table saw. You will raise the saw by utilizing the lever and elevating the blade above the table surface.
This adjustment allows easier access and improved maneuverability during the blade replacement procedure. It is crucial to ensure the saw is securely raised and locked into position before advancing to the subsequent step.
This precautionary measure establishes a safe working environment and provides adequate clearance for accurately removing and installing the new blade.
4. Make use of the wrenches
Typically, you will have two types of wrenches: a blade wrench and an arbor wrench, included with your table saw. These wrenches are indispensable for loosening and tightening the blade and arbor nuts.
Begin by locating the blade wrench specifically designed for the blade nut. Insert the blade wrench into the holes on the blade nut, ensuring a secure fit.
Rotate the wrench counterclockwise to loosen the blade nut, being cautious not to apply excessive force if it feels tight. Once adequately loosened, completely remove the blade nut from the arbor shaft.
Next, find the arbor wrench to keep the arbor shaft in place. Insert the arbor wrench into the shaft, engaging the flats or holes provided. This will prevent the arbor shaft from spinning as you loosen or tighten the blade.
With the arbor wrench securely, employ the blade wrench to loosen the arbor nut by rotating it counterclockwise. When the arbor nut is sufficiently loose, please remove it from the arbor shaft, allowing you to detach the old blade from the saw.
Once the old blade is removed, carefully align the new blade on the arbor shaft, ensuring that the teeth face the correct direction as specified by the manufacturer. Subsequently, employ the arbor wrench to steady the arbor shaft while utilizing the blade wrench to tighten the arbor nut by rotating it clockwise.
Lastly, verify that both the blade and arbor nuts are securely tightened. Once satisfied with the tightness, reattach the blade guard and lower the saw back to its original position. Remember, it is essential to consult the manual provided with your table saw for specific instructions and safety guidelines regarding blade replacement.
5. Use your fingers to unscrew the nut
During the blade replacement process on a Ryobi Table Saw, the subsequent step involves using your fingers to unscrew the nut. After you have loosened the nut with the wrenches, you can use your fingers to completely unscrew it. It is crucial to ensure a secure grip on the nut and then rotate it counterclockwise to loosen it from the arbor shaft.
You can apply a gentler touch and maintain better control throughout the unscrewing procedure using your fingers. This method allows for increased sensitivity and precision.
Once the nut is sufficiently loosened, you can safely remove it from the arbor shaft, facilitating the detachment of the old blade from the saw. Remember to exercise caution while handling the nut and the blade, as they may have sharp edges that could cause injury.
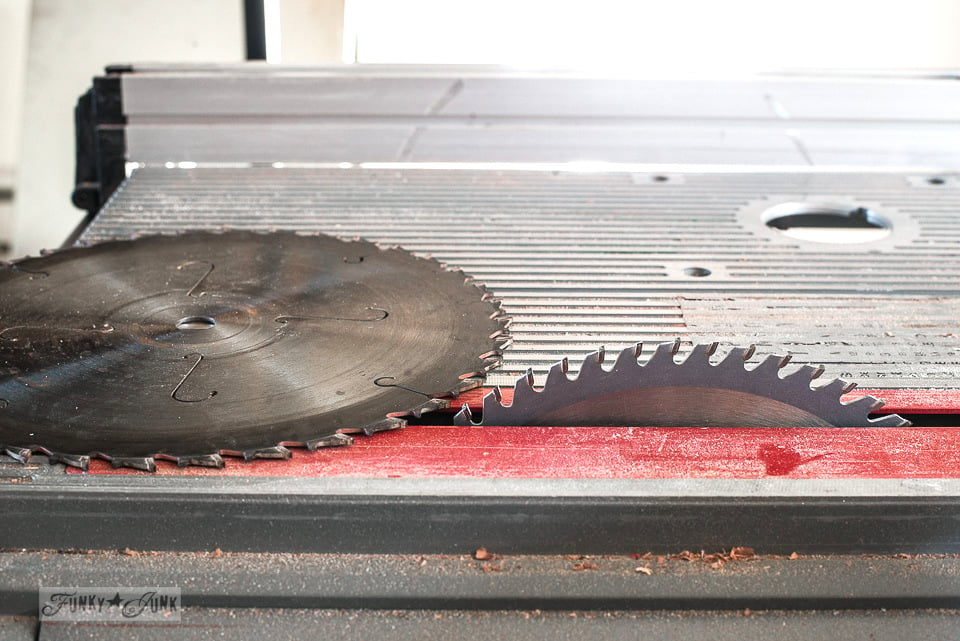
6. Remove the blade
After successfully unscrewing the nut and separating it from the arbor shaft, the subsequent step in changing the blade on your Ryobi Table Saw is to remove the blade itself.
Exercise caution and ensure a secure grip on the blade using both hands, one on each side. By firmly holding the blade, lift it straight up while being mindful of its weight and dimensions.
Proceed slowly and steadily, keeping the blade parallel to the table surface. Avoiding sudden movements or contact between the blade and surrounding surfaces or objects is crucial. With a careful and deliberate motion, completely disengage the blade from the arbor shaft.
Once the blade is fully detached, set it aside in a designated and safe area, ensuring it does not pose a risk or obstruct subsequent steps. Properly removing the blade prepares the workspace for installing the new blade and minimizes potential accidents or damage.
7. Install the new blade
With the old blade removed, it is now time to install the new blade on your Ryobi Table Saw. Begin by carefully aligning the mounting hole of the new blade with the arbor shaft.
Slide the new blade onto the arbor shaft, ensuring it fits securely. Care to align any keyways or splines on the blade with the corresponding features on the arbor shaft.
Once the blade is in place, it is time to secure it with the arbor nut. Insert the arbor nut onto the shaft and hand-tighten it by turning it clockwise. Use your fingers to initially tighten the nut, ensuring it is snug.Use the blade and arbor wrench to fully tighten the arbor nut.
Hold the arbor shaft steady with the arbor wrench while using the blade wrench to tighten the arbor nut by turning it clockwise. Be careful not to overtighten the nut.
After tightening the arbor nut, visually inspect the blade to ensure it is properly seated and aligned on the shaft. Check for any obstructions or misalignments that could affect the blade’s performance.
Finally, double-check the tightness of both the blade and arbor nuts, ensuring they are securely fastened. Once you are confident that everything is properly installed, you can reattach the blade guard and lower the saw back to its original position.
Always refer to the manufacturer’s instructions and guidelines for your Ryobi Table Saw when installing a new blade.
8. Fix the washer
As a part of the blade replacement process for your Ryobi Table Saw, it is essential to properly fix the washer. The washer acts as a spacer between the blade and the arbor nut, providing stability and preventing the blade from wobbling during operation.
To fix the washer, begin by locating it. The washer is typically a flat, metal disc placed over the arbor shaft before installing the blade. It may have a small center hole to accommodate the arbor shaft.
Carefully position the washer onto the arbor shaft, ensuring that it sits flush against the mounting hole of the blade. Please take note of any grooves or ridges on the washer and align them with corresponding features on the arbor shaft.
Once the washer is properly positioned, proceed with the blade installation as outlined in the previous steps. Align the blade’s mounting hole with the arbor shaft, slide it onto the washer, and secure it with the arbor nut.
While tightening the arbor nut, be mindful of the washer and ensure it remains in place without shifting. Utilize the blade and arbor wrench described earlier to securely tighten the arbor nut while keeping the washer aligned.
After tightening the arbor nut, visually inspect the washer to verify it is still correctly positioned and snugs against the blade. Check for any gaps or misalignments that may have occurred during the tightening process.
If you notice any issues with the washer’s fixing, loosen the arbor nut and readjust the washer as necessary before retightening the nut.
By properly fixing the washer, you contribute to the stability and smooth operation of your Ryobi Table Saw, enhancing both safety and cutting performance.
9. Screw the arbor nut using your fingers
After placing the blade and washer on the arbor shaft, the next step in changing the blade on your Ryobi Table Saw is to secure the arbor nut. For this task, you will use your fingers to screw the arbor nut onto the arbor shaft
Begin by holding the arbor nut between your thumb and fingers. Align the threads of the arbor nut with the threads on the arbor shaft. Slowly and steadily, turn the arbor nut clockwise using your fingers, applying gentle pressure.
Continue screwing the arbor nut onto the arbor shaft using your fingers until it is snug and securely in place. Once the arbor nut is hand-tightened, visually inspect it to ensure proper seating and alignment with the blade. Verify that there are no gaps or misalignments between the nut, washer, and blade.
Remember that while hand-tightening the arbor nut is the initial step, the final tightening should be done using the blade and arbor wrench to ensure optimal security. The wrenches will allow you to apply the necessary torque and achieve a firm and safe connection.
Initially, using your fingers to screw the arbor nut onto the arbor shaft, you establish a secure starting point for the subsequent tightening process. Always refer to the manufacturer’s instructions and guidelines for properly handling and securing the arbor nut on your Ryobi Table Saw.
10. Tighten the arbor nut with the wrench
After hand-tightening the arbor nut onto the arbor shaft, the subsequent step in changing the blade on your Ryobi Table Saw is to tighten the nut using the wrench. This step ensures a secure and safe connection.
Locate the blade wrench and the arbor wrench. The blade wrench is designed to hold the blade in place, while the arbor wrench is used to steady the shaft. Insert the blade wrench into the holes on the blade, ensuring a snug fit. Utilize the arbor wrench to firmly grip the arbor shaft.
Apply consistent and firm pressure to the blade wrench, turning it clockwise to tighten the arbor nut. It is crucial to tighten the nut sufficiently to securely hold the blade, but exercise caution not to over-tighten it, as this could potentially damage the blade or the saw.
Once you have tightened the arbor nut, visually inspect the blade and the nut to confirm proper alignment and seating. Check for any gaps or misalignments that may affect the performance and safety of the blade.
To perform a final check, gently attempt to wiggle the blade. It should be firmly secured without any noticeable movement.
Correctly tightening the arbor nut is vital for safely operating your Ryobi Table Saw. Always refer to the manufacturer’s instructions and guidelines to ensure proper tightening procedures and adhere to the recommended torque specifications for your specific model.
11. Lower the blade
Once you have securely tightened the arbor nut, the subsequent step in the blade replacement process on your Ryobi Table Saw is to lower the blade back to its original position. Locate the lever or knob responsible for blade height adjustment to lower the blade.
This lever or knob is typically situated on the front or side of the saw. Gently turn the knob counterclockwise or push the lever downwards, depending on the design of your table saw, to gradually lower the blade.
Take care to lower the blade in a slow and controlled manner, ensuring that it aligns with the table’s surface. Continue lowering the blade until it reaches its original position, slightly above the table surface. This positioning allows for safe and precise cutting.
Once the blade is at the desired height, release the lever or tighten the knob to secure the blade in place. Confirm that it is properly locked into position to prevent unintended movement during operation.
Before using the table saw, double-check that the blade is securely installed, the arbor nut is tightened, and all necessary safety features, such as the blade guard, are correctly reattached.
Lowering the blade to its original position ensures optimal functionality and safety when utilizing your Ryobi Table Saw for woodworking projects. Refer to the manufacturer’s instructions and guidelines for specific details regarding your model’s blade height adjustment.
12. Protect the blade with the guard
Once you have lowered the blade to its desired position, the subsequent step in ensuring safety while using your Ryobi Table Saw is to protect the blade with the guard.
To protect the blade with the guard, locate the blade guard assembly, typically positioned near the blade housing or attached to the riving knife.
Carefully position the blade guard over the blade, ensuring it covers the entire cutting area. The guard is designed with a clear shield or covering that lets you see the blade while keeping your hands and other objects safe.
Depending on your model, the guard may have a release mechanism or a locking lever. Follow the manufacturer’s instructions to securely attach the guard in place. Engage the release mechanism or activate the locking lever to ensure the guard remains firmly positioned.
Once the guard is properly secured, visually inspect it to confirm correct alignment and proper functionality. Check for obstructions or misalignments that could interfere with the saw’s operation or compromise safety.
Keeping the blade guard in place during operation is crucial, except when temporarily removed for specific cuts that require its absence.
Remember to consult the manufacturer’s instructions and guidelines for specific details regarding the installation and use of the blade guard on your particular model of Ryobi Table Saw.
How can I properly align the blade on a Ryobi table saw?
To safely disassemble a Ryobi table saw, following a step-by-step approach is crucial while prioritizing safety. Start by preparing your workspace, ensuring it’s clean and spacious. Clear the area so that you have ample room to work comfortably and organize the disassembled parts efficiently.
Next, remove the blade guard, which protects from the spinning blade. Typically, the guard is held in place by screws or a bracket. Use an appropriate tool, like a screwdriver, to carefully unscrew and remove the guard.
Lower the blade to its lowest position by turning the height adjustment wheel. This step is important for easier access to the blade and its surrounding components during disassembly.
Identify the arbor nut responsible for securing the blade to the arbor shaft. The nut is usually located in the center of the saw blade and may feature a wrench symbol or arrow indicating the loosening direction.
To immobilize it, make it not spin while you loosen the arbor nut. Insert a piece of wood between the teeth of the blade and the table saw’s surface. This ensures that the blade remains stationary as you loosen the nut.
Using a wrench, carefully loosen the arbor nut by turning it counterclockwise, following any arrow or symbol imprinted on the nut. Maintain a firm grip on the wrench and the nut, exercising caution throughout.
Once the arbor nut is loose, securely hold the blade and remove the nut. Lift the blade slowly from the arbor shaft, paying attention to any washers or spacers between the blade and the arbor. If necessary, you may disassemble additional components, such as the blade insert or throat plate.
When it’s time to reassemble the table, saw carefully follow the steps in reverse order, ensuring that all components are securely fastened and properly aligned. Always consult the manufacturer’s instructions and safety guidelines to ensure the safe operation of your Ryobi table saw.
What are the steps to properly install a blade guard on a Ryobi table saw?
To install a blade guard on your Ryobi table saw, start by ensuring that the saw is turned off and unplugged for safety.
Gather the necessary tools and safety equipment, such as gloves and safety goggles. Position the blade guard assembly near the blade area, aligning the mounting bracket of the guard with the corresponding slots or holes on the table saw’s housing.
Securely attach the mounting bracket using the provided screws or fasteners, ensuring not to over-tighten. Adjust the blade guard height to achieve proper clearance between the guard and the workpiece you’ll be cutting.
If applicable, attach the guard splitter by aligning it with the appropriate slot and securely attaching it according to the manufacturer’s instructions.
Check the operation of the guard by manually moving it up and down to ensure smooth movement. Test the installation by turning on the table saw and verifying that the guard rises and lowers properly with the blade height adjustment.
Ensure the guard remains in the correct position during cuts and doesn’t obstruct your view. Consider the user manual for specific instructions based on your Ryobi table saw model. Following these steps and prioritizing safety, you can install the blade guard on your Ryobi table saw.