
Are you searching for how to Unlock Your DeWalt Miter Saw for Precision Cutting? Unlocking a DeWalt miter saw is crucial in unleashing its full potential for precision cutting and woodworking projects. Whether you’re a seasoned DIY enthusiast or a beginner looking to make accurate angled cuts, knowing how to unlock your DeWalt miter saw is fundamental.
This guide will walk you through the basic yet essential steps of unlocking a DeWalt miter saw, ensuring your tool is ready to deliver the precise cuts you need for your projects.
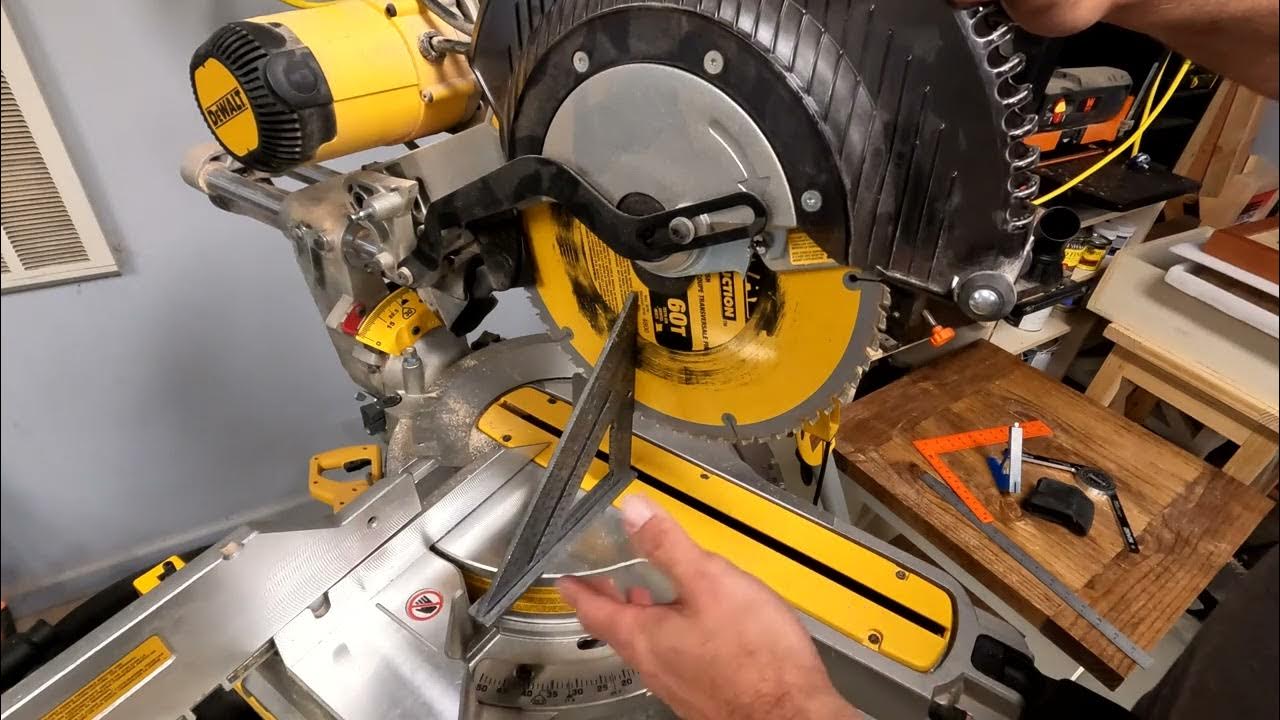
Familiarize Yourself with the Saw
To unlock a DeWalt miter saw safely and effectively, take a moment to become familiar with the specific model of the saw you are working with. Read the user manual provided by DeWalt to understand the saw’s features, controls, and safety mechanisms.
Pay special attention to the sections related to locking and unlocking the saw, as different DeWalt miter saw models may have slightly different mechanisms. Knowing your saw well will help you navigate the unlocking process with confidence.
Remove Any Hazards In Your Shop or Space
Before unlocking your DeWalt miter saw, ensuring your workshop or work area is free of any potential hazards is crucial. Remove any clutter, debris, or obstacles from the vicinity of the saw to create a safe and unobstructed working environment.
This step is essential to prevent accidents and ensure you have adequate space to maneuver and access the saw’s unlocking mechanisms without any hindrances. Safety should always be a top priority when working with power tools.
Opening Utilizing the Down Lock and Push Lock
DeWalt miter saws often feature two common locking mechanisms—the down Lock and the push lock. To unlock your saw using these mechanisms, follow these steps
a. Down Lock
- Locate the down lock lever on the rear or side of the saw’s arm.
- To unlock the saw, push the down lock lever upward or in the direction indicated by the arrow or label.
- While holding the down lock lever in the unlocked position, carefully raise the saw’s arm to the desired cutting angle or position.
- Release the down lock lever to secure the saw in the new position.
B. Push Lock
- The push lock is typically located on the front of the saw’s arm, near the handle or trigger.
- To unlock the saw, press the push lock lever, which may have a red or contrasting color, and hold it in the unlocked position.
- With the push lock lever depressed, adjust the saw’s angle or position as needed.
- Once the saw is in the desired position, release the push lock lever to lock it securely.
Utilizing the Lock Pin to Delivery the Head
DeWalt miter saws typically have a lock pin or locking mechanism that securely lowers the saw head for transportation and storage. To unlock the saw and release the head for cutting operations, follow these steps
- Locate the Lock Pin: Start by identifying the lock pin or locking mechanism on your DeWalt miter saw. It’s usually located near the pivot point where the saw head meets the base.
- Access the Locking Mechanism: Depending on the DeWalt model, the locking mechanism may be a pin, lever, or knob. Ensure the saw is powered off and unplugged before proceeding.
- Unlock the Head: To unlock the saw head, disengage or release the lock pin or mechanism. This may involve pulling out the pin, turning a knob counterclockwise, or flipping a lever up, depending on the design of your specific saw.
- Lift the Head: You can lift the saw head to the desired cutting position with the lock pin or mechanism disengaged. Ensure the head is securely locked in place before beginning your cutting operation.
- Adjust Cutting Angles (if needed): Depending on your project, you may need to adjust the cutting angle of the saw head. DeWalt miter saws often feature miter and bevel adjustments for making angled cuts. Refer to your saw’s user manual for instructions on how to make precise angle adjustments.
- Secure the Workpiece: Before making any cuts, secure the workpiece to the miter saw’s fence and ensure it’s adequately supported on both sides of the blade’s path. This enhances safety and accuracy during cutting.
- Activate the Saw: Turn on the miter saw and permit the edge to arrive at maximum speed before carefully lowering it through the workpiece to make your cut.
- Re-engage the Locking Mechanism (After use): After completing your cuts and transporting or storing the saw, re-engage the lock pin or mechanism to secure the saw head in the lowered position. This prevents any accidental movement during transportation and storage.
By following these steps and understanding the locking mechanism on your DeWalt miter saw, you can safely and effectively release and lock the saw head as needed for your woodworking or cutting tasks.
Moving the Guide Rail on a Compound Saw
DeWalt compound miter saws often have guide rails that make precise and repeatable cuts. These guide rails can be adjusted to accommodate different workpiece sizes and cutting angles. Here’s how to move the guide rail on a DeWalt compound miter saw
- Power Off and Unplug: Ensure the saw is powered off and unplugged from the electrical source for safety.
- Identify the Guide Rail: Locate the guide rail on your DeWalt compound miter saw. It’s typically a horizontal bar or fence that runs perpendicular to the blade.
- Release the Locking Mechanism: Many DeWalt miter saws have a locking lever or knob that secures the guide rail. Look for this locking mechanism, often found on the rear of the saw near the guide rail.
- Unlock the Rail: Disengage the locking mechanism to move the guide rail. This may involve lifting or turning the locking lever/knob to release the guide rail.
- Slide the Rail: With the locking mechanism disengaged, you can now slide the guide rail horizontally to the desired position. Some models may have measuring scales or detents to help you set precise angles or lengths.
- Set the Cutting Angle (if needed): If you’re making angled cuts, adjust the miter and bevel angles on the saw as required for your project.
- Secure the Locking Mechanism: After positioning the guide rail to your desired location, securely engage the locking mechanism. This ensures that the guide rail is firmly in place and prevents it from moving during cutting.
- Secure the Workpiece: Before making any cuts, ensure your workpiece is securely positioned against the guide rail and adequately supported on both sides of the blade’s path.
- Activate the Saw: Turn on the compound miter saw and permit the edge to arrive at max throttle before lowering it through the workpiece to make your cut.
Unlocking the Angle Lock
Unlocking the angle lock on a DeWalt miter saw allows you to change the cutting angle or slope of the saw blade. Follow these steps to unlock the angle lock:
Locate the angle lock lever, typically on the front or side of the saw’s arm, near the pivot point. Push or pull the angle lock lever to unlock the angle, depending on your saw model’s design. This action should disengage the Lock, allowing the saw arm to move.
Carefully adjust the angle of the saw blade to the desired position for your specific cutting needs. Once you’ve set the desired angle, release the angle lock lever to secure the saw in the new position. Ensure that the angle lock engages fully to securely hold the saw blade at the chosen angle.
Always consult your DeWalt miter saw’s user manual for precise instructions and safety guidelines related to unlocking and adjusting the angle lock. Safety precautions are crucial to avoid accidents when using power tools, including miter saws.
Unlocking The Knurled Knob Lock
DeWalt miter saws may feature a knurled knob lock that permits you to change the point or slope of the saw blade. To unlock the knurled knob lock, follow these steps:
Locate the knurled knob, typically near the angle adjustment scale on the front of the saw’s arm. To unlock the knob, turn it counterclockwise (left) while holding it. This action should release the Lock and allow you to adjust the angle or slope.
Carefully adjust the angle or slope of the saw blade to your desired position. Once you’ve set the angle, turn the knurled knob clockwise (right) while holding it to secure the saw in the new position. Ensure the knob is tightened sufficiently to lock the saw blade securely at the chosen angle.
Unlocking the Bevel
Unlocking the slope on a DeWalt miter saw allows you to adjust the blade bevel angle, which is the angle at which the blade tilts about the workpiece. To unlock the slope, follow these steps:
Locate the bevel lock knob or lever, typically positioned near the base of the saw’s arm or on the rear of the saw. Depending on your DeWalt miter saw model; you may need to loosen the bevel lock by turning the knob counterclockwise or releasing the lever.
Once the bevel lock is loosened, you can adjust the angle by tilting the saw blade to the desired position.
Carefully set the bevel angle based on your specific cutting requirements.
After achieving the desired bevel angle, retighten the bevel lock knob by turning it clockwise or re-engaging the lever to securely lock the saw blade in place. Refer to the user manual for your particular DeWalt miter saw model for precise instructions and safety precautions for unlocking and adjusting the angle. Proper knowledge of these steps ensures accurate cuts and safe operation of the saw.
Unlocking the Miter Saw’s Base
Unlocking the base of a DeWalt miter saw allows you to pivot the saw on its base to make miter cuts, which are angled cuts across the width of the workpiece. To unlock the miter saw’s base, follow these steps:
Locate the miter lock knob or lever near the front or rear of the saw’s base. Depending on your DeWalt miter saw model; you may need to loosen the miter lock by turning the knob counterclockwise or releasing the lever.
Once the miter lock is loosened, you can pivot the saw’s base to the left or right to set the desired miter angle.
Carefully adjust the miter angle to align with your specific cutting requirements.
After achieving the desired miter angle, retighten the miter lock knob by turning it clockwise or re-engaging the lever to lock the base in place securely. Always consult your DeWalt miter saw’s user manual for instructions and safety guidelines for unlocking and adjusting the base for miter cuts.
Proper understanding and execution of these steps are essential for achieving accurate miter cuts and ensuring the safe operation of the saw.
Opening Sliding Rails for A Compound Miter Saw
Unlocking the sliding rails on a compound miter saw is essential when extending the saw’s reach for cutting wider workpieces. To unlock the sliding rails, follow these steps:
Locate the sliding rail lock on the front or rear of the saw’s base near the sliding rails. Depending on your DeWalt compound miter saw model; you may need to loosen the sliding rail lock by turning the knob counterclockwise or releasing the lever.
Once the sliding rail lock is loosened, you can extend the saw’s sliding rails to increase its cutting capacity. Carefully adjust the sliding rails to accommodate the width of your workpiece while ensuring the rails are fully engaged and secure.
After extending the sliding rails to the desired position, retighten the sliding rail lock by turning it clockwise or re-engaging the lever to lock the rails. Refer to your DeWalt compound miter saw’s user manual for instructions and safety precautions for unlocking and adjusting the sliding rails. Proper knowledge of these steps is essential to ensure accurate cuts and safe operation when working with a compound miter saw.
Does the Dewalt Miter unlock The Same Way As Other Brands Do?
The unlocking mechanism on a DeWalt miter saw is similar in principle to that of many other brands. Still, the specific design and operation may shift depending on the model and highlights of the saw. Here are some common ways in which miter saws, including DeWalt models, typically unlock:
- Locking Lever or Knob: Many miter saws, regardless of the brand, feature a locking lever or knob that secures the saw head in a lowered position. To unlock the saw, you typically need to disengage this lever or turn the knob.
- Release Button or Trigger: Some miter saws have a release button or trigger near the handle or saw head. Pressing or squeezing this button or trigger will release the saw head and allow you to raise it.
- Pull-Out Pin: Certain miter saws, including some DeWalt models, have a pull-out or locking pin mechanism. Pulling out the pin releases the saw head from its locked position.
- Lever on the Saw Arm: In some cases, a lever or switch may be located on the saw arm itself. Moving this lever or switch will unlock the saw head.
- Safety Interlock Mechanism: Many miter saws incorporate a safety interlock system that may require you to engage a safety switch or button before unlocking the saw. This additional safety feature helps prevent accidental unlocking.
- Multiple Locking Points: Some miter saws, especially compound miter saws, may have multiple locking points for the saw head, including miter and bevel locks. These locks are typically released individually to adjust the saw for different cuts.
While the basic concept of unlocking a miter saw is similar across brands, it’s essential to consult your specific DeWalt miter saw’s user manual for precise instructions. The specific strategy might differ depending on the model and features of your saw. Always prioritize safety and follow the manufacturer’s guidelines when unlocking and operating your miter saw.
Conclusion
Unlocking a DeWalt miter saw is a straightforward process that requires careful attention to safety and precision. Following the manufacturer’s instructions in the user manual, ensuring the tool is powered off and unplugged, and utilizing suitable devices and strategies, you can safely unlock your DeWalt miter saw and prepare it for use in your woodworking projects.
Remember always to prioritize safety and take your time when working with power tools to prevent accidents and ensure the longevity of your equipment. With the proper knowledge and precautions, unlocking and using your DeWalt miter saw can be a smooth and efficient process, allowing you to confidently tackle a wide range of cutting tasks.