
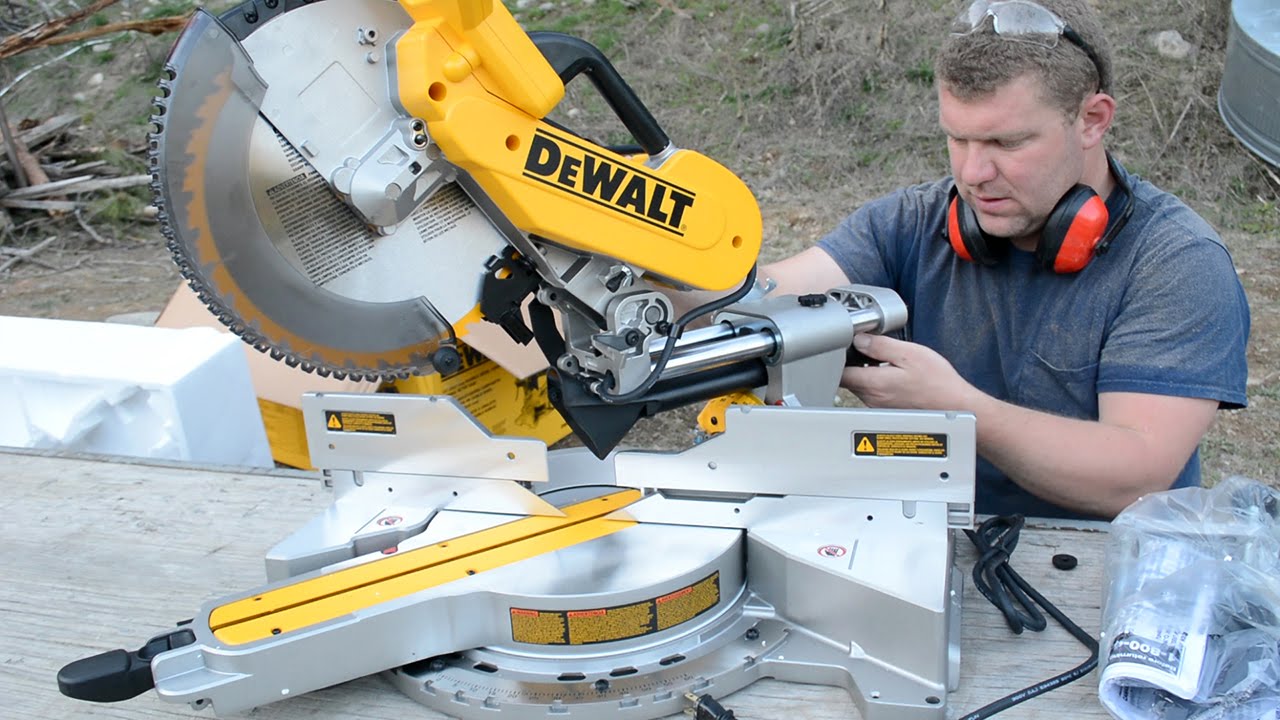
Unlocking the full potential of your DeWalt mitre saw begins with a fundamental yet crucial step: learning how to open it.
Whether you’re a seasoned woodworker looking to explore new angles or a DIY enthusiast embarking on your first home improvement project, understanding the correct procedure for opening your DeWalt mitre saw is essential.
By the end of this tutorial (How to open a Dewalt miter saw), you’ll have the confidence and knowledge to safely open your DeWalt mitre saw and easily make accurate cuts. Let’s dive in and unlock the potential of this versatile tool.
Unlocking and Opening the Miter Saw
Unlocking and opening your DeWalt mitre saw is crucial in preparing it for use. Follow these steps to safely and effectively unlock and open your mitre saw:
Safety Precautions
Before starting, wear appropriate personal protective equipment (PPE), including safety glasses and hearing protection. Ensure your workspace is well-lit and free of potential tripping hazards or obstructions.
Power Off
Ensure the mitre saw is disconnected from the power source to prevent accidental activation.
Position the Miter Saw
Place the mitre saw on a stable and level work surface, such as a workbench or sawhorse. Ensure the surface is strong enough to support the weight of the saw.
Check the Locking Mechanism
Locate the locking mechanism or latch that secures the saw arm in the closed position. This mechanism varies between different DeWalt mitre saw models but is typically found near the pivot point of the saw arm.
Some saws have a lever to release the lock, while others have a knob or button. Refer to your user manual for this mechanism’s specific location and operation.
Unlock the Saw
Actuate the locking mechanism according to your model’s instructions. This typically involves pushing, pulling, or turning the lever, knob, or button to release the lock. While unlocking, apply gentle pressure to the saw arm to help it move smoothly. Do not force it.
Raise the Saw Arm
Carefully and gradually lift the saw arm to the fully open position once the saw arm is unlocked. Pay attention to the movement of the saw arm and ensure it raises smoothly without any resistance or unusual sounds. Be cautious not to drop the arm abruptly, as this can damage the saw and pose a safety risk.
Verify Stability
Once the saw arm is fully open, verify that the mitre saw is stable on the work surface and that it’s not wobbling or tilting. Confirm that the saw arm is securely open and not moving unintentionally.
Inspect Safety Features
Check that all safety features, such as the blade guard, are in their proper positions and functioning correctly. Ensure the guard covers the saw blade when the armrests.
Gathering Necessary Tools and Materials
Gathering Necessary Tools and materials for a project is essential in ensuring that your work proceeds smoothly and efficiently. The specific tools and materials you need will depend on the nature of your project, but here’s a general guideline on how to approach gathering what you need:
- Identify the Project: First, clearly define the project you’re working on. Understand its scope, purpose, and the final result you want to achieve. This will help you determine what tools and materials are necessary.
- Make a List: Create a comprehensive list of all the necessary tools and materials. Divide your list into two sections: tools and materials. Consider factors like quantity, size, and any special features or specifications required.
- Check Inventory: Before heading to the store, check your existing inventory of tools and materials. You might already have some of the items you need, which can save you time and money.
- Research and Specifications: If you need to familiarize yourself with the required tools or materials, research. Understand the specifications and features you need. This might involve consulting project plans or seeking expert advice or online resources.
Shop for Tools and Materials
- Local Hardware Stores: Visit local hardware stores or home improvement centres. They typically have a wide range of tools and materials.
- Quality Matters: Invest in good-quality tools and materials, especially for projects that require precision or durability. Quality items often result in better outcomes and can last longer.
- Safety Gear: Remember safety equipment such as goggles, gloves, ear protection, and dust masks if your project involves potentially hazardous tasks.
- Organization: Keep your tools and materials organized. Use containers, bins, or shelves to store them in a neat and accessible manner. This will save you time and frustration during the project.
- Check for Updates: Occasionally, check your tools and materials inventory for wear and tear. Replace any damaged or worn-out items to ensure safety and efficiency.
- Project-Specific Items: Some projects may require specialized tools or materials you will use sparingly. In such cases, consider borrowing or renting them if feasible to reduce costs.
- Safety First: Always prioritize safety when working on any project. Read user manuals and follow safety instructions for tools and equipment. Use protective gear as necessary, and work in a well-ventilated area.
Preparing the Workspace
Preparing your workspace is a crucial step in any project, whether you’re working on a DIY home improvement task, a craft project, or any other type of work.
A well-organized and clean workspace can improve efficiency, safety, and the overall quality of your work. Here’s how to prepare your workspace effectively:
Clear the Area
Remove any unnecessary clutter from the workspace. Clearing the area of unrelated items will give you more room to work and reduce the risk of accidents.
Safety First
- Ensure the workspace is well-ventilated if you’re working with chemicals or producing dust or fumes.
- Check for proper lighting. Adequate lighting is essential for accurate work and safety.
- Identify potential safety hazards and address them. This could include securing cords and hoses, repairing damaged flooring, or removing tripping hazards.
- Keep a fire extinguisher and a first-aid kit handy, especially if your project involves potentially hazardous materials or equipment.
Organize Your Tools and Materials
- Arrange your tools and materials in a way that makes them easily accessible. Use toolboxes, shelves, cabinets, or pegboards to keep things organized.
- Group similar items together. For example, keep all your woodworking tools in one area and electrical tools in another.
- Label containers and drawers for easy identification of contents.
Workbench and Surface Preparation
- If you have a workbench, ensure it’s clean and clutter-free. A clear work surface is essential for precision work.
- Cover your workbench with a protective surface if needed. A sacrificial board can protect the bench from cuts and damage for woodworking.
- Ensure the workbench is level and stable.
Power and Utilities
- Ensure that electrical outlets are accessible and not overloaded. Use extension cords and power strips as needed, but do so safely, avoiding daisy-chaining multiple extension cords.
- If your project requires water or plumbing, ensure all necessary connections are in place and functioning correctly.
- Emergency Exits: Ensure that emergency exits and pathways are clear and unobstructed.
Comfort and Ergonomics
- Set up your workspace with ergonomics in mind. Adjust workbench heights and chair positions to reduce strain and discomfort during extended work periods.
- Provide adequate seating and a comfortable working height for tasks requiring extended sitting or standing periods.
Task-Specific Preparations
Depending on the project, you may need specific setups, such as a painting easel, a welding station, or a sewing table. Ensure these are correctly prepared for your task.
Personal Protective Equipment (PPE)
Gather and wear the necessary personal protective equipment for your specific task. This may include safety glasses, gloves, hearing protection, and respirators.
Keep an Organized Workspace During the Project
As you work, maintain the organization of your workspace. Put tools back in their designated spots after use and promptly clean up spills or debris.
Post-Opening Inspection
After successfully opening your DeWalt mitre saw, performing a thorough post-opening inspection is crucial to ensure everything is in proper working order and safe for operation.
This step helps identify potential issues that may have arisen during the opening process or any pre-existing problems that require attention. Here’s a checklist for your post-opening inspection:
Stability Check
Ensure the mitre saw is securely fastened to the work surface without wobbling or moving.
Safety Features
- Confirm that all safety features, such as blade guards, safety locks, and on/off switches, are functioning correctly.
- Verify that the blade guard retracts smoothly and covers the blade when unused.
Blade Inspection
- Examine the saw blade for any damage, wear, or dullness. Replace it if necessary.
- Ensure the blade is tightly secured, with no wobbling or movement.
Alignment and Calibration
- Check the alignment of the mitre and bevel angles. Adjust them if they are not at their default positions.
- Verify that the mitre saw’s scale and angle indicators are accurate.
Fence and Stops
- Ensure that the fence is straight and aligned with the blade.
- Test the positive stops for common angles (e.g., 45 degrees) to ensure they lock securely in place.
Dust Collection System
If your mitre saw has a dust collection system, check if it is properly connected and functioning. Clean out any dust or debris.
Lubrication
Lubricate the moving parts of the mitre saw, such as the pivot points and sliding rails, as the user manual recommends.
User Manual Review
Refer to the user manual for your DeWalt mitre saw model to cross-check maintenance and safety guidelines.
Storage and Maintenance Plan
- Determine a suitable storage location for your mitre saw to protect it from dust and moisture when not in use.
- Establish a regular maintenance schedule, including blade replacement and lubrication, to keep your saw in top condition.
- Checking for any loose components or damage
- When conducting a post-opening inspection of your DeWalt mitre saw, it’s essential to check for loose components or damage that may have occurred during use or the opening process.
Here’s a step-by-step guide on how to check for loose components or damage:
Disconnect the Power
Before inspecting the saw, ensure it is unplugged or disconnected from the power source to prevent accidental activation.
Visual Inspection
- Carefully examine all visible components of the mitre saw, including the base, frame, and moving parts.
- Look for signs of damage, such as cracks, dents, or bent metal, which can compromise the saw’s structural integrity.
- Inspect the power cord for any fraying, exposed wires, or damage.
Check Fasteners
- Inspect the saw’s bolts, nuts, screws, and other fasteners for tightness.
- Use the appropriate wrenches or tools to tighten any loose fasteners you encounter.
- Pay special attention to fasteners on the base, fence, blade guard, and motor housing.
Evaluate Handles and Controls
- Ensure that handles, knobs, and controls, such as the mitre angle lock and bevel angle adjustment, are securely fastened and not loose.
- Verify that levers and switches operate smoothly without excessive play.
Examine the Blade Guard
- Check the blade guard for any cracks, damage, or misalignment.
- Ensure it retracts smoothly when the saw is used and covers the blade at rest.
Inspect the Blade
- Re-examine the saw blade to ensure it’s tightly secured and free from defects or irregularities.
- Look for signs of wear on the teeth or blade surface, as a worn-out blade may need replacement.
Evaluate Sliding Rails and Pivot Points
- Inspect the sliding rails and pivot points for signs of rust, corrosion, or irregularities.
- Apply a suitable lubricant if necessary to ensure smooth movement.
Check the Fence
Verify that the fence is securely attached and straight, aligning correctly with the blade.
Test Movement
Operate the mitre saw through its range of motion to ensure all moving parts move smoothly without resistance or unusual noises.
Review User Manual
Refer to the user manual for your DeWalt mitre saw model to cross-check components and their proper alignment.
Make Necessary Repairs
If you discover any loose components or damage you cannot repair, consider seeking professional assistance or contacting DeWalt customer support for guidance.
Troubleshooting Common Issues
Even with careful preparation, sometimes issues may arise when opening your DeWalt mitre saw. Here are some common problems you may encounter and steps to troubleshoot them:
Difficulty in Unlocking the Saw
- Ensure that you have correctly released any locking mechanisms or latches.
- Check for obstructions or debris that may be preventing smooth unlocking.
- Inspect the saw’s hinge and pivot points for any signs of rust or damage. Lubricate them if necessary.
Resistance While Raising the Saw Arm
- Verify that the blade guard is not catching on anything and is fully retracted.
- Check the blade for proper installation; a misaligned or loose blade can cause resistance.
- Ensure the mitre and bevel angles are set to default before raising the arm.
Misalignment or Irregular Movement
- Double-check that the mitre saw is securely fastened to the work surface to prevent wobbling.
- Examine the tracks and rails for debris or foreign objects obstructing smooth movement.
- If you notice any loose components or damaged parts, address them promptly to prevent misalignment.
Unusual Sounds or Vibrations
- Investigate the source of the noise or vibration, which could be caused by loose parts or misalignment.
- Inspect the blade for damage or dullness, as a worn-out blade can produce unusual noises.
- Ensure that all screws and bolts on the mitre saw are correctly tightened.
Blade Guard Not Retracting
- Examine the blade guard mechanism for any obstructions or debris preventing it from retracting.
- Check the spring or tensioning mechanism of the blade guard for proper functioning.
- Lubricate the moving parts of the blade guard if it is sticking.
Electrical Issues
- If the saw does not power on, check the power source and ensure it matches the saw’s requirements.
- If there is an issue with the saw’s switch or wiring, it’s best to contact a professional for repairs.
Uneven Opening or Closing
- Ensure that the mitre saw is on a level and stable surface.
- Check for loose components, such as bolts or screws, that may affect the saw’s movement.
- If the saw consistently opens or closes unevenly, consult the user manual or consider professional maintenance.
Conclusion
In the woodworking and home improvement world, mastering the art of opening a DeWalt mitre saw is the foundational step that paves the way for a successful project. This guide has equipped you with the knowledge and understanding necessary to unlock the full potential of your mitre saw.
By following the safety precautions, gathering the right tools, and comprehending the inner workings of your saw, you’ve taken the first steps toward precision and efficiency in your cutting tasks.
Safety should always be a top priority when working with power tools. Familiarize yourself with the specific features of your DeWalt mitre saw by consulting the user manual, and always perform a post-opening inspection to guarantee that everything is in working order.