
Precise cuts and angles are often essential for a professional and polished finish. While mitre saws are a popular choice for making angled cuts, only some can access one, or the project may be where power tools aren’t practical.
The good news is that alternative methods and tools can still achieve accurate trim angles without a mitre saw. This guide explores techniques and tips to help you master cutting trim angles using readily available tools, ensuring your next project turns out perfectly, even without a mitre saw.
How to cut trim angles without a mitre saw?
Cutting trim angles without a mitre saw is a complex skill that can save time and money while achieving precise results. Follow these steps to cut trim angles using alternative tools and methods:
Tools and Materials You’ll Need
- Trim Material: The trim you want to cut to the desired angle.
- Protractor: To measure and mark the angle accurately.
- Pencil: For marking your measurements.
- Tape Measure or Ruler: To ensure precise measurements.
- Miter Box: A mitre box is a guiding tool that helps you make angled cuts with a handsaw. You can find mitre plastic or wood boxes at your local hardware store.
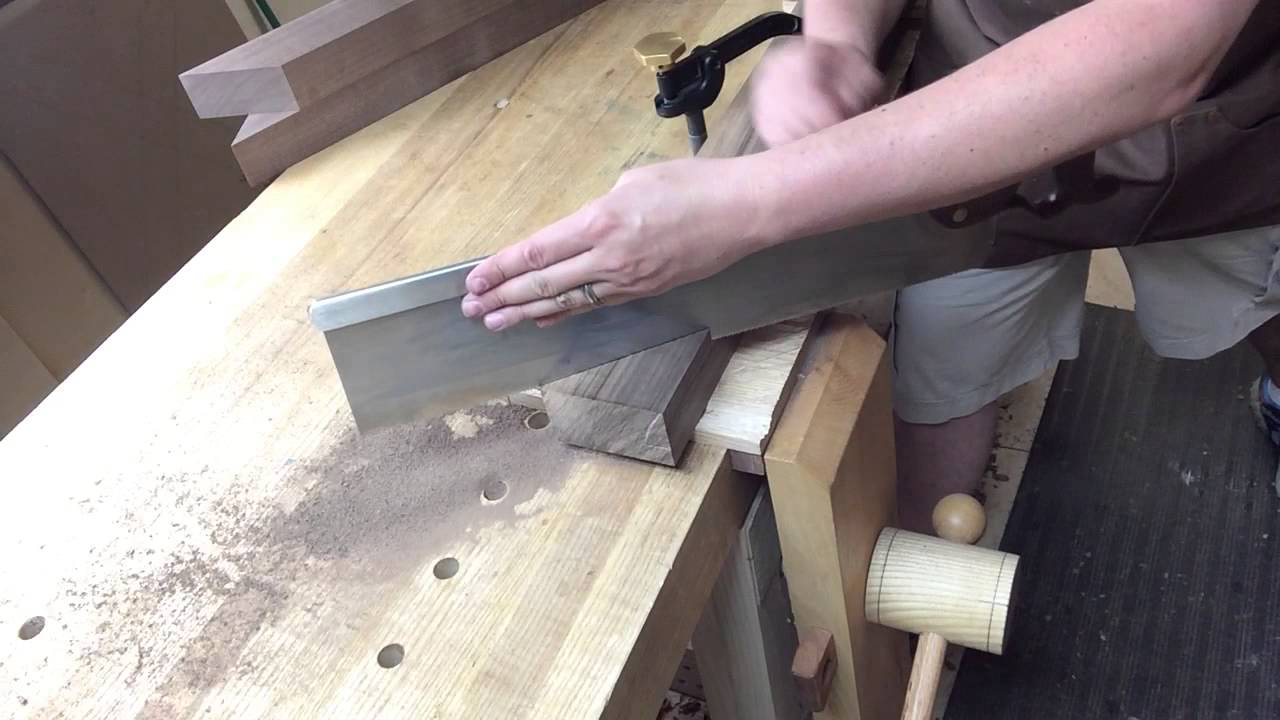
- Backsaw or Hand Saw: A backsaw or hand saw makes the actual cuts.
Measure and Mark
If you need an angle other than 90 degrees (a right angle), use a protractor to measure the exact angle required and mark it on the trim.
Ensure that your measurements are precise, crucial in achieving clean angles.
- Set Up the Miter Box: Place the mitre box on a stable surface, ensuring it’s level. The mitre box should have slots or guides for different common angles, such as 45 and 90 degrees. Align the marked angle on your trim with the appropriate slot in the mitre box.
- Secure the Trim: Hold the trim firmly against the mitre box, ensuring it’s flush with the chosen angle slot. You may want to use clamps to secure the trim, especially if it’s long or tends to move.
- Cut with the Backsaw: Use a backsaw or hand saw to carefully cut along the marked line, following the slot in the mitre box as your guide. Apply steady, even pressure and maintain a straight cut throughout. Take your time to ensure accuracy.
- Check the Fit: Once the cut is complete, remove the trim from the mitre box and check the angle against the surface where it will be installed. Make any necessary adjustments by trimming small amounts until the fit is perfect.
- Sand and Finish: After achieving the desired angle and fit, use sandpaper to smooth out any rough edges and ensure a seamless finish.
- Repeat as Needed: If your project requires multiple trim pieces with the same angle, use the same mitre box setting and angle measurements for consistency.
Explanation of the purpose of cutting trim angles
Cutting trim angles creates seamless and aesthetically pleasing transitions between different surfaces or components in a construction or home improvement project. Trim pieces, such as baseboards, crown moulding, door casings, or window sills, often need to be installed at various angles to fit the room’s contours or the architectural design. Properly cut trim angles serve several important purposes:
- Aesthetic Appeal: Trim angles are crucial for achieving a polished and visually appealing finish. They help conceal gaps, uneven joints, and rough edges, giving the overall space a more refined and elegant look.
- Seamless Transitions: Trim angles ensure that trim pieces seamlessly connect at corners, intersections, or where they meet other architectural elements, such as walls, ceilings, or floors. This creates a cohesive and harmonious appearance in a room.
- Improved Fit: Trim angles allow trim pieces to fit snugly against irregular surfaces, such as walls that are not perfectly straight or corners that are not precisely 90 degrees. Properly cut angles enable the trim to follow the contours of these surfaces accurately.
- Structural Integrity: Trim angles also play a role in the structural integrity of the trim installation. They help distribute the weight and stress evenly along the trim pieces, reducing the risk of warping, cracking, or gaps over time.
- Concealing Imperfections: Trim angles can be used strategically to hide imperfections or irregularities in the underlying construction, such as gaps between the wall and floor or ceiling. This can contribute to a more polished and finished appearance.
Tools and Materials
You’ll need a specific set of tools and materials to cut trim angles without a mitre saw. Here’s a list of what you’ll need:
Tools
- Trim Pieces: The trim you intend to cut.
- Measuring Tape: For accurate measurements.
- Pencil: To mark your cut lines on the trim.
- Speed Square or Protractor: For measuring and marking angles.
- Backsaw or Coping Saw: These are the primary tools for making cuts. A backsaw is excellent for straight cuts, while a coping saw is used for more intricate coping cuts.
- Sandpaper: For smoothing and refining cut edges.
Materials
- Trim Pieces: This depends on your project and the specific trim you’re working with.
- Safety Gear: Safety glasses, hearing protection, and dust masks to protect yourself from sawdust and debris.
- Scrap Wood (optional): If you’re practising or making test cuts, having some scrap trim or wood can be helpful.
- Cutting Techniques
- When cutting trim angles without a mitre saw, you’ll need to employ various cutting techniques depending on the type of angle and the tools you have at your disposal. Here are some common cutting techniques:
Using a Speed Square (for straight cuts)
- a. Measure and Mark: Measure the trim length and mark it with a pencil.
- B. Position the Speed Square: Place the Speed Square on the trim, aligning one edge with your marked line and the other with the trim’s edge.
- C. Secure the Trim: If you have clamps, use them to secure the trim in place. If not, ensure a stable cutting surface.
- D. Cut Along the Edge: With the Speed Square firmly held in place, use a backsaw or coping saw to make your cut, following the edge of the Speed Square.
Using a Protractor (for precise angles):
- a. Measure and Mark: Measure the angle on the trim and mark it with a pencil.
- b. Place the Protractor: Position the protractor on the marked angle, aligning it with the trim’s edge.
- c. Secure the Trim: Ensure the trim is securely held in place, either with clamps or on a stable work surface.
- d. Cut Along the Protractor: Use a backsaw or coping saw to make your cut, following the angle the protractor indicates.
Coping (for inside corners):
- a. Make a 90-degree Cut: Start by making a straight 90-degree cut on one of the trim pieces using a backsaw or coping saw. Ensure it’s a clean, square cut.
- b. Hold the Cut Piece Against the Corner: Position this cut piece against the corner where it will meet another trim piece.
- c. Mark the Profile: Use a pencil to mark the profile of the intersecting trim piece onto the cut piece. This is the shape you’ll need to cut.
- d. Cope the Trim: Use a coping saw to carefully follow the marked profile, removing excess material while keeping the saw at an angle to create a precise fit against the intersecting trim.
- e. Sand and Refine: After coping, use sandpaper to smooth and refine the cope cut for a snug fit.
Using a Protractor (for precise angles)
Using a protractor is a precise way to cut trim angles accurately when you don’t have a mitre saw. Here’s a step-by-step guide on how to use a protractor for cutting precise angles on trim:
Tools and Materials Required
- Trim piece
- Measuring tape
- Pencil
- Protractor
- Backsaw or coping saw
- Clamps (optional)
- Workbench or sawhorse
Procedure
Measure and Mark
Identify the angle you want to cut. If the angle isn’t a standard 45 or 90 degrees, you must measure and calculate the exact angle.
Position the Protractor
Place the protractor on the trim piece so that the centre point (usually the hole in the protractor) lines up with the corner or edge where you want to cut.
Align the Protractor
Rotate the protractor until the baseline (the straight edge of the protractor) aligns with the edge of the trim that you want to cut. This will ensure that you’re measuring the correct angle.
Measure the Angle:
Read the angle measurement on the protractor. This will indicate the precise angle at which you must cut.
Secure the Trim
If you have clamps, secure the trim piece to a workbench or sawhorse to prevent it from moving while you cut. If you still need to, ensure a stable and secure setup.
Cut Along the Protractor
Using a backsaw or coping saw, carefully cut along the marked angle indicated by the protractor. Ensure that your cut follows the exact angle measured.
Check the Fit
After cutting, check the fit of the trim piece at the desired location. It should fit snugly and match the angle of the corner or joint where it’s installed.
Adjust if Necessary
If the fit isn’t perfect, you can use sandpaper to fine-tune the cut edge until it fits precisely and forms a tight joint.
Coping (for inside corners)
Coping is a technique to create precise inside corner joints with trim pieces, such as baseboards or crown moulding, without needing a mitre saw. It’s a common method for achieving seamless inside corners. Here’s a step-by-step guide on how to cope with trim for inside corners:
Tools and Materials Required
- Trim piece
- Measuring tape
- Pencil
- Coping saw
- Backsaw or mitre saw (for initial 90-degree cuts)
- Sandpaper
- Safety gear (safety glasses and hearing protection)
- Workbench or sawhorse
Procedure
Measure and Mark
Measure the length of trim you need and mark it with a pencil.
Identify the inside corner where the trim will be installed.
Make a 90-degree Cut
Start by making a straight 90-degree cut on one end of the trim piece using a backsaw or mitre saw. Ensure that this cut is clean and square.
Position the Trim
Place the 90-degree cut end of the trim piece against the wall at the inside corner where it will be installed. The other end should extend past the corner.
Mark the Profile
Using a pencil, mark the profile of the intersecting trim piece onto the surface of the trim you want to cope. This profile should match the contour of the other trim piece where they meet at the corner.
Cut Along the Profile
Use a coping saw to cut along the marked profile carefully. To cope, follow these steps:
- a. Angle the coping saw blade to follow the contour of the profile.
- b. Cut just outside of the marked line, leaving a small gap.
- c. Gradually remove material while following the curve of the profile.
- d. Make relief cuts as necessary to remove waste material.
- e. Continue cutting until you have a precise cope cut that matches the contour of the intersecting trim piece.
Test the Fit
Fit the coped end of the trim piece against the intersecting trim at the inside corner. It should fit snugly and create a seamless joint.
Sand and Refine
Use sandpaper to smooth and refine the cope cut for a tight fit. Pay special attention to rough edges or imperfections to ensure a clean finish.
Tips and Tricks
When cutting trim angles without a mitre saw, Here are some valuable tips to keep in mind:
Measure Twice, Cut Once: Double-check all measurements and angles before making any cuts to avoid costly mistakes.
- Practice on Scrap Trim: If you’re new to cutting trim angles, practice your cuts on scrap pieces of trim first to refine your skills and gain confidence.
- Use a Sharp Saw Blade: A sharp saw blade will make cleaner and more accurate cuts. Replace or sharpen your blade as needed.
- Secure the Trim: Use clamps to secure the trim in place when cutting, especially for longer pieces. This ensures stability and prevents the trim from moving during the cut.
- Support Long Trim: If you’re working with long trim pieces, use supports like sawhorses to keep the material level and prevent it from sagging or bending.
- Cut Slightly Wide: When making angled cuts, cut slightly outside the marked line, and then use sandpaper to fine-tune the cut for a perfect fit. It’s easier to remove a little material than to add it back.
- Label Trim Pieces: To avoid confusion, label each trim piece with its location and orientation, especially if you have multiple pieces with different angles.
- Plan for Coped Joints: Make your initial straight cuts slightly longer than needed when coping inside corners. You can always trim them to fit perfectly during the coping process.
- Maintain a Clean Workspace: Sawdust and debris can interfere with your work and measurements. Keep your workspace clean and well-lit for accurate cuts.
- Use a Speed Square or Protractor Properly: Ensure that your measuring tools are correctly aligned and that you’re reading measurements from the right point on the tool to avoid inaccuracies.
Safety Precautions
Safety is paramount when working with tools and materials, especially when cutting trim angles without a mitre saw. Here are essential safety precautions to follow:
Wear Appropriate Safety Gear
- Hearing Protection: Use earplugs or earmuffs when operating loud tools.
- Dust Mask: Prevent inhaling sawdust and other airborne particles.
Maintain a Clean Workspace
Keep your work area tidy by regularly cleaning up sawdust, offcuts, and clutter to prevent accidents and ensure accurate measurements.
Good Lighting
Ensure your workspace is well-lit to see your work clearly and avoid mistakes.
Stable Work Surface
Use a stable workbench or sawhorse to support long trim pieces and prevent wobbling or instability during cuts.
Secure the Trim
Use clamps to hold the trim securely in place, especially for longer pieces, to prevent movement during cutting.
Proper Tool Handling
- Always use tools in the manner they are intended, following the manufacturer’s instructions.
- Keep hands and fingers away from the cutting area and behind the saw blade.
Keep Tools in Good Condition
Regularly inspect and maintain your tools to ensure they are in proper working order, with sharp blades or teeth.
Use Dust Collection
Connect a dust collection system to your saw to minimize airborne dust and maintain a clean workspace if available.
Stay Focused
Concentrate on your work while cutting, avoiding distractions that could lead to accidents.
No Loose Clothing or Jewelry
- Wear appropriate clothing that fits snugly and doesn’t hang loose to prevent it from getting caught in tools.
- Remove jewellery that could interfere with your work or pose a safety risk.
Mind Electrical Cords
Ensure power cords are not in the cutting path and are secured to prevent tripping hazards.
Use Caution with Power Tools
- When using power tools, be aware of the location of the on/off switch, and keep it in the off position when not in use.
- Unplug or disconnect power tools when changing blades or making adjustments.
Work with a Buddy
Have someone nearby who can assist or call for help in an emergency whenever possible.
Emergency First Aid Kit
Keep a basic first aid kit in your workspace to address minor injuries.
Conclusion
In conclusion, cutting trim angles without a mitre saw is a valuable skill for any DIY enthusiast or carpenter. Whether you’re installing baseboards, crown moulding, or other trim pieces, mastering the techniques outlined in this guide can help you achieve precise and professional results.
Following the steps and tips, you can create seamless transitions, precise joints, and aesthetically pleasing finishes in your home improvement projects. Remember to prioritize safety by wearing the appropriate protective gear, maintaining a clean and well-lit workspace, and using tools and materials properly.