
Are you an aspiring woodworking enthusiast eager to enhance your skills? If so, learning how to cut angles on a table saw is a fundamental technique to master.
Understanding the process is essential, whether you’re aiming to create precise angles or assemble angled joints. This beginner’s guide will walk you through cutting angles on a table saw while emphasizing safety precautions.
What tools do you need for cutting angles?
Having the right tools is crucial when achieving accurate and precise angled cuts. Whether working on woodworking projects or engaging in DIY tasks, using the appropriate tools ensures clean and well-executed cuts. This section will discuss the essential tools required for cutting angles on a table saw.
Table Saw: The table saw is the primary tool for cutting angles. It has a flat, table-like surface with a rotating circular blade at its center. Ensure your table saw is in optimal working condition and that the blade is sharp.
Miter Gauge: A miter gauge is a guiding tool that facilitates precise angled cuts on a table saw. Typically composed of a long metal or plastic bar with an adjustable guide and a pivoting head, the miter gauge is designed to fit into the grooves on the table saw. It lets you set the desired cut angle, ensuring accuracy and repeatability.
Protractor or Angle Finder: To determine the angle you need to cut, a protractor or angle finder proves invaluable. These devices assist in measuring and setting the desired angle accurately. Place the protractor or angle finder on the workpiece and adjust until it aligns with the desired angle. Once set, you can transfer the angle measurement to your table saw for precise cutting.
Safety Gear: Prioritizing safety is paramount when working with power tools. Ensure you have the necessary safety gear, including goggles, ear protection, and a dust mask. These items protect your eyes, ears, and lungs from flying debris and excessive noise.
Clamps: When cutting angles, it is essential to firmly secure your workpiece to prevent any movement during the cutting process. Clamps play a crucial role in holding the workpiece securely in place, enabling accurate and safe cuts. Utilize woodworking clamps to avoid damaging the material.

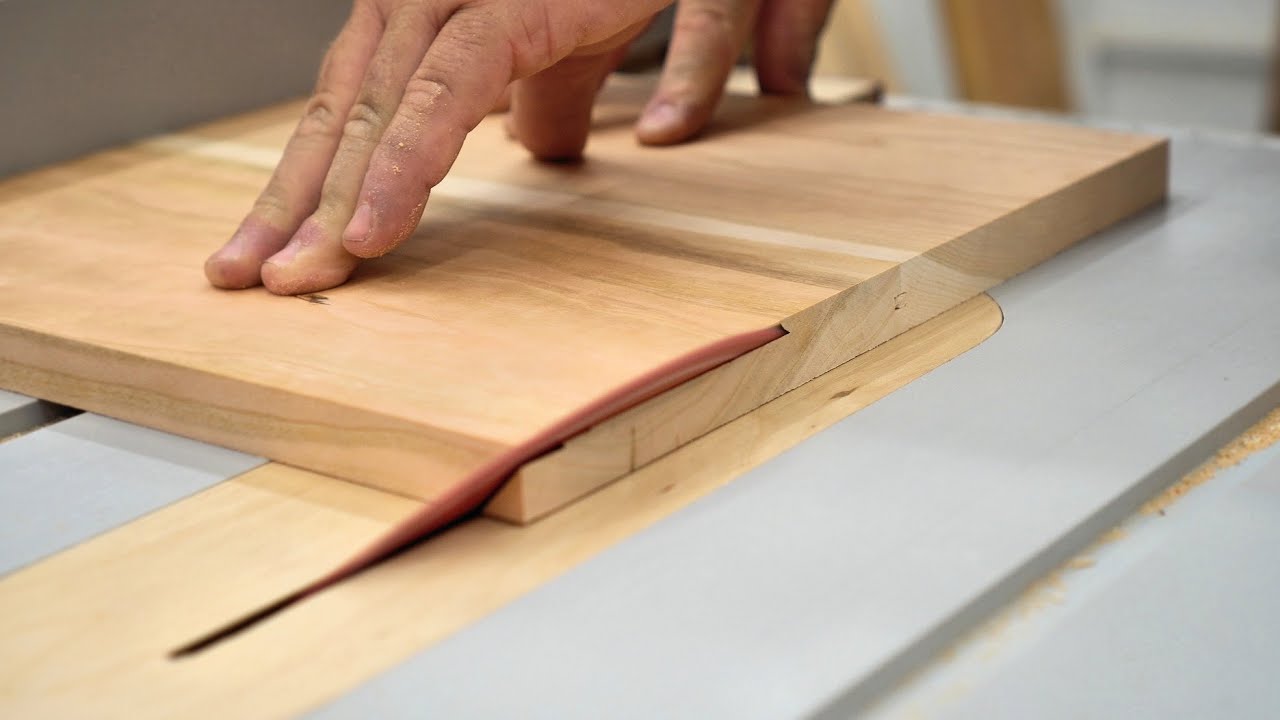
Push Stick: A push stick is a safety tool that guides the workpiece through the table saw while maintaining a safe distance from the blade. It provides better control and helps prevent accidents by reducing the risk of hand contact with the spinning blade. Always use a push stick when working with a table saw to ensure safety.
Achieving accurate and clean angled cuts on a table saw requires specific tools. The tools for cutting angles include a table saw, miter gauge, protractor or angle finder, safety gear, clamps, and a push stick. By employing these tools correctly and adhering to proper safety measures, you can confidently create precise angled cuts for your woodworking or DIY projects.
General Idea of Bevel Cut
In woodworking and carpentry projects, bevel cuts play a significant role in creating angled edges and joints. It is essential to grasp the general idea of bevel cuts to achieve accurate and professional results. This section will delve into bevel cuts, their purpose, and their typical execution.
Bevel cuts involve tilting the blade of a saw at an angle other than 90 degrees about the workpiece. This technique creates sloping or angled edges, deviating from the standard straight cuts. Bevel cuts are commonly used in various applications, such as crafting decorative edges, fitting pieces together at specific angles, or constructing joints with precise angles.
The purpose of a bevel cut can vary depending on the project. It may serve aesthetic purposes, adding visual interest or enhancing the overall design of a piece. Additionally, bevel cuts can fulfill functional objectives, such as creating a beveled edge for a picture frame or a sloping joint for a roof truss.
To execute a bevel cut, a table saw, or a miter saw with tilting capabilities is necessary. These tools allow you to adjust the blade’s angle by loosening a lock or release mechanism and then tilting the blade to the desired angle.
Precise measurements and markings on the workpiece are crucial when performing a bevel cut. A protractor or angle gauge can determine the angle at which the blade should be tilted. Carefully align the workpiece with the blade and maintain a firm grip to ensure accurate and safe cutting.
Before making the actual bevel cut, it is advisable to conduct a test cut on a scrap piece of material. Furthermore, wearing appropriate safety gear, such as safety glasses and hearing protection, is essential to ensure personal safety during cutting.
Once the saw is set up and the workpiece is prepared, guide it through the blade cautiously, maintaining a steady and controlled movement. Take your time and avoid rushing the cut to prevent mistakes or accidents. Always maintain a safe distance from the blade and utilize push sticks or other guiding tools to keep your hands away from the blade’s path.
Understanding the concept of bevel cuts is crucial in woodworking and carpentry projects requiring angled edges and joints. By comprehending the general idea of bevel cuts, their purpose, and their correct execution, you can achieve precise and professional results. Using appropriate tools, accurate measurements, and a focus on safety, you can confidently incorporate bevel cuts into your woodworking projects.
Cut angles on a table saw
Knowing how to cut angles on a table saw is fundamental for woodworkers and DIY enthusiasts. Whether you need to create beveled edges, mitered joints, or angled cuts for decorative purposes, accurate angle cuts are essential.
Step 1: Set up the Table Saw
Start by ensuring that your table saw is in proper working condition. Check the blade for sharpness and ensure it is securely fastened. Adjust the blade height according to your workpiece’s thickness, ensuring it protrudes just enough for a clean cut.
Step 2: Prepare the Workpiece
Measure and mark the desired angle on the workpiece using a protractor or an angle gauge. Use a pencil to create a clear, visible line indicating where the cut will be made. Take accurate measurements and ensure the workpiece is securely positioned against the table saw’s fence.
Step 3: Adjust the Blade Angle
Consult your table saw’s manual to locate and operate this machine. Loosen the bevel lock and adjust the blade angle to match the angle marked on the workpiece. Once set, securely tighten the bevel lock.
Step 4: Perform Test Cuts
Before making the final cut on your workpiece, it’s advisable to perform test cuts on scrap pieces of wood. This allows you to verify that the blade angle is correctly set and that the resulting cut matches your desired angle. Adjust the blade angle if necessary until you achieve the desired outcome.

Step 5: Make the Angle Cut
Once you are satisfied with the test cuts, it’s time to make the actual angle cut on your workpiece. Position the marked line on the workpiece against the table saw’s fence. Maintain a steady and controlled feed rate, ensuring your hands are safe from the blade.
Step 6: Inspect the Cut and Perform the Finishing Touches
After making the angle cut, carefully inspect it to ensure it meets your expectations.
Cutting angles on a table saw is a valuable skill for woodworking enthusiasts. Following these step-by-step instructions and focusing on safety, you can confidently and accurately cut angles on a table saw. Remember to exercise caution and precision to achieve clean and precise angled cuts for your woodworking projects.
Adjusting the wood and saw blade
It is crucial to adjust the wood properly and the saw blade to achieve precise and accurate angle cuts on a table saw. Proper adjustments ensure correct wood positioning and blade alignment at the desired angle.
Step 1: Mark the Wood
Begin by marking the wood with the desired angle using a protractor or an angle gauge. Use a pencil or marking knife to create a clear and visible line on the wood, indicating where the cut will be made. Double-check the accuracy of the angle measurement before proceeding.
Step 2: Adjust the Fence
Position the table saws fence to align with the marked line on the wood. The fence provides support and helps guide the wood through the blade during the cut. Double-check the alignment to prevent any inaccuracies.
Step 3: Set the Blade Angle
Refer to your table saw’s manual to locate the blade angle adjustment mechanism. Loosen the bevel lock or tilt mechanism and adjust the blade angle to match the marked angle on the wood. Take your time to ensure the blade is accurately tilted to the desired angle. Once set, securely tighten the bevel lock or tilt mechanism.
Step 4: Adjust the Blade Height
Proper blade height is essential for clean and precise cuts. Adjust the blade height according to the thickness of the wood, ensuring that it protrudes just enough for a clean cut.
Step 5: Perform Test Cuts
Before making the final cut on your workpiece, it’s advisable to perform test cuts on scrap pieces of wood. Check the resulting angle and adjust as needed to achieve the desired outcome.
Step 6: Make the Angle Cut
Once you are satisfied with the test cuts and adjustments, make the angle cut on the wood. Keep your hands safe from the blade and maintain a steady and controlled feed rate throughout the cut.
Step 7: Inspect the Cut
After making the angle cut, carefully inspect the resulting cut to ensure it meets your expectations. Always prioritize safety by wearing appropriate protective gear throughout the cutting process.
Properly adjusting the wood and the saw blade is crucial for achieving accurate and precise angle cuts on a table saw. By following these steps and ensuring the alignment of the wood and the blade, you can confidently cut angles on a table saw and achieve the desired results in your woodworking projects.
Prepare the wood and saw blade
Before cutting angles on a table saw, it is crucial to prepare both the wood and the saw blade properly. Adequate preparation ensures the wood is ready for cutting and the saw blade is in optimal condition.
Step 1: Select the Wood
Begin by selecting a suitable piece of wood for your project. Consider the type and thickness of the wood, as it may influence the blade height and cutting speed.
Step 2: Measure and Mark the Wood
Make precise measurements and mark the wood with a pencil or marking knife to indicate where the cut will be made.
Step 3: Inspect the Saw Blade
Thoroughly inspect the saw blade for any signs of damage or dullness. Look for missing or chipped teeth, as these can affect the quality of the cut. Follow the manufacturer’s instructions for blade replacement.
Step 4: Adjust the Blade Height
Set the blade height according to the thickness of the wood. The blade should extend slightly above the surface of the wood to ensure a clean cut.
Step 5: Check Blade Alignment
Ensure the saw blade parallels the miter gauge slot or the table saws fence. Misalignment can result in inaccurate angle cuts. Adjust the blade if necessary by loosening the appropriate mechanisms and carefully aligning it with the reference point. Securely tighten the mechanisms once the alignment is correct.

Step 6: Install Safety Features
Prioritize safety by ensuring that all necessary safety features are installed. This may include a blade guard, anti-kickback pawls, and a riving knife. These features help prevent accidents and protect you from hazards during the cutting process. Double-check that they are correctly installed and functioning properly.
Step 7: Prepare the Workspace
Clear the workspace of any debris, ensuring a clean and clutter-free area. Remove any potential hazards or obstacles that may interfere with the cutting process. This creates a safe and efficient working environment, allowing you to focus on the task.
Properly preparing the wood and the saw blade is crucial before cutting angles on a table saw. By selecting the suitable wood, inspecting the saw blade, adjusting the blade height and alignment, and ensuring the presence of safety features, you can create a suitable and safe setup for angle cutting.
Prioritize safety throughout the process and follow proper woodworking practices to achieve accurate and clean angle cuts on your table saw.
Measure and mark out the beginning and end of the cut
Measuring and marking a cut’s beginning and end points is essential for achieving accurate and precise results in woodworking. This step ensures that the cut is made at the intended location and helps maintain consistency throughout the project. This guide will explain measuring and marking a cut’s beginning and endpoints.
Step 1: Determine the Cut Length
Take precise measurements, accounting for any allowances or overlaps required for your project. Note down the measurement for future reference during the marking process.
Step 2: Mark the Beginning Point
Locate the beginning point of the cut based on your measurements. Ensure the mark is clear and easily distinguishable to guide the cutting process accurately.
Step 3: Mark the End Point
Based on your measurement and the beginning point, mark the end point of the cut on the workpiece. Measure from the beginning point along the length of the workpiece and make another clear and visible mark at the designated endpoint. Double-check the accuracy of the measurement to ensure the cut will be made at the correct location.
Step 4: Extend the Markings
To enhance precision and visibility during the cutting process, extend the marks along the surface of the workpiece. Use a straightedge, such as a ruler or square, to draw a line connecting the beginning and end marks. This extended line will serve as a visual guide, enabling you to align the saw blade accurately for the cut.
Step 5: Verify the Measurements
Before proceeding with the cut, verify your measurements to ensure accuracy. This verification step helps avoid errors and ensures the cut is made at the intended length.
Step 6: Secure the Workpiece
Ensure the workpiece is securely positioned on the table saw or work surface. Use clamps or other suitable methods to hold the workpiece in place, minimizing movement during cutting. This step is crucial for maintaining accuracy and preventing accidents caused by workpiece displacement.
Measuring and marking a cut’s beginning and end points is a crucial step in achieving accurate and precise results in woodworking. By carefully measuring the cut length, marking the beginning and end points, extending the markings for visibility, verifying the measurements, and securing the workpiece, you can ensure the cut will be made at the intended location. Remember to prioritize safety and maintain accuracy throughout your woodworking project.
Outline the Cut
Outlining the cut is a crucial step in woodworking that guides the saw blade and ensures accurate and precise cuts. Woodworkers can maintain consistency, avoid mistakes, and achieve desired results by carefully outlining the cut. This guide will discuss the importance of outlining the cut and provide a step-by-step process for this essential woodworking task.
Step 1: Review the Project Plans
Before outlining the cut, review the project plans or design specifications. Understand the desired dimensions, angles, and any other relevant details. This knowledge will guide your outlining process and ensure the final cut meets the project requirements.
Step 2: Examine the Workpiece
Thoroughly inspect the workpiece, paying attention to defects, knots, or irregularities that may affect the cut. Evaluate the grain direction and consider how it may influence the cutting process. Identify specific areas requiring extra care or precision.
Step 3: Measure and Mark the Cut
Measure carefully and mark the wood at the designated points using a pencil or marking knife. Ensure the marks are clear and easily visible, enabling accurate adherence to the outline.
Step 4: Extend the Markings
Extend the initial marks along the wood’s surface to create a comprehensive outline. Use a straightedge, such as a ruler or square, to connect the marked points with straight lines. These extended lines will serve as visual guides for the saw blade, ensuring precision and alignment during cutting.
Step 5: Consider Safety Precautions
Prioritize safety before proceeding with the cut. Ensure you wear appropriate safety gear, including safety glasses and hearing protection. Position yourself in a stable stance with a firm grip on the workpiece, maintaining a safe distance from the blade.
Step 6: Verify the Outline
Take a moment to review the outlined cut before initiating the actual cutting process. Double-check the measurements and alignment to confirm accuracy. Make any necessary adjustments or refinements to the outline for the best possible outcome.
Step 7: Begin the Cut
With the outline in place and safety measures in mind, initiate the cut using the appropriate cutting tool, such as a table saw, hand saw, or jigsaw. Follow the outlined cut lines carefully, maintaining a steady and controlled motion throughout the cutting process. Proceed at a suitable speed, allowing the blade to do the work while maintaining control.
Step 8: Inspect the Cut
After completing the cut, thoroughly inspect the result. Ensure it aligns with the outlined cut and meets the desired specifications. Address any rough edges or imperfections through sanding or refining, if needed.
Outlining the cut is a crucial step in woodworking that facilitates accurate and precise cuts. By following the outlined steps, reviewing project plans, measuring and marking the cut, extending the markings, considering safety precautions, verifying the outline, and performing the cut precisely, woodworkers can achieve desired results and enhance the overall quality of their woodworking projects.
Adjust the saw’s height
Properly adjusting the height of the saw blade is a critical step in achieving accurate and precise woodworking cuts. Whether using a table saw, miter saw, or circular saw, ensuring the correct blade height helps prevent tear-out, promotes safety, and enhances the overall quality of the cuts. This guide will discuss the importance of adjusting the saw’s height and provide a step-by-step process for this crucial task.
Step 1: Review the Cutting Requirements
Before adjusting the saw’s height, review the cutting requirements for your specific woodworking project. Understanding these requirements will guide you in setting the appropriate saw blade height.
Step 2: Locate the Height Adjustment Mechanism
Identify the height adjustment mechanism on your particular saw. Different saws have various methods for adjusting the blade height. Common mechanisms include knobs, levers, or crank handles near the blade or on the side of the saw. Consult your saw’s manual if needed to locate the specific adjustment mechanism.
Step 3: Power Off and Unplug the Saw
Before adjusting the saw’s height, ensure it is powered off and unplugged. This precaution is crucial for your safety. Double-check that the saw’s switch is in the “off” position and disconnect it from the power source to eliminate the risk of accidental start-up.
Step 4: Loosen the Height Adjustment Mechanism
Using the appropriate tool or method, loosen the height adjustment mechanism. This may involve turning a knob counterclockwise, releasing a lever, or rotating a crank handle. Follow the manufacturer’s instructions or consult the saw’s manual for specific guidance on loosening the mechanism.
Step 5: Set the Desired Blade Height
Adjust the blade height to the desired setting with the height adjustment mechanism loosened. Refer to your project’s requirements and adjust the blade accordingly. Lower the blade height for shallow cuts, while for deeper cuts, raise the blade height. Take minor incremental adjustments to ensure accuracy.
Step 6: Securely Lock the Height Adjustment Mechanism
Once you have set the desired blade height, securely lock the height adjustment mechanism. This will prevent any unintentional movement of the blade during the cutting process. Follow the manufacturer’s instructions or consult the saw’s manual to ensure the mechanism is correctly and securely locked.
Step 7: Verify the Blade Height
Before proceeding with the cut
- Verify the blade height to ensure accuracy.
- Use a ruler or measuring tool to measure
- Confirm that the blade height matches your desired setting and make any necessary adjustments if needed.
Step 8: Power On and Test the Saw
After confirming the blade height, power the saw and perform a test cut on scrap wood. Always prioritize safety and use proper cutting techniques during the test cut.
Setting the wood at an angle
Setting the wood at an angle is a common technique in woodworking that allows for the creation of beveled or angled cuts. Whether you’re working on furniture, trim, or other woodworking projects, properly setting the wood at the desired angle is crucial for achieving accurate and precise results. This guide will discuss the importance of setting the wood at an angle and provide a step-by-step process for this essential woodworking task.
Step 1: Deterine the Desired Angle
Before setting the wood at an angle, determine the specific angle you want to achieve. This can be done using a protractor, angle gauge, or other measuring tools. Measure and note the angle accurately to guide the setting process.
Step 2: Prepare the Work Area
Clear your work area of any debris or obstacles that may interfere with the wood-setting process. Create a clean and organized space to ensure stability and ease of manipulation when setting the wood at the desired angle.
Step 3: Secure the Wood
Place the wood on a stable work surface or use clamps to hold it during the setting process securely. This ensures stability and prevents movement, allowing for accurate and consistent angle settings.
Step 4: Position the Wood at the Desired Angle
Using your measurements and angle references, carefully position the wood at the desired angle. Depending on the project and angle, you may need to use clamps, jigs, or other woodworking aids to hold the wood in place securely.
Step 5: Double-Check the Angle
After positioning the wood at the desired angle
- Double-check the angle using a protractor or angle gauge.
- Compare the measured angle to your intended angle to ensure accuracy.
- Make any necessary adjustments if the angle does not match your desired measurement.
Step 6: Secure the Wood in the Set Position
Secure the wood in the set position once you are satisfied with the angle setting. Use clamps or other suitable methods to hold the wood firmly, ensuring it maintains the desired angle throughout the woodworking process. This step is crucial to prevent unintentional movement that can affect the accuracy of your cuts.
Step 7: Proceed with Woodworking Tasks
You can proceed with your planned woodworking tasks with the wood securely set at the desired angle. This may include making beveled cuts, shaping the wood, or other operations specific to your project. Maintain focus, use proper techniques, and prioritize safety throughout the woodworking process.
Step 8: Inspect and Adjust as Needed
After completing your woodworking tasks, carefully inspect the work to ensure it matches your expectations. If any adjustments are required, make them accordingly. This may involve refinements to the angle or additional modifications to achieve the desired result.
Set a miter gauge for cutting angles
A miter gauge is a valuable tool in woodworking that allows for precise and consistent angle cuts on a table saw or other woodworking machines. By correctly setting the miter gauge, woodworkers can achieve accurate and clean angled cuts, making it an essential skill to master. This guide will discuss the importance of setting a miter gauge and provide a step-by-step process for this essential woodworking task.
Step 1: Understand the Miter Gauge
Familiarize yourself with the components and features of the miter gauge. The miter gauge typically consists of a metal bar or guide with an adjustable angle indicator and a locking mechanism. Understanding how these parts function will help you effectively set the miter gauge for cutting angles.
Step 2: Determine the Desired Angle
Before setting the miter gauge, determine the specific angle you want to achieve in your woodworking project. Use a protractor, angle gauge, or other measuring tools to accurately measure and note the desired angle. This measurement will guide you in setting the miter gauge to the correct angle.
Step 3: Set the Miter Gauge at 90 Degrees
Begin by setting the miter gauge at a 90-degree angle. This is the default or starting position for most miter gauges. Align the indicator or angle guide on the miter gauge with the 90-degree mark on the gauge or the zero mark, depending on the design.
Step 4: Loosen the Locking Mechanism
Locate the locking mechanism on the miter gauge and loosen it.
Step 5: Align the Miter Gauge to the Desired Angle
Carefully adjust the miter gauge to the desired angle using your measurements or angle references. Ensure the indicator or angle guide aligns with the correct measurement on the gauge or the angle required for your project. Make minor adjustments as needed until the miter gauge is set accurately.
Step 6: Securely Lock the Miter Gauge
Once you have set the miter gauge to the desired angle, securely lock the locking mechanism. This will prevent any unintentional movement of the miter gauge during the cutting process, ensuring the accuracy and consistency of the angled cuts.
Step 7: Verify the Angle Setting
Before proceeding with the cut:
- Verify the angle setting of the miter gauge.
- Use a protractor or angle gauge
- Confirm that the angle matches your desired measurement, making any necessary adjustments if needed.
Step 8: Test the Miter Gauge Setting
This will allow you to assess the angle and make any final adjustments. Pay attention to the quality and precision of the cut to ensure the miter gauge is set correctly.