
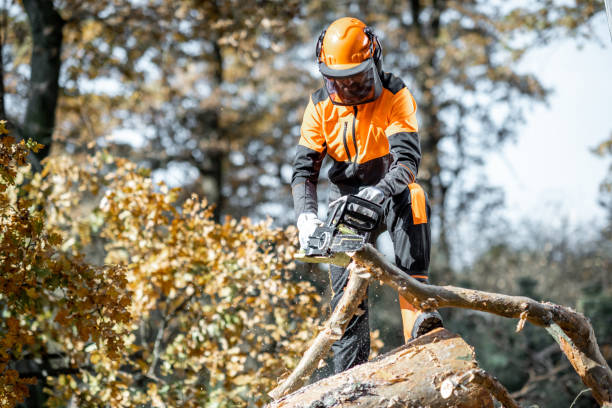
Ready to master the art of storing your chainsaw like a pro? Whether you’re wrapping up a project or preparing for the off-season, knowing how to store a chainsaw properly is essential for its longevity and performance.
In this comprehensive guide, we’ll walk you through the step-by-step process of storing your chainsaw in a way that protects its delicate components and ensures it’s ready to rev up when you need it most.
Drain the carburetor
Properly storing a chainsaw is essential to maintain its performance and extend its lifespan. One crucial step in preparing your chainsaw for storage is to drain the carburetor. This process helps prevent fuel deterioration and carburetor clogs, ensuring your chainsaw starts smoothly when you’re ready to use it again.
Step 1: Safety First
Before starting any maintenance procedure, ensure your chainsaw is turned off and the engine has cooled down. Wear protective gloves and safety glasses to prevent any fuel contact with your skin or eyes.
Step 2: Locate the Carburetor
The carburetor is a vital component of your chainsaw’s fuel system. It mixes fuel and air to create the combustible mixture required for the engine to run. To drain the carburetor, you need to locate it on your chainsaw. The carburetor is typically situated near the air filter and is connected to the fuel tank via fuel lines.
Step 3: Prepare a Clean Container
To collect the fuel and prevent any spills, prepare a clean and suitable container. Make sure the container is approved for storing gasoline and is resistant to fuel chemicals. A portable fuel container or a clean gas can is ideal for this purpose.
Step 4: Position the Chainsaw
Place the chainsaw on a stable and level surface, ensuring it is secure and won’t tip over during the draining process. This stability will help you handle the chainsaw safely and effectively.

Step 5: Fuel Shut-Off Position
Locate the fuel shut-off valve, which is typically found on the fuel line near the carburetor or fuel tank. Turn the fuel shut-off valve to the “Off” position. This step prevents the flow of fuel from the tank to the carburetor during the draining process.
Step 6: Remove the Fuel Cap
Remove the fuel cap from the chainsaw’s fuel tank. This step relieves pressure and allows air to enter the tank, facilitating a smooth fuel flow.
Step 7: Draining the Carburetor
With the fuel cap removed and the fuel shut-off valve turned off, carefully tilt the chainsaw towards the container, positioning the carburetor above it.
Gently tap the bottom of the carburetor to encourage fuel drainage. Allow the fuel to drain completely into the container. Ensure all fuel has been expelled from the carburetor before proceeding.
Taking the chain and the guide bar off
When it comes to storing your chainsaw for an extended period, proper maintenance is crucial. One important step is to remove the chain and guide bar from the chainsaw. This not only prevents accidental chain movement but also allows for better cleaning, lubrication, and overall preservation of the chainsaw components.
Step 1: Safety Precautions
Before starting any maintenance procedure, ensure that your chainsaw is turned off, the engine has cooled down, and you are wearing appropriate safety gear, including gloves and safety glasses.
Step 2: Chain Brake Activation
Activate the chain brake to lock the chain in place and prevent any accidental movement. The chain brake is typically located on the top handle of the chainsaw and can be engaged by pushing the guard forward or by pulling the chain brake lever towards the front handle.
Step 3: Chain Tension Adjustment
Using a chainsaw wrench or the tool provided with your chainsaw, loosen the chain tension by turning the tensioning screw in a counterclockwise direction. This will relieve tension on the chain and allow for easier removal.

Step 4: Removing the Side Cover
Locate the side cover of the chainsaw, which houses the chain and guide bar. Using the appropriate tool, such as a screwdriver or a wrench, loosen the nuts or screws securing the side cover. Remove the nuts or screws completely, taking care not to misplace them.
Step 5: Removing the Guide Bar and Chain
With the side cover removed, carefully lift the guide bar and chain away from the chainsaw. Pay attention to the orientation of the chain, making note of its position for reinstallation later.
Step 6: Cleaning and Inspection
Take this opportunity to clean the guide bar and chain. Use a brush or a cloth to remove any debris or sawdust. Inspect the guide bar for any signs of damage or wear. If necessary, clean and lubricate the guide bar groove as well.
Step 7: Proper Storage
After removing the chain and guide bar, store them in a clean and dry location. You can use a storage case specifically designed for chainsaw accessories or a secure container. This will protect the chain and guide bar from damage and ensure they are in good condition when you need to reinstall them.
Adjust the chain
A properly adjusted chain is essential for the safe and efficient operation of your chainsaw. Over time, the chain on your chainsaw may become loose, affecting its cutting performance and posing a safety risk.
Step 1: Safety First
Before performing any maintenance on your chainsaw, ensure it is turned off, the engine is cool, and you are wearing appropriate safety gear, including gloves and safety glasses.
Step 2: Chain Brake Activation
Activate the chain brake to prevent any accidental movement. The chain brake is typically located on the top handle of the chainsaw and can be engaged by pushing the guard forward or by pulling the chain brake lever towards the front handle.
Step 3: Chain Tension Check
Inspect the chain tension by gently pulling the chain away from the guide bar. A properly tensioned chain should have a slight gap between the chain and the guide bar, allowing the chain to move freely without sagging.
Step 4: Adjusting Chain Tension
To adjust the chain tension, locate the chain tensioning mechanism on your chainsaw. It is usually found on the side or bottom of the guide bar. The tensioning mechanism may vary depending on the chainsaw model, but it commonly involves either a tensioning screw or a tensioning wheel.
Step 5: Loosening the Chain
Using the appropriate tool, such as a chainsaw wrench or a screwdriver, loosen the tensioning screw or turn the tensioning wheel counterclockwise to release tension on the chain. This will allow you to adjust the chain tension freely.
Step 6: Proper Chain Tension
Adjust the chain tension by tightening the tensioning screw or turning the tensioning wheel clockwise. Continuously check the chain tension as you make adjustments. Aim for a properly tensioned chain where there is a slight gap between the chain and the guide bar, ensuring that the chain moves smoothly without sagging.
Step 7: Testing the Chain
Once you have adjusted the chain tension to your satisfaction, rotate the chain manually to ensure it moves freely along the guide bar without excessive tightness or binding. This will help verify that the chain is properly tensioned.
Step 8: Chain Brake Release
Before starting the chainsaw, disengage the chain brake by pulling the chain brake lever away from the front handle. This will allow the chain to rotate during operation.
Find the correct way to clean your air breather
Cleaning the air filter or air breather of your chainsaw is an important maintenance task to ensure proper engine performance and longevity. Here are the general steps to clean your chainsaw’s air breather:

- Safety First: Before starting any maintenance, ensure the chainsaw is turned off, the engine is cool, and you are wearing appropriate safety gear, such as gloves and safety glasses.
- Access the Air Filter: Locate the air filter housing on your chainsaw. It is typically located near the carburetor or the engine’s intake area. The housing is usually secured with screws or clips that need to be loosened or removed to access the air filter.
- Remove the Air Filter: Once you have access to the air filter, carefully remove it from the housing. Take note of its orientation for proper reinstallation later.
- Inspect the Air Filter: Examine the air filter for dirt, dust, debris, or oil buildup. If the filter appears excessively dirty or clogged, it is time to clean or replace it. Some air filters are disposable and should be replaced when dirty, while others are washable and reusable.
- Clean the Air Filter: If your air filter is washable, you can clean it by gently rinsing it with warm soapy water or a specialized air filter cleaner. Do not use high-pressure water or compressed air, as this may damage the filter. Gently squeeze and rinse the filter until it is clean, then allow it to air dry completely before reinstallation.
- Reinstall the Air Filter: Once the air filter is clean and dry, carefully place it back into the air filter housing. Ensure it is properly seated and oriented as it was before removal.
- Secure the Air Filter Housing: Fasten the air filter housing securely using the screws or clips. Ensure that the housing is tightly closed to prevent any debris from entering the engine
Removing the spark plugs
Removing the spark plug is an important step when performing maintenance tasks on your chainsaw, such as cleaning or replacing the spark plug. Here’s a general guide on how to remove the spark plug from your chainsaw:
- Safety First: Before starting any maintenance, ensure the chainsaw is turned off, the engine is cool, and you are wearing appropriate safety gear, including gloves and safety glasses.
- Locate the Spark Plug: The spark plug is typically located on the engine cylinder head. Look for a rubber or plastic boot that connects to the spark plug wire.
- Remove the Spark Plug Boot: Firmly grasp the spark plug boot (the rubber or plastic connector) and gently twist it counterclockwise to break the seal. Avoid pulling on the wire itself, as this may damage the connection.
- Remove the Spark Plug: Once the boot is disconnected, use a spark plug wrench or socket wrench with the appropriate size to fit the spark plug. Insert the wrench onto the spark plug and turn it counterclockwise to loosen and remove the spark plug from the cylinder head.
- Inspect the Spark Plug: Take a moment to inspect the removed spark plug. Look for signs of wear, such as excessive carbon buildup or worn electrodes. If the spark plug appears damaged, fouled, or worn out, it is recommended to replace it with a new one.
- Gap Adjustment (Optional): If you are reusing the same spark plug or installing a new one, you may need to adjust the spark plug gap. Check the owner’s manual or the specifications provided by the spark plug manufacturer for the correct gap measurement. Use a spark plug gap tool to carefully adjust the electrode gap, if necessary.
- Reinstall or Replace: Depending on your maintenance needs, either reinstall the cleaned or adjusted spark plug by threading it clockwise into the cylinder head. Use the spark plug wrench or socket wrench to tighten the spark plug securely. If you are replacing the spark plug, install a new one of the same type and specifications recommended by the manufacturer.
Tightening the screws, and bolts on your chainsaw
Properly tightening the screws and bolts on your chainsaw is crucial for maintaining its performance, safety, and longevity. Here’s a general guide on how to tighten screws and bolts on your chainsaw:

- Safety First: Before starting any maintenance, ensure the chainsaw is turned off, the engine is cool, and you are wearing appropriate safety gear, including gloves and safety glasses.
- Inspect the Screws and Bolts: Take a moment to visually inspect the screws and bolts on your chainsaw. Look for any loose or visibly damaged fasteners. If you notice any missing, damaged, or excessively worn screws or bolts, it is recommended to replace them before proceeding.
- Use the Correct Tools: To tighten screws and bolts on your chainsaw, use the appropriate tools, such as a screwdriver or a wrench. Ensure that the tool fits snugly onto the fastener to prevent slipping and potential damage.
- Tightening Sequence: Follow the manufacturer’s recommended sequence for tightening screws and bolts. This information can usually be found in the chainsaw’s owner’s manual. If a specific sequence is not specified, start from one end and work your way to the other, gradually tightening each fastener.
- Apply Even Pressure: When tightening screws and bolts, apply even pressure to ensure uniform tension. Avoid overtightening, as it can damage the threads or strip the fasteners. Snugly tighten the screws and bolts until they are secure without excessive force.
- Check for Proper Tightness: After tightening all the screws and bolts, check for proper tightness. Gently try to wiggle or rotate the components where the fasteners were tightened to ensure there is no noticeable movement or play. If any screws or bolts feel loose or have excessive movement, recheck and retighten them as needed.
- Periodic Inspection: Regularly inspect the screws and bolts on your chainsaw during routine maintenance. Look for signs of loosening or damage. If any fasteners become loose, retighten them promptly to maintain the chainsaw’s optimal performance and safety.
Storing your chainsaw
The final step is storing your chainsaw for which you need to consider following things :
Choose the Right Storage Location
Store your chainsaw in a dry and secure location away from extreme temperatures, direct sunlight, and humidity. Avoid storing it near flammable materials or in areas accessible to children or pets. A sturdy storage case, shelf, or dedicated chainsaw storage rack can help protect your chainsaw and keep it organized.
Maintain Regular Storage Checks
Periodically check your chainsaw during storage to ensure it remains in good condition. Inspect for any signs of rust, corrosion, or damage. Turn the engine over manually to distribute the lubricant and ensure smooth operation. If necessary, apply additional oil to the guide bar and chain to prevent drying out.