
Welcome to a practical guide on how to store a miter saw. Whether you’re a seasoned DIY enthusiast or a novice looking to keep your tools in tip-top shape, understanding how to store a miter saw is essential. A miter saw is a valuable tool for making precise cuts in various materials, but improper storage can lead to damage and decreased performance over time.
This article will investigate the accepted procedures and tips for storing a miter saw safely and efficiently, ensuring it remains in excellent working condition for years. So, let’s explore into miter saw storage and learn how to prepare your tool for your next project.
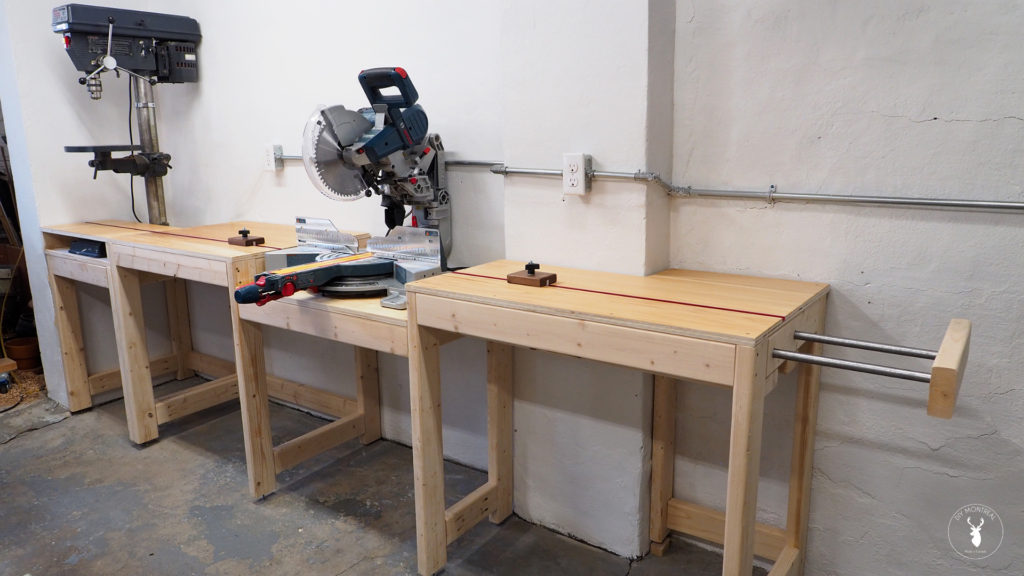
Miter Saw Storage Options
Storing your miter saw adequately is essential to protect it from dust, moisture, and damage when not in use. There are several options for miter saw storage, depending on your preferences, available space, and budget:
1. Miter Saw Storage Cover
A miter saw storage cover is a protective fabric to shield your saw from dust and debris. It’s a simple and cost-effective option to keep your saw clean when it’s not in use. These covers are available in various sizes to accommodate different miter saw models.
2. Miter Saw Box or Case
Many miter saw manufacturers offer custom-designed carrying cases or boxes for their saws. These cases give a cozy and secure fit for your saw and often include compartments for accessories and blades. They are a good choice if you frequently transport your miter saw and want extra protection.
3. Miter Saw Shelf
Installing a dedicated shelf in your workshop or garage for your miter saw is a convenient storage solution. You can place the saw on the shelf when unused, ensuring it’s readily accessible and protected from dust. Ensure the shelf is sturdy and large enough to accommodate your saw’s dimensions.
4. Miter Saw Cabinet
If you have ample space and want to keep your miter saw and related tools organized, consider a miter saw cabinet or workstation. These cabinets are designed with built-in storage compartments, drawers, and often a dedicated space for your miter saw. They can help keep your workspace tidy and your tools protected.
5. Custom Storage Solutions
Depending on your woodworking or DIY setup, you can design and build a custom storage solution for your miter saw. This might include a wall-mounted cabinet with retractable wings for support when cutting long materials or a dedicated workbench with integrated storage.
6. Dust Collection System
In addition to storage, consider implementing a dust collection system to keep your miter saw and workspace clean. A shop vacuum or dust collector with a hood or attachment near the saw can help capture sawdust and debris.
Where Should I Store My Miter Saw?
Storing your miter saw adequately is essential to keep it in good working condition and longevity. Here are some tips on where and how to store your miter saw:
Indoor Workshop or Garage
Storing your miter saw in an indoor workshop or garage is ideal. These spaces typically provide a controlled environment with protection from the elements.
- Ensure the storage area is dry and free from dampness, as dampness can cause rust and damage to the saw’s components.
- If you have a workbench or dedicated workstation, consider setting up a designated space for your miter saw. This makes it easily accessible and keeps it organized.
Cover or Case
When not in use, it’s a good practice to cover your miter saw with a protective cover or store it in a custom-designed case. This keeps residue and garbage from settling on the saw, which can affect its performance.
Secure and Elevated Surface
Place your miter saw on a secure and elevated surface when storing it. This prevents it from sitting directly on the ground, which can expose it to moisture and dust.
- A dedicated miter saw stand or bench is a suitable place to store the saw, especially if it’s designed to hold it securely.
Wall Mount or Wall Rack
You can install a wall mount or rack designed for miter saw storage. These mounts keep the saw off the floor and provide a convenient, space-saving storage solution.
Lockable Cabinet or Tool Chest
If you want to keep your miter saw and related tools organized and secure, consider storing them in a lockable cabinet or tool chest. This protects from dust and theft.
Climate Control
If you live in an area with extreme temperature fluctuations, consider climate control measures to prevent your miter saw from exposure to excessive heat, cold, or humidity. This may involve using a dehumidifier or air conditioning in the storage area.
Regular Maintenance
Regardless of where you store your miter saw, it’s essential to perform regular maintenance, including blade cleaning and lubrication, to ensure it remains in good working order.
How to Hang a Miter Saw on a Wall?
Hanging a miter saw on a wall is a convenient way to save space in your workshop while keeping the saw easily accessible. Here are the steps to hang a miter saw on a wall:
Tools and Materials Needed
- Stud finder
- Level
- Tape measure
- Drill and appropriate drill bits
- Screws and wall anchors
- Lumber or a mounting board
- Sawhorses or a workbench
- Safety gear (safety glasses, hearing protection)
Select a Location:
Choose a wall in your workshop or garage to hang your miter saw. Ensure it’s a convenient height and has enough space around it for the saw to operate safely.
Locate Wall Studs:
Utilize a stud locater to find the wall studs where you plan to hang the miter saw. Wall studs are the vertical framing members behind the wall surface. You’ll want to mount the saw securely to these studs for stability.
Prepare the Mounting Board:
Cut a sturdy piece of lumber (such as a 1×4 or 2×4) to a length slightly wider than your miter saw’s base. The length should allow the saw to be mounted comfortably and securely.
Mount the Board:
Position the mounting board on the wall at the desired height, ensuring it aligns with the wall studs you located earlier. Use a level to make sure it’s horizontal. Mark the areas of the wall studs on the board.
Attach the Board to the Wall:
Drill pilot holes through the mounting board at the marked stud locations. Use appropriate screws and wall anchors to secure the board to the wall. Make sure it’s firmly attached.
Mount the Miter Saw:
Place your miter saw on top of the mounting board. Align it with the board so that the saw’s mounting holes match the screw holes on the board.
Secure the Miter Saw:
Using appropriate screws, secure the miter saw to the mounting board. Be sure to use screws that are suitable for the type of mounting holes on your miter saw.
Test the Setup:
Ensure the miter saw is securely attached to the wall and the mounting board. Test the stability of the setup by gently moving the saw to ensure it’s firmly in place.
Organize the Workspace:
Once the miter saw is securely mounted, you can organize your workspace around it. Add shelving or storage for accessories and tools to keep everything within easy reach.
Can miter saws be stored vertically?
Yes, many miter saws can be stored vertically when not in use. Vertical storage can save space in your workshop or garage and keep the miter saw easily accessible. However, there are some important considerations and steps to follow when storing a miter saw in a vertical position:
1. Secure the Blade:
Before storing the miter saw vertically, ensure the saw blade is securely locked in its lowered position or, if applicable, that the blade is retracted adequately into the saw’s housing. This prevents accidental contact with the sharp blade during storage.
2. Use a Mounting Board or Stand:
To store the miter saw vertically, it’s a good practice to mount it on a stable backing board or a dedicated miter saw stand designed for vertical storage. The backing board or stand should securely attach to the wall or another stable structure to prevent tipping.
3. Wall Mounting:
If you’re wall-mounting the miter saw for vertical storage, follow the steps mentioned in a previous response for securely attaching a mounting board to the wall. Then, mount the miter saw to the board, ensuring it is level and well-secured.
4. Use Clamps or Brackets:
Some miter saws come with clamps or brackets designed for vertical storage. If your saw includes these accessories, follow the manufacturer’s instructions for their use to ensure secure vertical storage.
5. Safety Precautions:
When storing a miter saw vertically, it’s essential to consider safety. Ensure that the saw is firmly secured to prevent it from falling over. Double-check that the saw is turned off, the blade is retracted, and the power cord is managed correctly to prevent tripping hazards.
6. Regular Maintenance:
Regardless of how you store your miter saw, perform customary support to keep it in excellent condition. Clean the saw, lubricate moving parts, and check for loose or damaged components.
While many miter saws can be stored vertically, it’s essential to consult your saw’s user manual for specific recommendations and guidelines from the manufacturer. Some miter saws may have limitations or considerations unique to their design, so always follow the manufacturer’s instructions for safe and proper storage.
Can you store a table saw in a shed?
Storing a table saw in a shed is possible. Still, there are several important considerations to keep in mind to ensure the saw remains in good working condition and is protected from potential damage:
Climate Control: Sheds are typically not climate-controlled, which means they are subject to temperature fluctuations, humidity, and potential moisture. Extreme temperature variations and high humidity levels can unfavorably influence a table saw’s presentation and life span. If you plan to store a table saw in a shed, take steps to control the environment. This may involve insulating the shed, using a dehumidifier, and sealing gaps to prevent moisture from entering.
Dust and Debris: Sheds are prone to dust and debris accumulation, which can be detrimental to the precision and functionality of a table saw. Consider using dust collection systems or covers to protect the saw from dust and debris when not in use.
Secure Storage: Ensure the table saw is securely stored to prevent theft or unauthorized access. Use locks or other safety efforts to safeguard your essential equipment.
Moisture Prevention: Moisture is a common issue in sheds, especially during rainy or humid seasons. To prevent moisture-related damage to the table saw, elevate it off the ground using a stable platform, and consider placing moisture-absorbing materials like desiccant packs or moisture-absorbing crystals in the storage area.
Protection from Pests: Sheds can be susceptible to pests like rodents and insects, which may damage your table saw or its electrical components. Keep the shed clean and free from food sources, and consider using pest control methods if necessary.
Covering and Enclosure: When not in use, cover the table saw with a waterproof and dustproof cover to protect it from the elements. Alternatively, consider building an enclosure within the shed specifically for the table saw, providing additional protection.
Regular Maintenance: A table saw requires regular maintenance even when stored in a shed. Inspect and lubricate moving parts, check for rust, and keep the saw clean to ensure it remains in good working order.
Power Supply: Ensure a reliable power supply in the shed for the table saw. Use appropriate extension cords and surge protectors to connect the saw to power safely.
Access and Workspace: Consider the layout of the shed and ensure that you have adequate space and access to use the table saw safely when needed.
Manufacturer’s Guidelines: Always refer to the manufacturer’s recommendations for storing and maintaining your specific table saw model.
Where should saw blades be stored?
Saw blades should be stored properly to ensure their longevity and performance. Here are some tips on how to store saw blades effectively:
Dry, Climate-Controlled Environment: Store your saw blades in a dry, climate-controlled environment, such as a workshop, garage, or indoor storage area. Avoid exposing them to extreme temperature fluctuations and high humidity levels, as moisture can lead to rust and corrosion.
Protective Cases or Sleeves: It’s a good practice to keep your saw blades in protective cases or sleeves when not used. Many saw blades come with protective packaging that you can reuse. Alternatively, you can purchase blade storage sleeves or containers to protect saw blades.
Vertical Storage: Store saw blades vertically, preferably in a dedicated storage cabinet or rack designed for blades. This prevents the blades from touching each other and minimizes the risk of chipping or damage.
Labeling: Label each saw blade or its container to identify the blade’s type, size, and purpose. This helps you quickly find the right blade for a specific task.
Hang on Pegboard or Wall: If you have limited space or a small workshop, you can hang saw blades on a pegboard or wall-mounted storage rack. This keeps them organized, easily accessible, and off the floor.
Clean Before Storage: Before storing a saw blade, ensure it’s clean and free from sawdust, resin, or other debris. Clean the blade using an appropriate blade cleaning solution or blade and bit cleaner. This prevents the buildup of material that can affect blade performance.
Protect Teeth: Use blade guards or blade protectors to cover the teeth of the saw blade when storing it. This prevents accidental contact with the sharp teeth and helps keep them in good condition.
Separate Blades by Type: If you have multiple saw blades, such as rip blades, crosscut blades, and dado blades, store them separately to avoid confusion and ensure easy access to the right blade for the job.
Regular Inspection: Periodically inspect stored saw blades for signs of wear, damage, or rust. Assuming you notice any issues, address them immediately to maintain the blade’s performance.
Secure Storage: Ensure that your storage solution securely holds the saw blades to prevent them from falling or shifting during storage.
Conclusion
Properly storing a miter saw is essential to ensure its longevity, safety, and functionality. Whether you have a small workshop or a spacious garage, following the guidelines in this guide can help you maintain your miter saw in excellent condition.
By keeping it clean, protected from dust and moisture, and properly secured, you extend its lifespan and make it readily available for your woodworking projects whenever you need it.
Remember that a well-maintained miter saw is not just a tool; it’s an investment in the quality of your work and the efficiency of your DIY or professional projects. So, take the time to store your miter saw correctly, and you’ll reap the benefits for years.