
Welcome to the world of precision woodworking, where pursuing a flawless cut is the ultimate goal. If you’ve ever been frustrated by your Makita track saw not cutting straight, you’re not alone.
Achieving those perfectly straight cuts is an art form, and even the most seasoned woodworkers can encounter challenges when their trusty tool veers off course.
In the realm of woodworking, where precision reigns supreme, the issue of a Makita track saw not cutting straight can throw a wrench into your creative process. But fear not! We’re here to unravel the mysteries behind this common problem and guide you toward the straight and narrow path of precise cutting.
Say goodbye to jagged edges and hello to the clean, smooth cuts your projects deserve. Join us as we delve into the intricacies of your Makita track saw and explore the solutions that will have you back on Track in no time. Let’s get cutting!
Common Causes of Off-Track Cuts with a Makita Saw.
Misaligned Tracks: The Silent Culprit
One of the primary reasons for inaccurate cuts with a Makita saw is misaligned tracks. Even a slight misalignment can throw off your entire project. Tracks are designed to guide the saw precisely, ensuring clean and straight cuts.
Check for gaps or unevenness along the Track’s length. If you notice any issues, realign the tracks carefully before making any cuts. This simple maintenance step can significantly improve the accuracy of your cuts.
Improper Technique: A Common Pitfall
Even with well-maintained tracks and sharp blades, improper technique can lead to off-track cuts. Your cutting technique plays a significant role in the outcome of your woodworking projects. Here are some tips to help you maintain precision:
1. Steady Pressure:
Apply consistent and steady pressure when guiding the saw along the Track. Avoid pushing too hard or too lightly, as this can cause the saw to deviate from its path.
2. Proper Positioning:
Ensure that the material you are cutting is correctly positioned on the Track. Misalignment of the workpiece can result in inaccurate cuts.
3. Controlled Movement:
Move the saw slowly and steadily along the Track, maintaining control at all times. Rapid or jerky movements can lead to off-track cuts.
4. Secure Clamping:
If necessary, use clamps to secure the workpiece firmly to the Track. This prevents any unexpected movement during cutting.
Regular Maintenance: The Key to Precision
In addition to addressing specific issues, regular maintenance of your Makita saw is essential to maintaining accuracy. Here are some maintenance tasks to include in your routine:
1. Cleanliness:
Keep your saw and tracks clean from sawdust and debris. Accumulated dust can interfere with the smooth movement of the saw.
2. Lubrication:
Apply lubricant to the tracks and moving parts of the saw as the manufacturer recommends. This ensures that everything operates smoothly.
3. Calibration:
Periodically calibrate your Makita saw to ensure that it is in perfect alignment.
Calibrating Your Makita Track Saw: Achieving Precision and Straight Cuts
When it comes to woodworking, precision is paramount. That’s where your trusty Makita Track Saw comes into play.
Understanding the Track Saw System
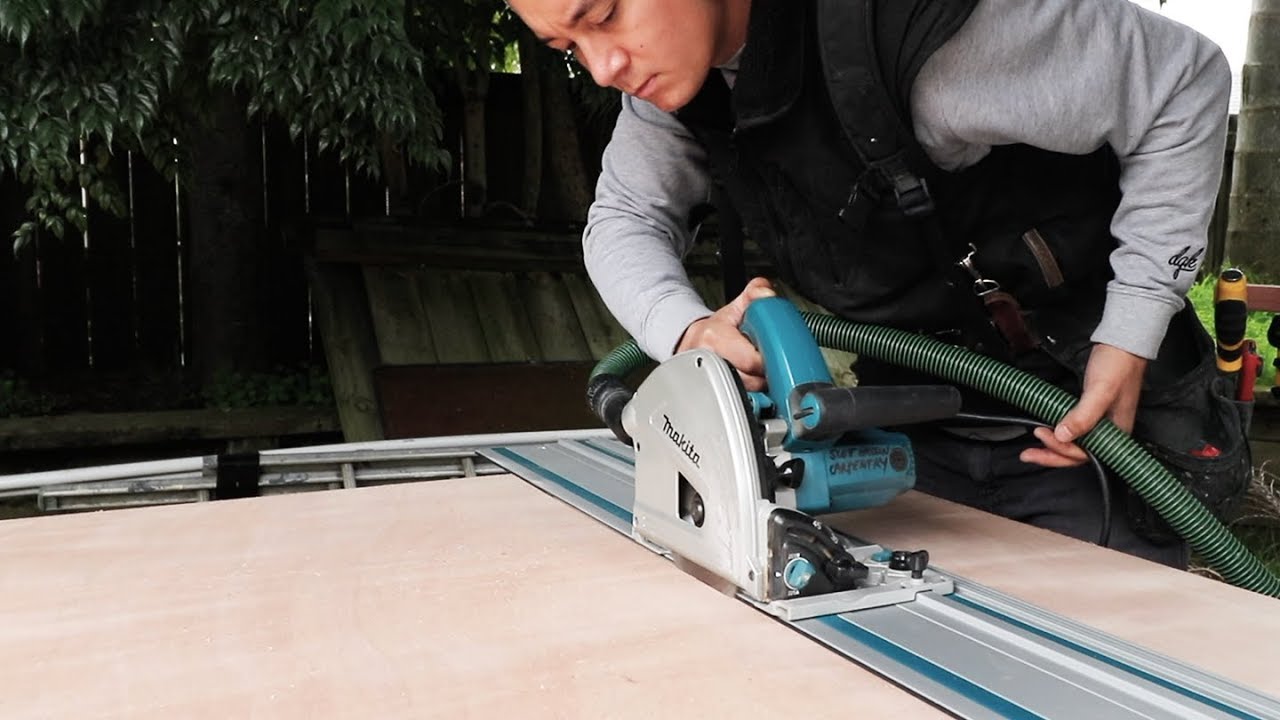
The Makita Track Saw system has two main components: the saw and a guide rail. The saw glides smoothly along the guide rail, allowing for precise cuts with minimal effort. This design eliminates the need for traditional table saws, making it an excellent choice for woodworkers of all levels.
Why Calibration Matters
Calibrating your Makita Track Saw is crucial for several reasons:
- Accuracy: Proper calibration ensures that your saw cuts precisely where you want it to, reducing the margin for error.
- Safety: A well-calibrated saw is safer, as it minimizes the risk of kickback or binding during operation.
- Efficiency: Calibrated saws are more efficient, saving you time and materials in the long run.
Now that we understand the importance of calibration, let’s proceed to the step-by-step guide.
Step-by-Step Calibration Guide
Step 1: Gather Your Tools
Before you begin, make sure you have the following tools and equipment on hand:
- Your Makita Track Saw
- A sturdy workbench or sawhorse
- A measuring tape or ruler
- A combination square
- Safety goggles and ear protection
Step 2: Secure the Guide Rail
Place your guide rail on a flat and stable surface, such as a workbench or sawhorse. Ensure that it is level and secure. The guide rail will act as the straight edge for your cuts.
Step 3: Attach the Saw to the Guide Rail
Align the saw’s guide rail attachment with the guide rail’s edge. Carefully slide the saw onto the guide rail, ensuring it fits snugly and securely. Make sure the saw is parallel to the guide rail.
Step 4: Measure and Mark
Using your measuring tape or ruler, measure the distance from the edge of the guide rail to the blade’s cutting path. Mark this distance on your workpiece. This step will determine the precise location of your cut.
Step 5: Adjust the Depth
Before making your cut, adjust the saw’s cutting depth. This can be done by loosening the depth adjustment knob, setting the desired depth, and then tightening the knob to secure it in place.
Step 6: Make the Cut
With everything properly set up and marked, you’re ready to make your cut. Align the saw blade with the marked line on your workpiece and turn on the saw. Slowly guide the saw along the guide rail, maintaining a steady pace to ensure a clean and precise cut.
Step 7: Check the Results
After cutting, carefully inspect the quality of your work. Ensure that it is straight and accurate. If adjustments are needed, revisit the calibration steps and fine-tune as necessary.
Maintenance Tips
To keep your Makita Track Saw in optimal condition and maintain its accuracy, here are some essential maintenance tips:
- Regularly clean the guide rail and saw blade to prevent dust and debris buildup.
- Check the saw’s alignment periodically to ensure it stays parallel to the guide rail.
- Lubricate the guide rail occasionally for smooth gliding.
By following these maintenance practices, you can enjoy years of precise cutting with your Makita Track Saw.
Blade Maintenance and Replacement: Ensuring Straight Cuts
Why Sharpness Matters
The blade of a saw is its heart and soul, and its sharpness is paramount for several reasons. First and foremost, a sharp blade reduces the effort required to cut. When a blade is dull, it tends to tear through the material, leaving rough edges that require additional sanding and refinishing. This not only adds to your workload but also compromises the precision of your project.
Moreover, a sharp blade promotes safety in the workshop.By maintaining a sharp blade, you significantly reduce the risk of mishaps, making your woodworking experience safer and more enjoyable.
Signs of a Dull Blade
Recognizing when your saw blade is losing its edge is crucial. Some common signs of a dull blade include:
- Burn Marks: When you notice burn marks on your wood after cutting, your blade struggles to make clean cuts.
- Increased Effort: If you find yourself exerting more force than usual to cut, it’s time to inspect your blade.
- Wandering Cuts: Blades that have lost their sharpness tend to wander off the intended cutting line, leading to imprecise results.
- Excessive Noise: A noisy blade is often a sign of wear and tear. Sharp blades operate smoothly and quietly.
The Art of Blade Maintenance
Regular Cleaning
Proper maintenance begins with regular cleaning. Sawdust, resin, and other debris can accumulate on the blade’s teeth, reducing efficiency. To clean your blade:
- Use a Blade Cleaning Solution: There are specialized blade cleaning solutions available that can effectively remove built-up residue. Apply the solution and scrub gently with a brush.
- Inspect for Damage: While cleaning, inspect the blade for any signs of damage or wear, such as chipped teeth. Replace any damaged parts promptly.
Sharpening Techniques
To maintain a sharp blade, periodic sharpening is necessary. Several methods can be used, including:
- Hand Files: Hand files can be used to sharpen the teeth of the blade manually. This method requires patience and precision.
- Sharpening Stones: Sharpening stones, also known as whetstones, are a reliable option for achieving a sharp edge.
- Blade Sharpeners: Electric blade sharpeners are available for those who prefer a quick and efficient solution. These machines ensure a consistent and precise sharpening angle.
Blade Replacement
Despite your best efforts in maintenance, there comes a time when a blade is beyond salvation. Knowing when to replace it is crucial to maintain the quality of your work. Signs that indicate the need for a replacement include:
- Excessive Wear: When the blade has been sharpened multiple times, and the teeth are significantly smaller, it’s time to consider a replacement.
- Cracks or Warping: Blades that show signs of physical damage, such as cracks or warping, should be replaced immediately.
- Inconsistent Cuts: If your cuts are becoming increasingly inconsistent, even after sharpening, the blade needs replacement.
Tools and Materials Needed:
- Track saw, circular saw, jigsaw, or router
- Appropriate track guide or rail
- Material to be cut
- Measuring tape
- Clamps
- Screwdriver or hex key (if applicable)
Step 1: Prepare Your Workspace
Set up your work area with adequate lighting and a stable workbench or surface. Ensure that the material you’ll be cutting is clean and adequately supported.
Step 2: Choose the Right Track
Select the appropriate track guide or rail for your tool and project. Ensure that it’s compatible and long enough for your intended cuts.
Step 3: Measure and Mark
Measure and mark the exact position where you want to cut your material.
Step 4: Position the Track
Place the track guide or rail along the marked cutting line. Ensure it’s aligned with the line and extends beyond both ends of the material to provide stability. If necessary, use clamps to secure the Track in place.
Step 5: Check Alignment
Before making any adjustments, verify that the Track is parallel to the cutting line and straight.
Step 6: Adjust the Track
Loosen any locking mechanisms or adjustment screws on the Track, if applicable. Make minor adjustments to the Track’s position to align it with the cutting line. Use a spirit level to ensure it’s perfectly horizontal or vertical, depending on your cut.
Once the Track is aligned, tighten any locking mechanisms or adjustment screws securely. Ensure the Track remains in the correct position.
Step 7: Test the Alignment
Before making your actual cut, perform a test run by running your tool along the Track without the blade engaged. Ensure that the tool moves smoothly and follows the Track without deviation.
Step 8: Make the Cut
With the Track adequately aligned and secured, engage the tool’s blade and cut along the marked line. Maintain a steady and controlled motion to achieve a clean and accurate cut.
Step 9: Remove Clamps
After completing the cut, remove any clamps securing the track guide or rail.
Step 10: Inspect the Cut
Examine the cut to ensure it meets your desired accuracy and quality standards. Make any necessary adjustments for future cuts if needed.
Techniques for Straight Cuts: Mastering Your Makita Track Saw
Setting Up Your Workstation
Achieving straight cuts also relies on your workspace setup. Here’s how to prepare your workstation for success:
1. Secure Your Workpiece
Before cutting, firmly secure your workpiece to your workbench or sawhorse using clamps.
2. Use a Stable Work Surface
Make sure your workbench or sawhorses are level and sturdy. A wobbly surface can lead to uneven cuts, so invest in a solid work platform.
3. Align Your Track
Position your Makita track on the workpiece along the cut line. Ensure it’s straight and parallel to the desired cut. The Track serves as your guide, guaranteeing straight cuts.
Perfecting Your Cutting Technique
Now that your setup is spot-on let’s dive into the cutting techniques that will elevate your straight-cut game:
1. Start Slow and Steady
Begin your cut at a slow, controlled pace. Rushing can lead to inaccuracies and splintering. As you become more comfortable, you can increase the speed.
2. Maintain Firm Pressure
Apply consistent downward pressure on the Track saw while guiding it along the Track. This helps prevent the saw from wandering off course.
3. Stay Aligned with the Track
Keep a keen eye on the Track as you cut. Make sure the saw’s base remains flush against it throughout the cut. This is the key to maintaining a straight line.
4. Use Support Blocks
For longer cuts, consider using support blocks or sawhorses to keep the Track at the same level as the workpiece. This minimizes the risk of sagging or misalignment.
Troubleshooting Tips
Even with the best techniques, occasional issues may arise. Here’s how to troubleshoot common problems:
1. Splintering
If you notice splintering on the cut edge, try using painter’s tape along the cut line before making your cut. This can help reduce splintering.
2. Inconsistent Depth
To ensure consistent depth throughout the cut, ensure your saw’s depth adjustment is correctly set before starting.
Maintaining Your Makita Track Saw
To ensure your Makita track saw continues to deliver impeccable straight cuts, proper maintenance is crucial. Regularly clean the sawdust from the Track and ensure the Track is free from debris. Keep the blade sharp, and lubricate the moving parts as recommended in the user manual.
What Are Cutting Guides and Jigs?
Before we dive into the advantages of using these tools, let’s clarify what cutting guides and jigs are:
Cutting Guides: These are straight-edged, often metal or aluminum, rails you attach to your workpiece. They are an extended guide for your track saw, ensuring even straighter cuts over longer distances.
Jigs: Jigs are specialized tools designed to hold your workpiece securely in place while allowing you to make precise cuts. They can be customized to create various angles, shapes, or repetitive cuts with ease.
The Benefits of Using Cutting Guides or Jigs
1. Enhanced Precision
One of the primary benefits of using cutting guides or jigs is the enhanced precision they offer. These tools act as foolproof guides, reducing the chance of human error. With a well-aligned cutting guide or jig, your track saw will follow a perfectly straight path, resulting in flawless cuts.
2. Longer Cuts Made Easy
Track saws are fantastic for short to medium-length cuts, but when you need to make long, continuous cuts, maintaining perfect alignment can be challenging. Cutting guides come to the rescue by providing continuous support along the entire length of your workpiece, ensuring a consistent, straight cut.
3. Versatility
Jigs, in particular, are incredibly versatile. They can be customized to suit a wide range of cutting needs. Whether you’re creating intricate shapes or need to replicate a specific angle multiple times, jigs can be adapted to meet your requirements.
4. Improved Safety
Using a cutting guide or jig can significantly enhance safety during your woodworking projects. These tools help stabilize the workpiece, reducing the risk of kickbacks or the saw wandering off course. This added stability allows you to focus on the precision of your cut without worrying about safety concerns.
5. Efficiency and Time Savings
Cutting guides and jigs streamline your workflow by minimizing the need for constant measurements and adjustments. You’ll spend less time preparing and more time cutting, increasing overall efficiency in your projects.
6. Consistency in Repetitive Cuts
If your project involves making multiple identical cuts, jigs are invaluable. They ensure that each cut is identical to the last, producing a more professional and polished end product.
Tips for Using Cutting Guides and Jigs Effectively
To reap the full benefits of these tools, here are some tips for using cutting guides and jigs effectively:
- Proper Alignment: Ensure your cutting guide or jig is aligned precisely with your intended cut line. Double-check its placement before making any cuts.
- Secure Attachment: Make sure your cutting guide or jig is securely attached to your workpiece to prevent any slippage during the cut.
- Practice: Familiarize yourself with using these tools through practice cuts on scrap material before tackling your main project.
- Maintenance: Keep your cutting guides and jigs in good condition by cleaning and maintaining them regularly.
Conclusion
The issue of a Makita track saw not cutting straight can be frustrating and lead to less than satisfactory results in your woodworking projects. However, it is essential to remember that this problem can often be resolved with careful troubleshooting and maintenance.
First, ensure that the Track and the saw blade are clean and debris-free. Secondly, check the Track for defects or damage causing the saw to deviate from a straight path. Additionally, confirm that the saw blade is sharp and aligned with the Track.