
If you own a chainsaw, you know how crucial it is to maintain its functionality. Any individual who utilizes a chainsaw can undoubtedly figure out How to put a chain back on a chainsaw? We will describe to you how to quickly restore your chainsaw’s functionality.
Easy Steps to put a Chain Back on a Chainsaw
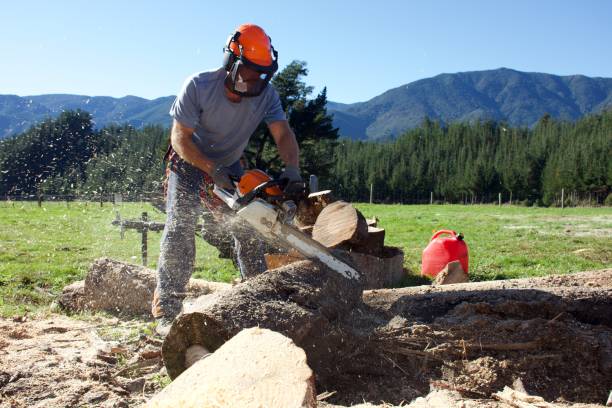
Expecting that you’re using a chainsaw, there’s a good open door you’ll eventually need to return the chain on after it has tumbled off. This can be a digit undermining in case you’ve never gotten it going, but it’s actually a fundamental cycle.
Step 1: Turn off the Chainsaw
When it comes to putting a chain back on a chainsaw, safety is the top priority. Before attempting to put the chain back on, it’s essential to turn off the chainsaw and unplug it from any power source.
In the event that the chainsaw is an internal combustion model, make a point to separate the flash fitting wire to forestall unintentional beginning. It’s likewise smart to wear defensive gloves to keep away from cuts and scratches from the chain.
Once the chainsaw is turned off and disconnected from any power source, you’re ready to move on to the next step in putting the chain back on. Remember to always prioritize safety when working with a chainsaw to prevent injury.
Step 2: Remove the Cover
The next step in putting the chain back on a chainsaw is to remove the cover that protects the chain and the bar. The cover is usually held in place by two nuts, which can be loosened with the appropriate size of wrench or socket.
Once the nuts are removed, carefully lift the cover off the chainsaw, making sure not to damage the chain or bar. At this point, you’re ready to move on to the next step in putting the chain back on.
Step 3: Check the Tension
Before you can reattach the chain to your chainsaw, it’s important to check the tension of the chain. To check the tension of the chain, locate the tensioning screw on the chainsaw.
Use the appropriate tool to turn the screw to adjust the tension of the chain. If the chain is too loose, turn the screw clockwise to tighten it. If the chain is too tight, turn the screw counterclockwise to loosen it.
You can test the tension of the chain by pulling it away from the bar. A properly tensioned chain should be snug against the bar, but still able to move freely around it.

It’s important to note that the exact tension required for the chain may vary depending on the chainsaw model and manufacturer. Be sure to consult your chainsaw’s user manual for specific instructions on how to adjust the chain tension.
Once you have adjusted the tension of the chain, you’re ready to proceed with putting the chain back on the chainsaw. Refer to the previous steps for detailed instructions on how to reattach the chain to the chainsaw.
Step 4: Reattach the Chain
Now that the chainsaw’s cover is removed and the chain is untangled, it’s time to reattach the chain to the chainsaw. Start by placing the chain around the sprocket on the chainsaw’s clutch drum. Make sure that the cutting teeth on the chain are facing in the right direction, which is towards the front of the chainsaw.
Next, thread the chain around the bar. The chain should sit snugly against the grooves on the bar, with the cutting teeth pointing towards the front of the chainsaw.
Once the chain is in place on the sprocket and bar, replace the cover and tighten the nuts. Be sure to tighten them securely, but not so much that they strip the threads or damage the cover. Finally, test the tension of the chain by pulling it away from the bar.
The chain should be tight, but not so tight that it can’t move freely around the bar. Adjust the tension as needed using the adjusting screw on the chainsaw.
With the chain properly reattached and tensioned, your chainsaw is now ready to use. Remember to always prioritize safety when working with a chainsaw and follow the manufacturer’s instructions for maintenance and operation.
Step 5: Replace the Cover
With the chain properly reattached and tensioned, the next step is to replace the cover that protects the chain and the bar. Carefully align the cover over the chainsaw, making sure that the bolts line up with the holes on the chainsaw.
Once aligned, gently press the cover down until it rests flush against the chainsaw. Next, thread and tighten the nuts onto the bolts. Use the appropriate size of wrench or socket to ensure that the nuts are securely tightened, but not so much that they strip the threads or damage the cover.

Finally, double-check that the chain is properly tensioned and positioned on the bar, and that the cover is securely in place. You’re now ready to safely use your chainsaw.
Remember to always prioritize safety when working with a chainsaw, including wearing protective gear and following the manufacturer’s instructions for maintenance and operation. By following these easy steps, you can quickly and safely put a chain back on your chainsaw and get back to work.
Step 6: Test the Chainsaw
Once you have put the chain back on your chainsaw, it’s important to test it before you start using it again.
First, turn on the chainsaw and let it idle for a few seconds. Check the chain to make sure it’s moving freely around the bar and sprocket. Next, rev the chainsaw to full throttle and check the chain’s movement again. Make sure it’s not wobbling or jumping off the bar.
If the chain is not moving correctly or is wobbling, it may be a sign that it’s not properly tensioned or positioned on the bar. Repeat the previous steps to ensure that the chain is correctly positioned and tensioned.
Finally, test the chainsaw by making a few cuts on a piece of scrap wood. Ensure that the chain is cutting smoothly and cleanly through the wood. If it’s not cutting properly, it may be a sign that the chain needs sharpening or replacing.
By testing the chainsaw before using it, you can identify and address any issues that may compromise its performance or safety. Remember to always prioritize safety when working with a chainsaw, including wearing protective gear and following the manufacturer’s instructions for maintenance and operation.
How to Put a Chain Back on an Electric Chainsaw?
If you’re using an electric chainsaw, you may need to put the chain back on after it has come off. While the process is similar to putting a chain back on a gas-powered chainsaw, there are a few important differences to keep in mind. In this article, we’ll walk you through the steps of how to put a chain back on an electric chainsaw.
Step 1: Turn off the Electric Chainsaw
The first step to putting a chain back on an electric chainsaw is to make sure that the saw is turned off and unplugged from the power source. This is a crucial safety step that must not be skipped. When working on a chainsaw, it’s important to prioritize safety at all times.
Always wear appropriate safety gear, including eye and ear protection, gloves, and long sleeves. Once the chainsaw is turned off and unplugged, you can proceed to the next step.
Step 2: Remove the Cover
After turning off and unplugging the electric chainsaw, the next step is to remove the cover to access the chain.
Locate the cover of the chainsaw and remove any screws or bolts that are holding it in place. Be sure to keep the screws or bolts in a safe place where they won’t get lost.
Once the cover is removed, you should have clear access to the chain. It’s important to note that electric chainsaws may have different types of covers and fasteners, so be sure to consult your user manual for specific instructions on how to remove the cover.
Take a moment to inspect the chain for any signs of damage or wear. Look for any missing or damaged teeth, as well as any kinks or bends in the chain. If the chain is damaged, it will need to be replaced before you can use the chainsaw again.
Now that the cover is removed and the chain is visible, you can proceed to the next step of putting the chain back on the electric chainsaw.
Step 3: Check the Tension
Before you can put the chain back on your electric chainsaw, it’s important to check the tension of the chain. Chains that are too loose or too tight can damage the bar and the chain itself, and can also create safety hazards during use.
To check the tension of the chain, locate the tensioning screw on the electric chainsaw. This is typically found on the side of the chainsaw near the bar.

Use the appropriate tool to turn the screw to adjust the tension of the chain. If the chain is too loose, turn the screw clockwise to tighten it. If the chain is too tight, turn the screw counterclockwise to loosen it.
You can test the tension of the chain by pulling it away from the bar. A properly tensioned chain should be snug against the bar, but still able to move freely around it.
It’s important to note that the exact tension required for the chain may vary depending on the electric chainsaw model and manufacturer. Be sure to consult your electric chainsaw’s user manual for specific instructions on how to adjust the chain tension.
Once you have adjusted the tension of the chain, you’re ready to proceed with putting the chain back on the electric chainsaw. Refer to the next step for detailed instructions on how to reattach the chain to the chainsaw.
Step 4: Reattach the Chain
Now that you’ve turned off the electric chainsaw, removed the cover, and checked the tension of the chain, you can proceed with reattaching the chain to the chainsaw.
To reattach the chain, start by placing it onto the sprocket at the base of the chainsaw’s bar. Make sure that the chain is facing in the right direction, with the cutting teeth pointing towards the front of the chainsaw.
Next, carefully align the chain around the bar, ensuring that it is properly seated in the groove. Then, slide the bar back into place, making sure that it is properly aligned with the chainsaw’s body.
Finally, reattach the cover of the chainsaw, making sure to tighten any screws or bolts that were removed earlier. Make sure that the cover is properly secured and that there are no gaps or loose parts.
Before using the electric chainsaw, it’s important to check the tension of the chain once again to ensure that it is properly adjusted. A loose chain can easily come off during use and cause injury, while an overly tight chain can cause damage to the bar and chain.
Once you’ve verified the tension of the chain, you’re ready to use your electric chainsaw again. Always prioritize safety when using power tools, and be sure to wear appropriate safety gear at all times.
Step 5: Adjust the Tension
After reattaching the chain to the electric chainsaw, it’s important to double-check the tension of the chain. This will ensure that the chain is properly seated on the bar and sprocket, and will also help prevent any potential safety hazards during use.
To adjust the tension of the chain, use the appropriate tool to turn the tensioning screw on the electric chainsaw. Turn the screw clockwise to tighten the chain and counterclockwise to loosen it.
You can test the tension of the chain by pulling it away from the bar. A properly tensioned chain should be snug against the bar, but still able to move freely around it. If the chain is too loose, it can easily come off during use, while an overly tight chain can cause damage to the bar and chain.
Be sure to consult your electric chainsaw’s user manual for specific instructions on how to adjust the chain tension. The recommended tension may vary depending on the make and model of your electric chainsaw.
Once you’ve adjusted the tension of the chain to the appropriate level, check it once again to ensure that it is properly tensioned. Then, you can proceed with using your electric chainsaw safely and effectively.
Step 6: Replace the Cover
After you have reattached the chain and adjusted its tension, it’s time to replace the cover on your electric chainsaw. This is a crucial step, as the cover protects the chain and bar, and ensures that the chainsaw operates safely.
Begin by lining up the cover with the chainsaw body, ensuring that the chain and bar are properly seated within it. Once in place, tighten any screws or bolts that were removed earlier to secure the cover.
Make sure that the cover is properly aligned and tightened, and that there are no gaps or loose parts. Any gaps or loose parts can be hazardous during use, as they can allow debris to enter the chainsaw and potentially cause harm.
Finally, give the chainsaw a quick once-over to ensure that everything is in proper working order. Make sure that all parts are secure, that the chain is properly tensioned, and that the cover is securely in place.
By following these easy steps to replace the cover on your electric chainsaw, you can ensure that your tool is operating safely and effectively. With a properly installed cover, you can use your chainsaw with confidence and peace of mind.
Step 7: Test the Electric Chainsaw
Now that you have reattached the chain, adjusted the tension, and replaced the cover on your electric chainsaw, it’s time to give it a test run. Testing your electric chainsaw is important to make sure that everything is in proper working order before you start using it for any heavy-duty tasks.
To test your electric chainsaw, turn it on and let it run for a few moments. Observe the chain to make sure that it is properly seated and moving freely around the bar. You can also check the chain’s tension once more to make sure that it is still properly adjusted.
Next, you can test your electric chainsaw by making a few light cuts through a small piece of wood. This will help you get a feel for the tool and ensure that it is operating smoothly.

If you notice any issues, such as the chain slipping off or the saw struggling to make cuts, stop using the chainsaw immediately and address the problem.
If everything seems to be working properly, you can proceed with using your electric chainsaw for your intended tasks. Remember to always use caution and wear appropriate safety gear, including eye and ear protection and gloves. With proper care and maintenance, your electric chainsaw can provide you with years of reliable use.
How to Put a Chain Back on Husqvarna Chainsaw?
If you have a Husqvarna chainsaw, you may need to put the chain back on after it has come off. Fortunately, the process is fairly straightforward. In this article, we’ll walk you through the steps of how to put a chain back on a Husqvarna chainsaw.
Step 1: Turn off the Husqvarna Chainsaw
Before attempting to put a chain back on your Husqvarna chainsaw, it’s crucial to ensure that the tool is turned off and unplugged. This step is essential to prevent any accidents or injuries while handling the chainsaw. To turn off your Husqvarna chainsaw, simply flip the switch to the off position and unplug it from any power source.
If you’re working with a gas-powered chainsaw, you should also disconnect the spark plug wire to prevent any accidental starts. This will ensure that the chainsaw cannot accidentally turn on while you’re working on it. Safety should always be your top priority when working with any power tools, including chainsaws.
Step 2: Remove the Cover
Once your Husqvarna chainsaw is turned off and unplugged, the next step is to remove the cover. The cover is typically located on the side of the chainsaw and is held in place by a few screws or clips.
Using a screwdriver or pliers, carefully remove the screws or clips that are securing the cover in place. Be sure to set the screws or clips aside in a safe place so that you can easily find them later.
Once the cover is removed, you should have easy access to the chainsaw’s chain and bar. You may want to take this opportunity to inspect the chain and bar for any signs of damage or wear. If you notice any issues, it may be necessary to replace the chain or bar before reattaching the chain.
Step 3: Check the Tension
Before you reattach the chain to your Husqvarna chainsaw, it’s essential to check the tension of the chain. Proper chain tension is crucial for the chainsaw’s safe and effective operation.
To check the chain tension, use a screwdriver or wrench to loosen the chain tensioning screw. Then, pull the chain to ensure that it is not too loose or too tight. A properly tensioned chain should be snug against the chainsaw’s bar without sagging.
If the chain is too loose, tighten the tensioning screw until the chain is properly tensioned. If the chain is too tight, loosen the tensioning screw until the chain is properly tensioned.
Proper chain tension is critical to ensure that your chainsaw operates correctly and safely. It’s important not to overlook this step when reattaching the chain to your Husqvarna chainsaw.
Step 4: Reattach the Chain
Once you have checked the tension of the chain on your Husqvarna chainsaw, it’s time to reattach the chain.
Start by placing the chain around the chainsaw’s bar, ensuring that the chain teeth are facing in the correct direction. Then, align the chain with the chainsaw’s sprocket, making sure that the chain is properly seated in the sprocket.
Next, use the tensioning screw to adjust the tension of the chain until it is properly tensioned. Once the chain is properly tensioned, tighten the tensioning screw to secure the chain in place.
Finally, use the screwdriver or pliers to replace the cover over the chain and bar. Make sure that all of the screws or clips are securely in place before using the chainsaw again.
Step 5: Adjust the Tension
After reattaching the chain to your Husqvarna chainsaw, it’s important to adjust the tension again to ensure that it is properly tensioned. To do this, use a screwdriver or wrench to loosen the chain tensioning screw. Then, use your hand to pull the chain to check its tension. If the chain is too loose, tighten the tensioning screw until the chain is properly tensioned.
If the chain is too tight, loosen the tensioning screw until the chain is properly tensioned. Once the chain is properly tensioned, tighten the tensioning screw to secure the chain in place. Be sure to check the tension periodically while using the chainsaw to ensure that it stays properly tensioned.
Proper chain tension is essential for the chainsaw’s safe and efficient operation. It’s important to take the time to adjust the tension properly after reattaching the chain to your Husqvarna chainsaw.
Step 6: Replace the Cover
After you have adjusted the tension of the chain on your Husqvarna chainsaw, it’s time to replace the cover.
Start by lining up the cover with the chainsaw, ensuring that it is properly aligned with the bar and chain. Then, use a screwdriver or pliers to reattach the cover, tightening the screws or clips securely. Make sure that the cover is properly secured in place before using the chainsaw.
A loose or improperly secured cover can be dangerous and can cause the chainsaw to malfunction. Once the cover is securely in place, you can start the chainsaw and test it to ensure that it is running smoothly and the chain is properly tensioned.
If you notice any issues, such as a loose chain or abnormal sounds, stop using the chainsaw and recheck the tension and alignment of the chain. Following these steps can help you safely and easily put the chain back on your Husqvarna chainsaw and ensure its proper operation.
Step 7: Test the Husqvarna Chainsaw
After you have replaced the cover on your Husqvarna chainsaw and adjusted the tension of the chain, it’s important to test the chainsaw to ensure that it’s running smoothly and safely.
To test the chainsaw, start by turning it on and allowing it to run for a few seconds. Listen for any abnormal sounds or vibrations, which could indicate that the chain is not properly tensioned or aligned.
Next, engage the throttle and test the chainsaw by making a few cuts into a piece of scrap wood. Make sure that the chain is cutting smoothly and evenly, and that there are no visible signs of wear or damage on the chain or bar.
If you notice any issues during the testing process, stop using the chainsaw immediately and recheck the tension and alignment of the chain.
Continuing to use a chainsaw with a loose or improperly tensioned chain can be dangerous and can cause damage to the saw and injury to the user. By following these steps, you can ensure that your Husqvarna chainsaw is properly tensioned and aligned, and is safe and effective for use in cutting tasks.
Final Thoughts
Putting a chain back on a chainsaw may seem like a daunting task, but it’s actually a relatively simple process if you follow the right steps. By turning off the saw, removing the cover, checking the tension, reattaching the chain, adjusting the tension, and replacing the cover, you can get your chainsaw up and running again in no time.
It’s important to remember to always prioritize safety when working with chainsaws. Always wear appropriate protective gear, such as gloves and eye and ear protection, and follow the manufacturer’s instructions for use and maintenance.