
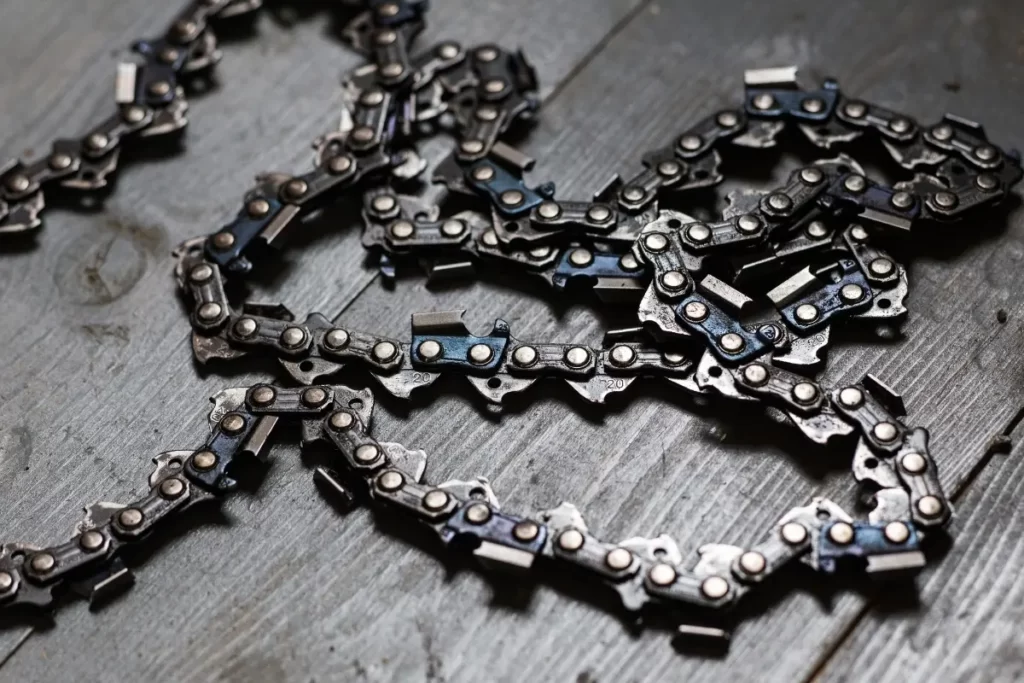
Is your chainsaw chain in a frustrating tangle, leaving you scratching your head? Untangling a chainsaw chain may seem daunting, but fear not. We’ll unveil the secrets to effortlessly untangling your chainsaw chain like a pro.
Whether you’re a seasoned lumberjack or a DIY enthusiast, understanding the proper techniques will save you time, effort, and potential headaches.
While we’re at it, we’ll even share some valuable insights on how to untangle a chainsaw chain, ensuring your chainsaw performs at its peak. So, let’s dive into the world of untangling chainsaw chains and get back to cutting with precision and ease.
How to untangle a Chainsaw Chain? step by step guide
Safety Measures
Proper knowledge and adherence to safety measures can significantly reduce the risk of untangling a chainsaw chain. This article will outline essential safety measures to follow when untangling a chainsaw chain.
Personal Protective Equipment (PPE)
Wear the appropriate personal protective equipment before attempting to untangle a chainsaw chain. Here are some essential items to consider:
- Chainsaw Safety Helmet: A helmet with a built-in face shield and ear protection provides crucial head and face protection.
- Chainsaw Gloves: Choose gloves that provide a good grip and protect your hands from sharp chain edges.
- Chainsaw Chaps or Pants: Invest in chainsaw-resistant pants or chaps to safeguard your legs against potential cuts or accidents.
- Steel-Toed Boots: Wear sturdy, non-slip boots with protective toe caps to prevent injuries from falling objects or accidental chain contact.
Workspace Preparation
Ensure your workspace is clear and well-lit before untangling the chainsaw chain. Follow these guidelines:
- Remove any obstructions or potential tripping hazards from the area.
- Provide ample lighting to see the tangled chain and work area.
- Work on a stable and level surface to maintain balance and stability.
Chain Brake Engagement
Engage the brake before starting work on the chainsaw chain to prevent accidental rotation. Here’s how to engage the chain brake:
- Locate the chain brake handle on the top handle of the chainsaw.
- Push the chain brake handle forward until it clicks or locks into place.
- Confirm that the chain brake is engaged by manually rotating the chain.
Power Disconnection
To further enhance safety, disconnect the chainsaw’s power source before attempting to untangle the chain. This ensures that the engine cannot start accidentally. Follow these steps:
- Disconnect the spark plug wire or remove the chainsaw’s battery (if applicable).
- Ensure that the chainsaw is completely powered off and cannot be started during the untangling process.
Proper Tool Usage
When untangling the chainsaw chain, use the appropriate tools to avoid injuries and damage. Consider the following:
- Chain Detangler Tool: Utilize a specialized chain detangler tool to assist in safely separating and untangling the chain links.
- Needle-nose Pliers: In cases where the chain is tightly interlocked, needle-nose pliers can help manipulate individual links without causing damage.
Methodical Approach
Adopt a systematic and cautious approach to untangling the chainsaw chain. Follow these steps:
- Assess the tangled area and identify the points of entanglement.
- Gradually work through the tangle, gently manipulating the chain links to separate them.
- Avoid excessive force or sudden movements resulting in injury or chain damage.
- Take breaks as needed to maintain focus and prevent fatigue, which can lead to accidents.
Lay Chain on a Flat Surface
Laying a chainsaw chain on a flat surface is a simple yet important step in performing maintenance tasks, such as cleaning, inspecting, or sharpening the chain. By laying the chain properly, you can work on it more effectively and minimize the risk of accidental injury.
Step 1: Ensure Workspace Safety
Before working with the chainsaw chain, ensure your workspace is clean, well-lit, and free from any potential obstructions. Follow these guidelines:
- Choose a stable and level surface, such as a workbench or a clean floor area.
- Remove any debris or objects that may interfere with the chain placement or cause accidents.
- Provide adequate lighting to see the chain and workspace.
Step 2: Prepare the Chainsaw Chain
Before laying the chainsaw chain on a flat surface, consider the following preparation steps:
- Engage the chain brake on your chainsaw to prevent accidental chain movement.
- Disconnect the chainsaw’s power source by removing the spark plug wire or disconnecting the battery (if applicable).
- Ensure the chain tension is properly released by loosening the tensioning screw or adjuster.
Step 3: Lay the Chainsaw Chain
Follow these steps to lay the chainsaw chain on a flat surface:
- Hold the chain with both hands, grasping it near the guide bar and away from the sharp cutting edges.
- Gently place the chain on the flat surface, ensuring that it lies straight and untangled.
- Position the chain so that the cutting edges face upward, making it easier to inspect, clean, or perform maintenance tasks on the chain.
Step 4: Maintain Caution
While the chain is laid on a flat surface, exercise caution to prevent accidental injuries.
- Avoid touching the sharp cutting edges of the chain to prevent cuts or injuries. Handle the chain only by the non-sharp areas, such as the drive links or the body of the chain.
- Do not place body parts or objects near the chain to prevent accidental contact or entanglement.
- If working on a floor, ensure that others are aware of the presence of the chain to avoid accidental trips or falls.
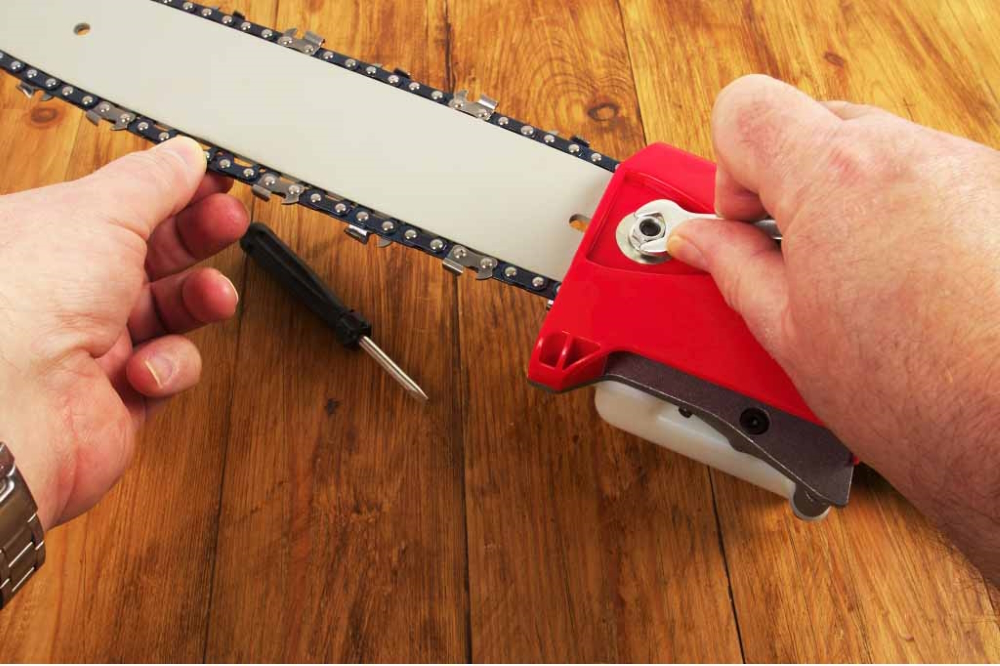
Lubricate the Chain
Lubricating the chainsaw chain is a vital maintenance task that ensures smooth operation, minimizes friction, and extends the life of the chain and the guide bar. Proper lubrication reduces heat and wear, allowing the chain to cut through wood more efficiently.
Step 1: Choose the Right Lubricant
Selecting the appropriate lubricant is essential for optimal chain performance and longevity. Chainsaw bar and chain oil are designed to offer the necessary viscosity and adhesion properties. Avoid using other lubricants, such as motor oil, as they may not provide adequate lubrication or could potentially damage the chain.
Step 2: Prepare the Chainsaw
Before lubricating the chain, ensure the chainsaw is powered off, the chain brake is engaged, and the spark plug wire is disconnected (or the battery is removed for cordless models). This prevents accidental starting and ensures your safety during the lubrication process.

Step 3: Position the Chainsaw
Position the chainsaw to allow easy access to the chain and guide bar.
Step 4: Apply the Lubricant
Follow these steps to apply the lubricant to the chainsaw chain:
- Shake the chainsaw bar and chain oil well before use to ensure proper oil mixing.
- Locate the oil filler cap on the chainsaw, typically near the guide bar or on the top.
- Unscrew the oil filler cap and pour the lubricant into the reservoir. Refer to your chainsaw’s manual for specific oil capacity information.
- Slowly and evenly pour the oil to prevent spills or overfilling.
- Replace and securely tighten the oil filler cap to prevent any leaks.
Step 5: Distribute the Oil
To evenly distribute the oil along the chain and guide bar, follow these steps:
- Observe the oil being distributed onto the chain and guide bar. Adjust the oil flow if your chainsaw provides this feature.
- Slowly move the chainsaw back and forth to ensure the oil is evenly distributed along the entire chain length.
Step 6: Check Oil Level Regularly
It’s important to check the oil level in the reservoir regularly during use to ensure an adequate supply of lubricant. Refill the reservoir as needed to maintain proper lubrication and prevent chain damage due to insufficient oil.
Make Two Loops
When operating a chainsaw, it’s not uncommon for the chain to become tangled or jammed. Untangling a chainsaw chain may seem daunting at first, but it can be resolved effectively with a systematic approach. This article will guide you through creating two loops to untangle a chainsaw chain, ensuring smooth operation and optimal performance. Let’s get started.
Section 1: Understanding the Chainsaw Chain
Before we dive into untangling the chain, it’s essential to understand its basic structure. A chainsaw chain consists of interconnected metal links, including drive, cutting, and tie straps. These components work together to rotate the chain around the guide bar, allowing it to cut through wood effectively.

Section 2: Safety First
Before attempting any maintenance or repair on your chainsaw, it’s crucial to prioritize safety. Ensure that the chainsaw is powered off and disconnected from any power sources. Additionally, wear protective gloves to shield your hands from sharp edges, and consider using safety goggles to protect your eyes from debris.
Section 3: Creating Two Loops
To begin the untangling process, follow these step-by-step instructions
Step 2: Identify the point where the chain is tangled. Gently separate the tangled portion, focusing on one side of the tangle.
Step 3: Hold the separated portion of the chain and create a loop by folding it back over itself. The loop should be large enough to allow the other side of the tangle to pass through it.
Step 4: Now, shift your attention to the other side of the tangle. Insert it through the loop you just created in step 3. This will form the first loop.
- Separate the chain.
- Create a second loop.
- Thread the remaining portion of the tangle through it.This will create the second loop.
Step 6: Gently pull both loops simultaneously in opposite directions. This action will gradually untangle the chain as the loops move closer together, releasing any snags or knots.
Raising the Chain
- To raise the chainsaw chain and untangle it, follow these step-by-step instructions
- Locate the area where the chain is tangled. Gently separate the tangled portion, focusing on one side of the tangle.
- Carefully lift the chain upwards to create slack. This can be done by lifting the nose of the guide bar or by using a flat-head screwdriver to lift the drive links slightly. Raising the chain creates space to maneuver and untangle it effectively.
- Once you have raised the chain and created enough slack, work on untangling the specific area. Use your fingers or a small tool, such as needle-nose pliers or a flat-head screwdriver, to untangle any knots or snags.
- Take your time to untangle the chain, gently separating any links that have become twisted or intertwined. Ensure that each link is free and able to move independently.
- After successfully untangling the chain, lower it back into its original position on the guide bar.
Repeat as Needed
To untangle a chainsaw chain with a complex tangle, follow these step-by-step instructions:
- Step 1: Identify the area where the chain is tangled. Carefully separate the tangled portion, focusing on one side of the tangle.
- Step 2: If the tangle appears intricate and challenging to untangle in one attempt, create smaller loops within the tangled section. Gently twist and manipulate the chain, gradually working towards untangling the links.
- Step 3: As you work on untangling the chain, be patient and take your time. Use your fingers or small tools like needle-nose pliers or a flat-head screwdriver to carefully manipulate the links and free them from the tangle.
- Step 4: If you encounter resistance or difficulty in untangling a specific section, repeat steps 2 to 4. Create additional loops within the tangle, separating it into more manageable portions. This approach lets you focus on untangling smaller segments simultaneously, gradually working through the complexity.
- Step 5: Continue repeating the untangling process, alternating between separating the tangle and creating smaller loops until the entire chain is successfully untangled.