
Below, we will explore how to replace a chainsaw chain. Whether you’re a seasoned chainsaw operator or a complete novice, our easy-to-follow instructions will ensure you can get your chainsaw back up and running quickly. So, let’s dive in and discover the secrets of a hassle-free chainsaw chain replacement.
Remove the Old Chainsaw Chain
Step 1: Secure the Chainsaw
To ensure your safety and prevent accidental starting, it is crucial to secure the chainsaw properly. Follow these steps:
- Turn off the chainsaw: Switch off the chainsaw.
- Remove the spark plug: Disconnect the spark plug wire.
- Secure the chainsaw bar: Use a vice or a clamp to secure the chainsaw’s bar, ensuring it remains stable during the chain removal process.
Step 2: Loosen the Chain Tension
Now, it’s time to release the tension in the chainsaw chain.
- Locate the tensioning mechanism: Identify the chain tensioning screw or knob, usually on the chainsaw’s side.
- Loosen the tension: Using an appropriate tool (such as a screwdriver or wrench), turn the tensioning screw counterclockwise to release the tension on the chain. Keep loosening until the chain becomes slack.
Step 3: Remove the Drive Links
You can now remove the chain from the guide bar, and the chainsaw’s drive sprocket with the chain slackened. Follow these steps carefully:

- Disengage the chain from the bar: Gently lift the loose chain from the guide bar, ensuring it detaches from its groove.
- Unhook the drive links: Locate the connecting link, the master link or tie strap, on the chainsaw’s drive sprocket. Unhook the drive links from the sprocket using needle-nose pliers or a suitable tool.
- Slide off the chain: After unhooking the drive links, carefully slide the old chainsaw chain off the guide bar, ensuring it doesn’t snag on any parts.
Step 4: Clean and Inspect
Now that the old chain is removed take a moment to clean and inspect the guide bar and the chainsaw’s drive sprocket. Remove any dirt or sawdust using a brush or compressed air.
Release the Chain Tension
Step 1: Locate the Chain Tensioning Mechanism
Different chainsaws have varying mechanisms for adjusting chain tension. It could be a tensioning screw or a tensioning knob. Locate the specific mechanism on your chainsaw. The most common locations are:
Side-mounted tensioning screw: Typically found on the side of the chainsaw, close to the guide bar. Front-mounted tensioning knob: Positioned on the chainsaw’s front, near the guide bar.
Step 2: Loosen the Chain Tension:
Now that you’ve identified the tensioning mechanism, it’s time to release the chain tension.
For a side-mounted tensioning screw
- Use the appropriate tool: Select the correct tool, such as a screwdriver or wrench, that fits the tensioning screw.
- Turn counterclockwise: Insert the tool into the tensioning screw and rotate it counterclockwise. Continue turning until you feel the chain tension loosening.

For a front-mounted tensioning knob
- Locate the tensioning knob: Identify the tensioning knob positioned near the guide bar on the front of the chainsaw.
- Rotate counterclockwise: Grasp the knob firmly and rotate it counterclockwise. Continue turning until you observe the chain tension easing.
Step 3: Check Chain Slackness
After loosening the chain tension, check the slackness of the chain. Gently pull the chain away from the guide bar with your hand. The chain should easily move away from the bar, with enough slack for removal.
Step 4: Verify Chain Tension Release
To ensure the chain tension is fully released, visually inspect the chain. It should appear visibly slack and loose around the guide bar.
Loosen the Tensioning Screw
Step 1: Locate the Tensioning Screw
The tensioning screw is typically positioned near the guide bar or chain cover on the chainsaw body. Refer to your chainsaw’s manual to identify the exact location of the tensioning screw.
Step 2: Loosen the Tensioning Screw
Once you have located the tensioning screw, follow these steps to loosen it
- Select the proper tool: The appropriate tool fits the tensioning screw. It should engage securely to prevent slippage during the process.
- Insert the tool: Insert the tool into the tensioning screw, ensuring a firm grip.
- Turn counterclockwise: Rotate the tool counterclockwise to loosen the tensioning screw. Apply steady, but not excessive, force. The screw should gradually release the tension as you turn it.
- Check chain slackness: Periodically check the slackness of the chain by gently pulling it away from the guide bar. The chain should exhibit increased slack as you loosen the tensioning screw.
- Adjust as needed: If the chain tension remains too tight, loosen the tensioning screw until the desired slackness is achieved.
Thread the New Chain Onto the Saw
After removing the old chainsaw chain, it’s time to install the new chain. Properly threading the new chain onto the chainsaw is essential for optimal performance and safety.
Step 1: Prepare the New Chain
Inspect the new chain for any defects or damage. If everything looks good, proceed with the following steps:
- Orient the chain correctly: Take a moment to observe the teeth orientation of the new chain. The cutting edges should be facing forward, pointing away from the chainsaw body.
- Check the direction: Confirm that the chain rotation direction matches the arrow indicator on the chainsaw’s guide bar. The arrow typically indicates the direction of chain movement during operation.
Step 2: Loosen the Chain Tension
Ensure the chain tension is properly loosened before threading the new chain onto the chainsaw.
Step 3: Position the New Chain
Now, let’s proceed with threading the new chain onto the chainsaw. Follow these steps carefully:

- Place the chain on the guide bar: Align the bottom of the new chain’s drive links with the guide bar’s groove. Ensure the cutting edges face forward and the drive links sit snugly within the guide bar’s track.
- Fit the chain onto the sprocket by aligning the drive links with the sprocket teeth. Gradually feed the chain onto the sprocket, ensuring the drive links properly engage with the sprocket teeth.
- Thread the chain around the guide bar: As you continue to fit the chain onto the sprocket, guide the rest around the guide bar. Ensure that the chain remains aligned with the groove on the guide bar.
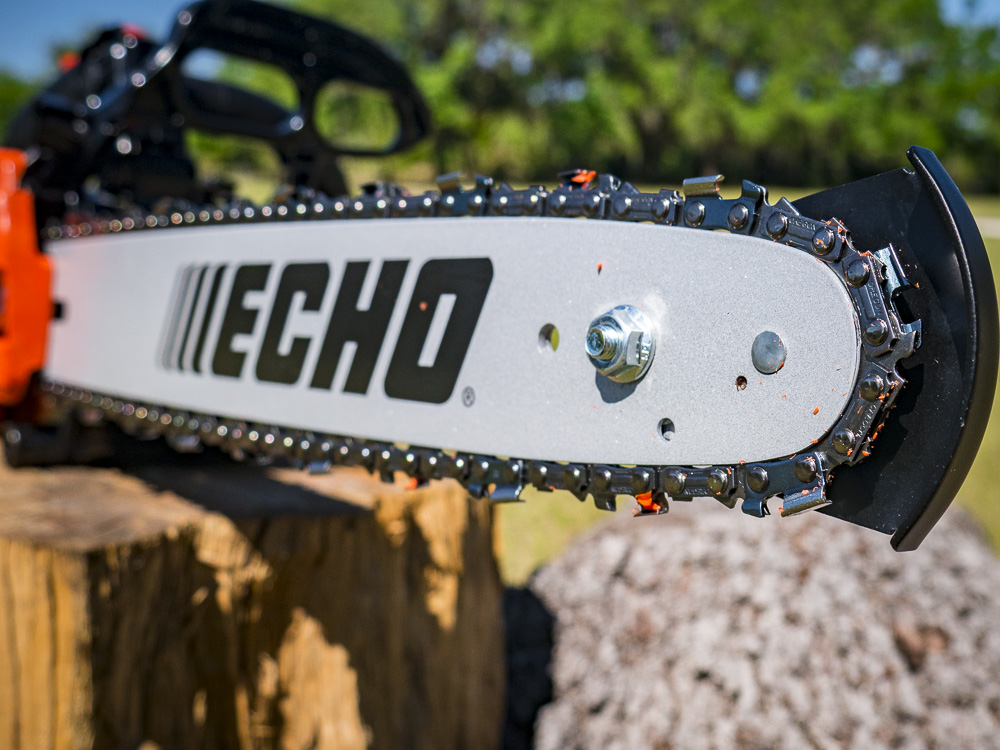
Step 4: Engage the Chain with the Bar Nose
The bar nose is the rounded front end of the guide bar. It is designed to support the chain and reduce friction during cutting. Follow these steps to engage the chain with the bar nose:
- Hold the chainsaw firmly: Grasp the chainsaw with one hand, ensuring a secure grip on the handle.
- Pull the chain around the bar nose: With your other hand, gently pull the chain around the bar nose. This allows the chain to engage with the nose sprocket and sit properly on the guide bar.
Step 5: Check the Chain Tension
With the new chain threaded onto the saw, checking the chain tension and making any necessary adjustments is crucial. Refer to your chainsaw’s manual for instructions on properly tensioning the chain.
Align the Guide Bar
Step 1: Check for Damage or Wear
Before aligning the guide bar
- Inspect any signs of damage or excessive wear.
- Look for cracks, bent portions, or worn-out rails on the guide bar.
- If you notice any issues, replace the guide bar before the alignment process.
Step 2: Loosen the Guide Bar Mounting Nuts/Bolts
- Locate the mounting nuts/bolts: Identify the nuts or bolts holding the guide bar.
- Loosen the mounting nuts/bolts: Use the wrench or scrench to loosen the nuts or bolts in a counterclockwise direction. Loosen them enough to allow for guide bar adjustment.
Step 3: Align the Guide Bar
Now it’s time to align the guide bar properly. Follow these steps carefully:

- Check alignment marks: Some chainsaws have alignment marks on the chainsaw body or guide bar. Align these marks to ensure correct guide bar positioning. Consult your chainsaw’s manual for specific details on alignment marks, if applicable.
- Align with the chain catcher: The chain catcher is a metal tab or protrusion on the bottom of the chainsaw body near the guide bar. Ensure the guide bar aligns properly with the chain catcher to maintain chain tension and prevent chain derailment.
- Align with the tensioning mechanism: If your chainsaw has a chain tensioning mechanism, make sure the guide bar aligns correctly with the mechanism. This ensures smooth and effective chain tensioning.
- Adjust guide bar position: With the guide bar mounting nuts or bolts still loose, adjust the guide bar position as needed. Slide it forward or backward until it aligns accurately with the alignment marks, chain catcher, and tensioning mechanism.
Step 4: Secure the Guide Bar
Once the guide bar is aligned correctly, it’s time to secure it. Follow these steps:
- Tighten the mounting nuts/bolts: Using the wrench or scrench, tighten the guide bar mounting nuts or bolts in a clockwise direction. Ensure snug but not overly tightened to avoid damaging the guide bar or chainsaw body.
- Check for proper alignment: Double-check the alignment of the guide bar, ensuring it remains aligned with the marks, chain catcher, and tensioning mechanism.
Step 5: Verify Tensioning Mechanism Operation
If your chainsaw has a chain tensioning mechanism, verify that it operates smoothly and effectively. Adjust the tension as needed, following the manufacturer’s instructions.
Finish Tightening the Side Plate Nuts
Step 1: Acquire the Correct Replacement Side Plate
You will need to obtain a compatible replacement part to replace the side plate. Consult your chainsaw’s manual or contact the manufacturer to identify the specific side plate model or part number required for your chainsaw.
Step 2: Loosen the Side Plate Retaining Nuts/Bolts
Locate the nuts or bolts that secure the side plate to the chainsaw body. Using the appropriate tool (typically a wrench or screwdriver), loosen the retaining nuts or bolts in a counterclockwise direction. Do not remove them entirely at this stage; only loosen them enough for side plate removal.
Step 3: Remove the Old Side Plate
Once the retaining nuts or bolts are sufficiently loosened, carefully remove the old side plate from the chainsaw. Gently slide it off the guide bar, ensuring you do not disturb the chain or other components.
Step 4: Clean and Inspect
With the old side plate removed, take a moment to clean the guide bar and surrounding areas. Inspect the guide bar for any signs of damage or excessive wear. If necessary, address these issues before proceeding.

Step 5: Install the New Side Plate
Now it’s time to install the new side plate. Follow these steps:
- Position the new side plate: Align the new side plate with the guide bar and chain. Ensure that it fits securely and rests flush against the chainsaw body.
- Align the retaining holes: Check that the holes on the side plate align with the threaded inserts or studs on the chainsaw body.
- Insert and tighten the retaining nuts/bolts: Insert the retaining nuts or bolts into the corresponding holes on the side plate. Begin tightening them clockwise, ensuring they are snug but not overly tightened. Refer to your chainsaw’s manual for recommended torque specifications.
- Verify secure attachment: Confirm that the new side plate is securely attached and has no excessive play or movement. Gently tug on the side plate to ensure it is properly secured.
Step 6: Reconnect the Spark Plug Wire and Test
Once the new side plate is installed and securely attached, reconnect the spark plug wire to the spark plug. Perform a quick visual inspection to ensure all components are in place and secure. Finally, start the chainsaw and verify that the side plate remains in position during operation.