
This guide is here to helping you to correctly measure the chainsaw bar. We will delve into accurately measuring a chainsaw bar. Understanding chainsaw bar measurements is crucial for selecting the right fit and optimizing your chainsaw’s performance. In the guide below, we will cover How to measure a Chainsaw Bar?
Two Methods to Measure A Chainsaw Bar
- Finding the Cutting and True bar Lengths
- Measuring the Chain
Finding the Cutting and True bar Lengths
Unplug the spark plug wire so the chainsaw doesn’t start
When measuring a chainsaw bar, it is essential to prioritize safety. An important step in ensuring safety is to unplug the spark plug wire off the chainsaw before attempting any measurements.
This precautionary measure is necessary to prevent the chainsaw from accidentally starting during the process, which could lead to serious injuries.
1. To unplug the spark plug wire, follow these step-by-step instructions
Locate the spark plug: The spark plug is usually on the engine’s cylinder head. It is a small, cylindrical component with a rubber cap attached to it. Look for it near the rear or side of the chainsaw, depending on the specific model.
Identify the spark plug wire: The spark plug wire is a thick, insulated cable that connects to the spark plug.
Once you have disconnected it, keep it away from the spark plug opening. This step ensures the chainsaw cannot receive any electrical current from the ignition system, eliminating the risk of accidental starting. By unplugging the spark plug wire, you have taken an important safety measure to ensure the chainsaw remains inoperable during the measurement process.
2. Measuring the cutting length from the tip of the bar to where it enters the body
When measuring a chainsaw bar, it is important to determine the cutting length, which refers to the portion of the bar actively involved in cutting. To measure the cutting length accurately, follow these step-by-step instructions:
Locate the tip of the bar: Find the farthest point away from the chainsaw body, typically marked by a small sprocket or a rounded end. This point indicates the tip of the chainsaw bar.
Identify where the bar enters the body: Look for the location where the chainsaw bar enters the main body of the chainsaw. Usually, this is near the front of the chainsaw, where the chain tensioning mechanism is located.
Align the measuring tool: Take a measuring tape or ruler and align it parallel to the chainsaw bar. Ensure the measuring tool is straight and in line with the bar for an accurate measurement.
Measure where the bar enters the body: Extend the measuring tape or ruler along the chainsaw bar, starting from the tip and moving towards the point where the bar enters the body. Ensure the measuring tool remains straight and aligned with the bar throughout the measurement.
Read the measurement: Once the measuring tool reaches the point where the bar enters the body, note the measurement indicated by the endpoint of the bar. This measurement represents the cutting length of the chainsaw bar.
It is crucial to record the measurement accuracy as it determines the effective cutting length of the chainsaw bar. This measurement plays a significant role in selecting the appropriate chain size for your chainsaw, ensuring optimal performance and safety.
3. Removing the bar by taking off the clutch cover of the chainsaw
To remove the chainsaw bar, you need to take off the clutch cover. The clutch cover is a protective plate that encloses the clutch assembly and is secured by screws.
Prioritize safety by turning off the chainsaw and disconnecting the spark plug wire. Pay attention to any tabs or clips holding it in place and release them if necessary.
Set the clutch cover aside in a clean and secure area. With the clutch cover off, you can access the chainsaw bar. Slide the bar from the chainsaw body, ensuring it remains level and stable. Be cautious of the chain, as it may still be tensioned around the bar.
By following these steps and carefully handling the chainsaw and its components, you can safely remove the chainsaw bar by removing the clutch cover.
4. Measure the bar to find its proper length.
To determine the proper length of a chainsaw bar, you can measure it from end to end. Follow these step-by-step instructions:
Prepare a measuring tool: Get a measuring tape or ruler that is long enough to cover the entire length of the chainsaw bar. Make sure the measuring tool is in good condition and provides accurate measurements.
Position the measuring tool: Place one end of the measuring tape or ruler at the very end of the chainsaw bar, aligning it with the outermost point. Ensure the measuring tool is straight and level to obtain precise measurements.
Extend the measuring tool: Carefully extend the measuring tape or ruler along the length of the chainsaw bar until you reach the opposite end. Keep the measuring tool straight and aligned with the bar throughout the process.
Take the measurement: Once the measuring tool reaches the other end of the chainsaw bar, note the measurement indicated by the endpoint of the bar.
Record the measurement: Write down or remember the measurement for future reference. This measurement is essential for determining the appropriate chain size and selecting compatible accessories.
By measuring the chainsaw bar from end to end, you can accurately determine its actual length. Always prioritize safety and handle the chainsaw with care during the measurement process.
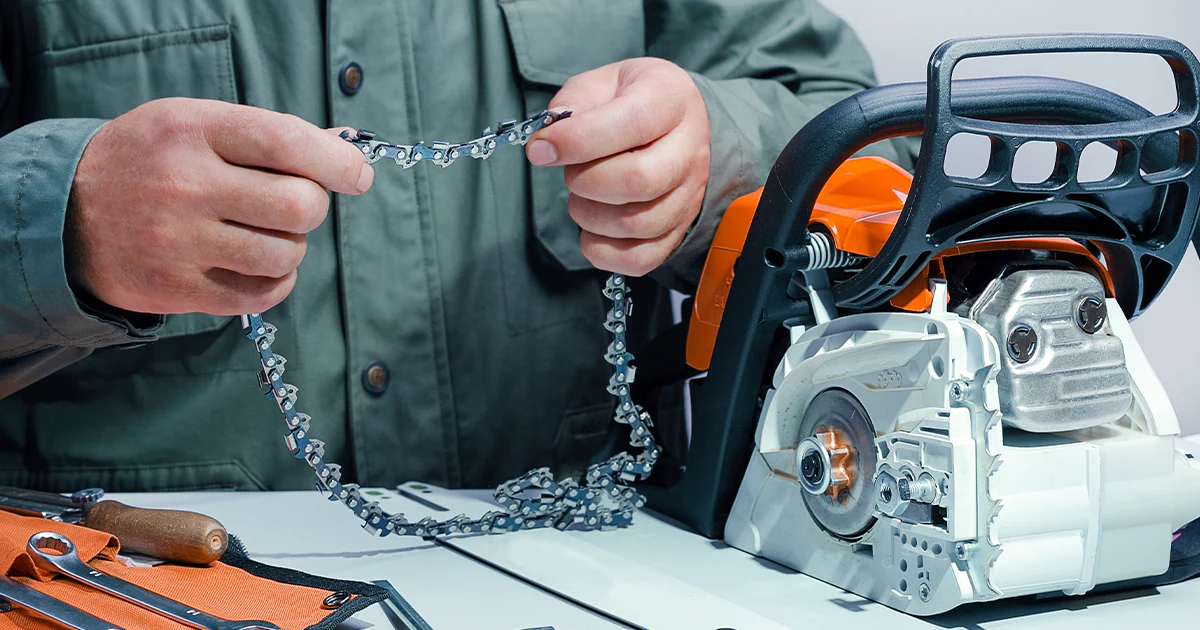
Measuring the Chain
Removing the Chain from the Chainsaw for Easier Measurement
Removing the chain from the saw is beneficial to facilitate the measurement of a chainsaw bar. Let’s delve into the step-by-step explanation of how to remove the chain:
Step 1: Prioritize Safety
Before proceeding, it is crucial to prioritize your safety. Ensure that the chainsaw is turned off and that the engine has completely cooled down. Additionally, wear protective gloves and goggles to safeguard your hands and eyes.
Step 2: Locate the Chain Tensioner
The chain tensioner is typically positioned on the side of the chainsaw, near the bar and chain. Its purpose is to adjust the chain tension. Consult your chainsaw’s user manual to accurately identify the location and operation of the chain tensioner specific to your model.
Step 3: Loosen the Chain Tension
Using an appropriate tool, such as a chainsaw wrench or screwdriver, loosen the chain tension by turning the chain tensioner screw counterclockwise. This action relieves the tension on the chain, facilitating its removal.
Step 4: Disengage the Chain
After loosening the tension, you can disengage the chain from the chainsaw bar. Begin by gently lifting the chain off the bar, starting from the top or bottom, and guide it carefully from the chainsaw’s sprocket.
Step 5: Remove the Chain
With the chain disengaged from the bar, continue lifting until it is removed from the chainsaw.
Step 6: Measure the Chainsaw Bar
Now that the chain has been safely removed, you can focus on measuring the chainsaw bar. Employ a tape measure or ruler and position one end at the starting point of the bar (typically at the base of the chainsaw body).

Extend the measuring tool along the entire length of the bar until reaching the tip. Ensure that the tape measure or ruler remains parallel to the bar to obtain an accurate measurement.
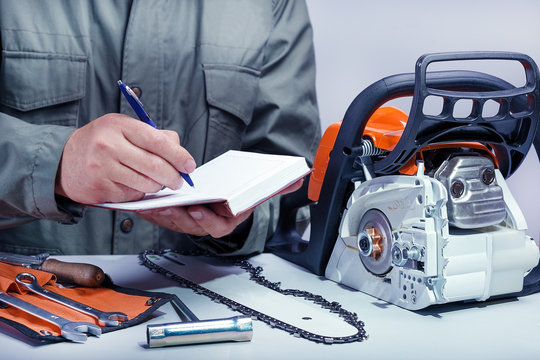
Step 7: Record the Measurement
Upon measuring the complete length of the chainsaw bar, record the measurement in either inches or centimeters, depending on your preferred unit system or the one used in your region. This measurement signifies the length of the chainsaw bar and plays a crucial role in selecting a suitable replacement chain.
By removing the chain before measuring the chainsaw bar, you can eliminate any potential interference or inaccuracies caused by the chain itself.
Measuring the Chain’s Pitch by Measuring the Distance between Three Consecutive Rivets
Determining the pitch of a chainsaw chain is important when it comes to replacing it. One effective way to measure the chain’s pitch is by measuring the distance between three consecutive rivets. Let’s go through the step-by-step process:
Step 1: Locate Three Consecutive Rivets
Identify a section of the chain where you can easily access three consecutive rivets. These rivets are the small cylindrical components that hold the chain links together. Choose a portion where the rivets are visible and accessible for measurement.
Step 2: Measure the Distance
Ensure the measuring tool is aligned parallel to the chain for an accurate measurement. This distance represents the chain’s pitch.
Step 3: Record the Measurement
Note down the measured distance in inches or millimeters, depending on your preferred unit of measurement. This recorded measurement indicates the pitch of your chainsaw chain.
Step 4: Verify the Pitch
Compare the recorded measurement with the recommended pitch for your specific chainsaw model. Chainsaw chains are available in different pitches, such as 0.325 inches, 3/8 inches, or 0.404 inches. Matching the measured pitch with the required pitch for your chainsaw is crucial.
By measuring the distance between three consecutive rivets, you can accurately determine the pitch of your chainsaw chain. This measurement is vital for selecting the appropriate replacement chain, as using the correct pitch ensures the proper functionality and optimal chainsaw performance.
Determining the Chain Gauge Using a Caliper
To accurately determine the gauge of a chainsaw chain, you can utilize a caliper, a precise measuring tool. The chain gauge refers to the thickness of the drive links, which are the parts that fit into the bar groove. Here’s a step-by-step explanation of how to find the chain gauge using a caliper:
Step 1: Prepare the Caliper
Ensure that the caliper is clean and properly calibrated to ensure accurate measurements. Please set it to the desired unit of measurement, such as inches or millimeters, depending on your preference or the caliper’s settings.
Step 2: Identify the Drive Link
Locate a single drive link on the chainsaw chain. The drive link is the chain part that engages with the sprocket and moves along the bar. It usually has a distinct shape or design compared to the other links.
Step 3: Measure the Drive Link Thickness
Using the caliper, carefully position the jaws around the drive link. Gently close the caliper jaws until they contact both sides of the link. Take note of the measurement displayed on the caliper. This measurement represents the thickness of the drive link, which indicates the chain gauge.
Step 4: Repeat the Measurement
For increased accuracy, repeat the measurement process on several different drive links. This accounts for any minor variations that may exist within the chain gauge. Take multiple measurements and calculate an average if there are differences in the readings.
Step 5: Verify the Chain Gauge
Compare the average thickness of the measured drive links with the standard chain gauges available in the market. Chainsaw chains typically come in gauges such as 0.050 inches, 0.058 inches, or 0.063 inches. Determine the closest matching chain gauge to ensure compatibility with your chainsaw.
By using a caliper to measure the thickness of the drive links, you can accurately determine the chain gauge. This measurement is crucial when selecting a replacement chain, as using the correct gauge ensures proper fit and optimal chainsaw performance.
Counting the Number of Drive Links on a Chainsaw Chain
Counting the number of drive links on a chainsaw chain is important when replacing the chain or performing maintenance. Drive links are the chain parts that engage with the sprocket and move along the bar.
Step 1: Prepare for Counting
Ensure that the chainsaw is turned off and that the chain is not under tension. This creates a safer environment for counting the drive links.
Step 2: Locate the Starting Point
Identify a convenient starting point on the chainsaw chain. This can be any visible point on the chain that allows easy tracking during the counting process.
Step 3: Identify the Drive Links
Familiarize yourself with the appearance of the drive links before starting the counting process. Drive links typically have a distinct shape and differ from the other links in the chain. They are the parts that engage with the sprocket and move along the bar.
Step 4: Begin Counting
From the identified starting point, carefully count each drive link individually. To avoid errors, pay attention to each drive link and maintain accuracy throughout the counting process.
Step 5: Note the Total Count
Once you have counted all the drive links on the chainsaw chain, note the total count. This number represents the total number of drive links present on the chain.
Following these steps, you can accurately count the number of drive links on a chainsaw chain. This information is essential for selecting the correct replacement chain or for maintenance purposes, ensuring the proper fit and optimal performance of your chainsaw.
Mastering Chainsaw Bar Groove Gauge Measurement for Optimal Chain Selection
1.Gather the necessary tools
To achieve accurate chainsaw bar groove gauge measurement and effectively select the best chain for your needs, it is vital to gather the required tools beforehand. Here is a breakdown of the essential tools:
Chainsaw: Begin by ensuring that your chainsaw is in proper working order. Check that the chain is sharp and the bar is well-maintained.
Groove gauge: Acquire a groove gauge, a compact handheld tool designed explicitly for measuring the groove width of the chainsaw bar. This tool typically offers various slots of different widths to accommodate different chain sizes.
Measuring tape or ruler: Utilize a measuring tape or ruler to accurately measure the length of the chainsaw bar. This measurement is essential for selecting the correct chain length.
Pencil or marker: Keep a pencil or marker within reach to mark the groove measurement on the bar for convenient reference.
Safety equipment: Prioritize safety by obtaining protective gear, gloves, goggles, and ear protection. Chainsaws can pose hazards, so it is vital to take precautions.
With ensure tools at your disposal, you accurately measure the groove gauge and select the optimal chain for your chainsaw.
2.Clean the chainsaw bar
Cleaning the caw bar is crucial in maintaining its optimal performance and extending its lifespan. Follow these step-by-step instructions to effectively clean the chainsaw bar:
Prioritize safety: Before starting any maintenance tasks, turn the chainsaw off and disconnect the spark plug wire to prevent accidental starts. Additionally, wear appropriate safety gear, including gloves and safety goggles, to protect yourself during cleaning.

Remove the chain: To clean the chainsaw bar thoroughly, it’s necessary to remove it. Locate the chain tensioning screw or knob on the side or bottom of the guide bar. Loosen the tension by turning the screw or knob in the correct direction. Once the tension is released, the chain will loosen, allowing you to remove it from the bar.
Clean the bar groove: The groove on the chainsaw bar, where the chain rests, can accumulate debris like sawdust, dirt, or resin over time. Use a small, stiff brush like an old toothbrush to remove these particles from the groove. Gently but thoroughly scrub the groove, ensuring all nooks and crannies are clean.
Inspect the bar: While cleaning, carefully inspect the chainsaw bar for any signs of damage, such as cracks, dents, or excessive wear. If you identify any issues, replacing the bar may be necessary before using the chainsaw.
Remove residue: Besides cleaning the groove, there may be residual debris on the surface of the chainsaw bar. Wipe the bar clean using a clean cloth or rag. If stubborn residues persist, you can use a mild detergent or a specialized chainsaw bar cleaner.
Reassemble the chainsaw: Once the chainsaw bar is clean and dry, it’s time to reassemble it. Carefully place the chain back onto the bar, ensuring it fits properly into the groove. Follow the manufacturer’s instructions to correctly tension the chain and secure it.
Regularly cleaning the chainsaw bar can prevent debris buildup and maintain the chainsaw’s cutting performance. It is recommended to clean the bar after each use or whenever you observe significant dirt or residue.
Always prioritize safety and consult the chainsaw’s manual for specific cleaning instructions provided by the manufacturer.
3.Identify the groove
Identifying the groove on a chainsaw bar is crucial for performing maintenance tasks and making adjustments related to the chain. Follow these steps to accurately identify the groove on a chainsaw bar:
Prioritize safety: Before working on the chainsaw, ensure it is turned off and disconnect the spark plug wire to prevent accidental starts.
Locate the chainsaw bar: The bar is the elongated metal component extending outward from the body. It is usually situated on the bottom side of the chainsaw, running parallel to the chain.
Examine the bar’s surface: Take a close look at the surface of the chainsaw bar. You will notice a distinct groove that runs along its length. This groove is typically positioned on the top side of the bar, facing away from the chainsaw body.
Identify the chain track: The groove on the chainsaw bar serves as a track for the chain to move along. It is a recessed channel designed to hold and guide the chain during operation. The cutting teeth of the chain fit into the groove, enabling them to engage with the wood being cut.
Note the groove width: The width of the groove can vary depending on the chain gauge. Different chains come with different gauge measurements, and the groove width must match the chain gauge for optimal performance and safety. Accurately measuring the groove width is critical when selecting the chain size for your chainsaw.
By correctly identifying the groove on the chainsaw bar, you better understand its function. You can perform maintenance tasks like cleaning the groove or selecting the correct chain size. Always prioritize safety and consult the chainsaw’s manual for specific instructions the manufacturer provides.
4.Position the groove gauge
Positioning the groove gauge accurately is crucial for obtaining precise measurements of the chainsaw bar groove. To ensure safety:
- Ensure the chainsaw is turned off and the spark plug wire is disconnected.
- Wear the necessary safety gear, including gloves and safety goggles.
- Use a groove gauge tool designed specifically for measuring the chainsaw bar groove.
- Locate the groove on the top side of the chainsaw bar, facing away from the chainsaw body.
The groove serves as a track for the chain. Select the appropriate slot on the groove gauge that matches the width of the chainsaw bar groove. Slide the groove gauge into the groove, ensuring it is positioned fully and evenly along the length of the groove.
Observe the measurement on the gauge, representing the width of the chainsaw bar groove or the chain gauge. This measurement is crucial for selecting the correct chain size and ensuring optimal performance and safety.
5.Determine the gauge size
Determining the gauge size of a chainsaw is essential for selecting the correct chain that fits the chainsaw bar properly. Follow these steps to determine the gauge size accurately:
Gather the required tools: Retrieve a ruler or caliper for precise measurements. Ensure that the measuring tool is suitable for accurate readings.
Locate the gauge marking: Carefully examine the chainsaw bar to find the gauge marking. This marking is typically engraved or imprinted on the side of the bar and indicates the gauge size. It is commonly denoted in inches or millimeters.

Measure the gauge size: Using a ruler or caliper, position the measuring tool against the groove on the chainsaw bar. Take an accurate measurement of the groove’s width. This measurement corresponds to the gauge size of the chainsaw bar.
Select the appropriate chain: Once you have determined the gauge size, refer to the chainsaw’s manual or seek guidance from a specialist to identify compatible chain sizes. Match the gauge size you measured with the recommended chain gauge for a proper fit.
6.Read the measurement
Reading the measurement accuracy is crucial when determining the gauge size for a chainsaw. After positioning your measuring tool, such as a ruler or caliper, against the chainsaw bar groove:
- Ensure proper alignment for an accurate reading.
- If using a ruler, observe the markings or increments on the ruler that correspond to the width of the groove.
Alternatively, if using a caliper, gently close the jaws of the caliper around the width of the groove and take note of the measurement displayed on the scale or digital screen.
The obtained measurement represents the chainsaw bar groove’s width, typically in inches or millimeters. Record the measurement for future reference, as it will help you select the appropriate chain gauge for your chainsaw.
By reading the measurement accurately, you can determine the gauge size of your chainsaw and make informed decisions when selecting the compatible chain size. Remember to use a reliable and precise measuring tool to obtain the most accurate measurement.
7. Record the measurement
Recording the measurement accuracy is essential when determining the gauge size for a chainsaw. It’s important to note the precise value after obtaining the measurement using a ruler, caliper, or another measuring tool. This value represents the width of the chainsaw bar groove, also known as the gauge size.
If using a ruler, read the measurement at the point where the edge of the groove aligns with the ruler’s markings. Alternatively, if using a caliper, take note of the measurement displayed on the scale or digital screen. Record the measurement in a designated place for future references, such as a notepad or digital device.
Ensure that the measurement is recorded using the appropriate units, such as inches or millimeters, based on the measuring tool used. By accurately recording the measurement, you will have a reliable reference for the gauge size of your chainsaw bar.