
Welcome to a beginner-friendly guide on how to sharpen a drill bit with a grinder. You’re in the right place if you’ve ever found yourself frustrated with dull drill bits that just won’t cut it. Using a hero to sharpen your drill bits can save time and money while ensuring your DIY or professional projects go smoothly.
This bit-by-bit instructional exercise will walk you through the process, ensuring that your drill bits are in top-notch condition for all your drilling needs. So, let’s dive in and discover how to sharpen a drill bit with a grinder.
Safety Precautions
Importance of Safety When Working with Grinders
Prioritizing safety when using grinders is paramount. Grinding tools, including bench grinders, pose potential risks, so it’s crucial to understand and adhere to safety precautions. Always approach the task cautiously and respect the equipment’s power and potential hazards.
Necessary Safety Gear and Equipment
- Safety Glasses: Wear ANSI-approved safety glasses with side shields to protect your eyes from sparks, debris, and abrasive particles.
- Face Shield: Consider using a face shield for additional protection, especially when dealing with substantial sparks or flying particles.
- Hearing Protection: In noisy grinding environments, wear hearing security, like earplugs or ear protectors, to forestall hearing damage.
- Dust Mask or Respirator: When grinding materials that produce dust or airborne particles, use a dust cover or respirator to safeguard your respiratory framework from inhalation hazards.
- Gloves: Choose gloves to shield your hands from sharp or abrasive materials. Ensure the gloves fit well to maintain agility.
- Long Sleeves and Pants: Wear clothing that covers your arms and legs to protect against sparks, hot debris, or accidental contact with the grinding wheel.
- Safety Shoes: Use sturdy, closed-toe shoes with slip-resistant soles to safeguard your feet from falling objects and potential hazards on the ground.
- Hair and Lose Clothing: Tie back long hair and avoid loose clothing that could become entangled in the grinder.
Importance of a Well-Ventilated Workspace
Grinding operations can produce airborne particles and dust that may pose respiratory risks. To mitigate this, work in a well-ventilated area or use local exhaust ventilation systems or dust collection devices where appropriate.
Adequate ventilation helps disperse fumes and particles, maintaining air quality and reducing health hazards associated with inhalation. Additionally, it minimizes the accumulation of airborne contaminants in your workspace, enhancing safety and comfort during grinding tasks.
Tools and Materials
List of Tools and Materials Required for the Sharpening Process
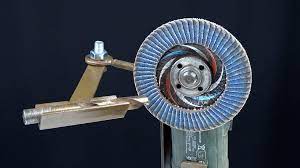
- Bench Grinder: A bench grinder is the primary tool for sharpening drill bits.
- Drill Bit Sharpening Jig (Optional): While not mandatory, a drill bit sharpening jig can help maintain consistent angles during sharpening.
- Lubricating Oil: Lubricating oil or cutting fluid keeps the drill bit cool during sharpening.
- Cleaning Tools: You’ll need brushes or other cleaning tools to remove metal shavings and debris from the grinder’s work area and the drill bit.
Brief Descriptions and Recommendations for Each Item
Bench Grinder
Invest in a quality bench grinder with adjustable tool rests and adequate power for efficient sharpening. Ensure the hero is securely mounted to a stable workbench or stand.
Safety Gear
Choose ANSI-approved safety glasses with side shields that provide adequate protection against sparks and debris. A face shield adds extra protection for the face and should be used when dealing with substantial sparks. Ear protection is advisable if the grinder generates a high level of noise.
Drill Bit Sharpening Jig (Optional)
While not essential, a drill bit sharpening jig can simplify the process, especially for beginners. Look for a well-designed, adjustable jig accommodating various bit sizes and angles.
Lubricating Oil
Use a suitable cutting fluid or lubricating oil to keep the drill bit cool during sharpening. Water-based coolants or specialized cutting oils are commonly used. Ensure the chosen lubricant is compatible with your grinder and sharpened materials.
Cleaning Tools
Keep a set of brushes, compressed air, or a vacuum cleaner on hand to remove metal shavings and debris from the grinder and the work area. Regular cleaning helps maintain the grinder’s efficiency and safety.
Having these tools and materials ready before the sharpening process ensures a smoother and safer experience while maintaining the drill bits in optimal condition.
Preparation
Before embarking on the sharpening process, preparing the drill bit meticulously for safety and effectiveness is crucial. Begin by thoroughly cleaning the drill bit, removing dirt, debris, or residual lubricants from its surface and flutes.
This initial cleaning step ensures no contaminants interfere with the sharpening process and minimizes unnecessary wear on the grinding wheel. Following the cleaning, conduct a comprehensive inspection of the drill bit.
Scrutinize it for signs of damage, such as chips, cracks, or excessive wear. This inspection serves a dual purpose: it helps you assess the overall condition of the bit. It allows you to identify any significant issues that impact its usability or the outcome of the sharpening process.
If you encounter substantial damage, consider whether sharpening is a viable option or if opting for a replacement is more practical. Once the drill bit is clean and securely clamped in place, you’re ready to proceed with sharpening, setting the stage for a successful and efficient process that prolongs the life of your valuable drill bits.
Importance of Cleaning and Inspecting the Bit
Cleaning and inspecting the drill bit represent essential preliminary steps before sharpening. Cleaning eliminates contaminants that could disrupt the sharpening process or damage the grinding wheel. Ensuring the bit is free from dirt and debris creates an optimal environment for sharpening. Simultaneously, inspecting the drill bit holds significant value.
Through careful examination, you can assess its overall condition and detect any substantial issues that might impact its effectiveness or longevity. This proactive methodology empowers you to go with informed choices, especially if you discover cracks, significant wear, or other forms of damage. Early detection empowers you to determine whether sharpening is a viable solution or if replacing the bit is the more pragmatic.
Setting up the Grinder
Preparing the grinder correctly is pivotal to achieving precise and effective drill bit sharpening. Here’s how to set up the hero:
- Stable Base: Ensure the bench grinder is securely mounted to a sturdy workbench or stand. This stability is crucial to prevent vibrations that could affect the accuracy of the sharpening.
- Adjust the Tool Rest: Position the tool rest, the support that holds the drill bit, to the correct angle for the drill bit you are sharpening. The tool rest should be close to the grinding wheel but not touching. Most drill bits have a standard point angle of 118 degrees for general use.
- Check Grinder Speed: Verify that the grinder is operating at the correct speed. Bench grinders typically run at a specific rotational speed, as indicated on the grinder’s label. Ensure it’s within the recommended range for your grinding wheel.
- Install the Proper Grinding Wheel: If necessary, replace the grinding wheel with one suitable for sharpening drill bits. Grinding wheels come in various grit sizes, so select one that matches your needs. Coarser grits remove material more quickly, while finer grits provide a smoother finish.
Significance of Adjusting the Grinder’s Settings
Adjusting the grinder’s settings is critical because it straightforwardly impacts the precision and nature of the drill bit sharpening process. Proper setup ensures you achieve the desired point angle and sharpness while minimizing the risk of overheating or damaging the bit.
- Tool Rest Angle: The tool rest angle determines the point angle of the sharpened drill bit. Setting it correctly, typically to the standard 118 degrees, ensures that the bit’s cutting edges meet at the correct angle for optimal drilling performance. Incorrect angles can result in inefficient drilling and reduced bit lifespan.
- Grinder Speed: Operating the grinder correctly is vital to prevent overheating the drill bit during sharpening. Overheating can cause the bit’s metal to lose its temper and become less effective. It’s crucial to adhere to the manufacturer’s recommended speed range for the specific grinding wheel.
- Grinding Wheel Selection: Choosing the right grinding wheel grit size is essential for achieving the desired level of sharpness. Coarse grits remove material rapidly, suitable for restoring heavily worn bits, while finer grits provide a smoother edge finish. Selecting the appropriate wheel ensures efficient material removal while maintaining bit integrity.
Sharpening Process
Sharpening a drill bit demands precision and careful execution. Begin by securely positioning the drill bit in the tool rest or jig, ensuring it aligns with the grinding wheel. Hold the bit firmly with both hands to prevent any movement during the sharpening process. Next, maintain the correct angle for the drill bit’s point, typically around 118 degrees for general-purpose bits.
Apply even and gentle pressure as you initiate grinding, moving the bit from side to side while sustaining the desired angle. Keeping the bit in continuous motion across the wheel is crucial to prevent uneven wear. Proceed with grinding until you attain the desired sharpness, periodically inspecting your progress to ensure uniformity.
Tips for Achieving a Sharp and Even Edge
Consistency plays a pivotal role in achieving a sharp and even edge. Maintain a steady angle and pressure throughout the sharpening process, as any deviations can result in uneven borders.
To prevent overheating and maintain the bit’s temper, dip it in water or use a lubricating oil during sharpening. Continuous checks of the drill bit are essential to monitor progress, ensuring both cutting edges wear evenly and the point angle remains consistent.
Avoid excessive pressure on the grinding wheel, allowing it to perform the work with a gentle yet consistent hand. As you approach the desired sharpness, reduce stress and make a few passes to create a fine edge, contributing to a sharp, smooth-cutting surface. Finally, maintain balance by grinding both sides evenly to prevent wobbling issues during drilling.
Checking Sharpness
To gauge the sharpness of your sharpened drill bit, undertake the following assessment. Begin with a visual inspection, scrutinizing the drill bit’s cutting edges.
An adequately sharpened bit exhibits symmetrical cutting surfaces that meet at the prescribed point angle, typically around 118 degrees. Run your fingernail gently along these edges; a sharp bit will catch slightly on your nail, providing tactile feedback.
Further sharpening may be necessary if the bit feels dull or doesn’t catch. Conduct a test drilling operation in a scrap material piece to make a practical evaluation.
A well-sharpened bit should cut smoothly, requiring minimal effort to create clean and precise holes. If the bit struggles or yields jagged holes, it requires additional sharpening.
Guidance on Re-sharpening if Necessary
If the drill bit falls short in sharpness assessments, it’s prudent to proceed with re-sharpening to optimize its drilling performance. Return to the sharpening process, carefully maintaining the correct angle and applying consistent pressure.
Follow the steps in the sharpening process section, ensuring even wear on both cutting edges and preserving the desired point angle. Frequent testing and re-sharpening, as required, will keep your drill bits in prime condition, enabling them to deliver precise and efficient drilling results consistently.
Maintenance
Importance of Regular Maintenance for Drill Bits
Regular maintenance for drill bits ensures their longevity and consistent performance. Care serves to preserve the sharpened edges, prevent premature wear, and enhance the overall functionality of the drill bits.
Without proper upkeep, even the sharpest drill bits can deteriorate quickly, leading to inefficiencies during drilling operations and potentially rendering them unusable. Therefore, routine maintenance is not merely beneficial but necessary to safeguard your investment in sharpened drill bits.
Offer Tips for Extending the Life of Sharpened Drill Bits
To prolong the lifespan of your sharpened drill bits and maximize their effectiveness, consider the following tips:
- Proper Storage: Store your drill bits in a dedicated case or organizer to protect them from damage, moisture, and dust. This prevents corrosion and ensures they remain in optimal condition between uses.
- Regular Cleaning: After each use, clean your drill bits to remove debris, chips, or residue. Use a wire brush or a specialized bit-cleaning tool to maintain clean cutting edges.
- Avoid Excessive Heat: While drilling, use cutting fluid or lubricating oil to reduce friction and prevent overheating. Excessive heat can temper the metal and decrease the bit’s sharpness.
- Use the Right Bit for the Job: Match the drill bit type to the material you’re working with. Using the wrong bit can cause excessive wear and diminish its lifespan.
- Inspect Before Use: Inspect your drill bit before each drill task for any signs of damage or dullness. If you notice issues, address them promptly through re-sharpening or replacement.
- Regular Sharpening: Maintain a schedule for sharpening your drill bits as needed. A sharp bit performs better and experiences less wear and tear during use.
Troubleshooting
Common Issues That May Arise During the Sharpening Process
Several common issues may present throughout the drill bit sharpening process, each requiring specific attention. Overheating is a primary concern, where excessive friction generates heat, potentially tempering the drill bit’s metal and diminishing its drilling efficacy.
Uneven grinding can result in irregular cutting edges, leading to drilling inefficiencies. Excessive material removal during sharpening can reduce the drill bit’s lifespan and compromise precision in drilling tasks.
Solutions and Tips for Overcoming These Challenges
Overheating:
Solution: To mitigate overheating, employ a lubricating oil or coolant to maintain the drill bit’s coolness during sharpening. Moreover, exercise a gentle touch and avoid extended contact with the grinding wheel. Keeping a steady yet unhurried pace during sharpening is advised to reduce heat buildup.
Uneven Grinding:
Solution: Counter uneven grinding by meticulously adhering to a consistent angle and pressure throughout the sharpening process. It’s essential to regularly inspect the drill bit’s progress to ensure uniform wear on both cutting edges.
Excessive Material Removal:
Solution: To avert excessive material removal, exercise prudence when applying pressure and let the grinding wheel perform the bulk of the work. As you approach the desired sharpness, lighten the pressure to achieve a finer edge without unwarranted material loss. Patience is critical; making multiple passes with reduced pressure yields a superior result.
Conclusion
Mastering the art of sharpening a drill bit with a grinder is an invaluable skill for any DIY enthusiast, woodworker, or metalworker. Following the step-by-step guide outlined earlier, you can breathe new life into dull and inefficient drill bits, ensuring your projects proceed smoothly and efficiently.
Remember to prioritize safety throughout the process by wearing appropriate protective gear and adhering to safety guidelines.
Regular maintenance and proper sharpening of drill bits save you money by extending the life of your tools and contribute to the quality of your work. Whether you are boring openings in wood, metal, or other materials, a sharp drill bit will produce cleaner and more precise results, making your projects more satisfying and professional-looking.