
Are you a common Saw user or an enthusiast who wants to know how to use the Dewalt Table Saw? This guide aims to give you a comprehensive understanding of How to use Dewalt Table Saw?
The Dewalt Table Saw is highly regarded for its precision and durability, making it a popular choice among those passionate about woodworking.
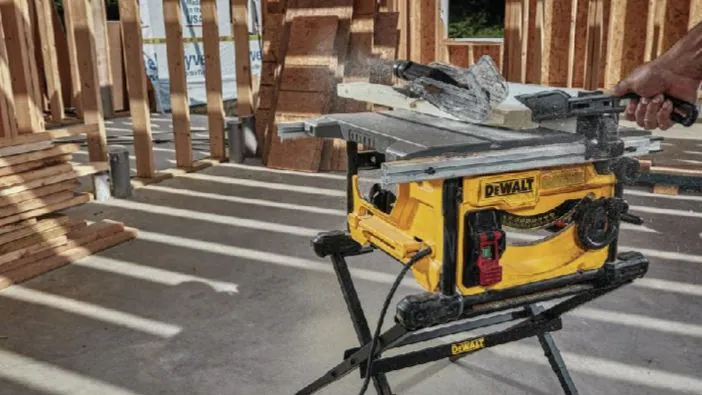
Overview of the Dewalt Table Saw
Are you interested in learning about the Dewalt Table Saw and its features? Renowned for their durability and performance, Dewalt table saws are popular among professionals and hobbyists. Whether you’re a seasoned woodworker or a beginner, understanding the features and functionality of the Dewalt Table Saw is essential to ensure safe and accurate cuts.
Specifications
- The Dewalt Table Saw comes in different models, each with unique specifications. However, common features and specifications you can expect to find include:
- Motor Power: Dewalt table saws typically boast a robust motor ranging from 15 amps to 20 amps, providing ample cutting power for various applications.
- Blade Size: The blade size may vary, but most Dewalt table saws accommodate 10-inch blades commonly used for woodworking projects.
- Rip Capacity: The rip capacity refers to the maximum distance between the blade and the fence. Dewalt table saws offer different rip capacities, allowing you to effectively handle materials of varying sizes.
- Table Size and Material Support: The table size determines the workspace available. Dewalt table saws feature spacious tables with sturdy construction, providing stability and support for different materials.
- Safety Features: Dewalt prioritizes Safety, and their table saws often include blade guards, anti-kickback pawls, and a riving knife to prevent accidents and ensure operator safety.
Key Features
- Dewalt table saws boast various features designed to enhance performance and user experience. Some notable features include:
- Fence System: Dewalt’s table saws have a robust fence system that enables precise and consistent cuts by ensuring accurate alignment and measurement.
- Dust Collection: Many Dewalt table saw models offer effective dust collection systems, keeping your workspace clean and reducing airborne particles.
- Portability: Some Dewalt table saws are designed with portability in mind, featuring foldable stands or compact designs for easy transportation and storage.
Benefits and Applications
- Woodworking Projects: From building furniture to crafting cabinetry, Dewalt table saws provide the precision and power needed for woodworking projects of all sizes.
- Home Improvement and DIY: Whether installing hardwood flooring, building a deck, or making custom shelves, a Dewalt table saw can help you achieve professional-quality results.
- Construction and Contracting: Professionals in the construction and contracting industry rely on Dewalt table saws for their durability, accuracy, and versatility on job sites.
The Dewalt Table Saw is a highly regarded tool in the woodworking industry due to its powerful motor, precision cutting capabilities, and user-friendly features. Always prioritize Safety by following proper operating procedures and utilizing the provided safety features.
Adjusting the Blade Height and Angle
Adjusting the blade height and angle on a Dewalt Table Saw is crucial for achieving various cuts in woodworking projects. Whether you need to make rip cuts, crosscuts, bevels, or mitres, understanding how to adjust the blade height and angle will empower you to create precise and customized cuts for your projects.
1. Adjusting the Blade Height
- Safety First: Before adjusting the blade height, ensure the table saw is turned off and unplugged. This step is essential to prevent accidental start-ups and ensure your Safety.
- Locate the Elevation Handwheel or Crank: On the Dewalt Table Saw, you will find an elevation handwheel or crank near the front or side of the saw. This mechanism allows you to raise or lower the blade.
- Raise or Lower the Blade: Turn the handwheel or crank clockwise to raise the blade. To lower the blade, turn it counterclockwise.
- Blade Height Alignment: Use a combination square or a specialized blade alignment tool to ensure the blade is properly aligned. Adjust the blade height until it aligns perfectly with the reference surface of the tool.
2. Adjusting the Blade Angle
- Safety First: As with adjusting the blade height, make sure the table saw is turned off and unplugged to avoid accidents.
- Locate the Bevel Adjustment Mechanism: On the Dewalt Table Saw, the bevel adjustment mechanism is typically found at the front or rear of the saw near the blade housing. It may consist of a bevel handwheel, bevel lock, and scale.
- Unlock the Bevel Lock: Depending on the model, you may need to loosen the bevel lock to allow the blade to tilt.
- Tilt the Blade to the Desired Angle: Turn the bevel handwheel clockwise or counterclockwise to tilt the blade to the desired angle. The bevel scale on the table saw will indicate the angle of the blade.
- Lock the Bevel Angle: Once you have set the desired angle, tighten the bevel lock to secure the blade and prevent any movement during operation.
Adjusting the blade height and angle on a Dewalt Table Saw is fundamental for achieving precise and customized cuts in woodworking projects. Following the proper procedures and safety precautions, you can confidently raise or lower the blade height and tilt the blade to different angles.
Mastering these adjustments will allow you to unleash the full potential of your Dewalt Table Saw and create professional-quality cuts for your woodworking endeavours. Remember to always prioritize Safety and refer to the manufacturer’s instructions for your specific model of Dewalt Table Saw.
3. Installing and changing the saw blade
Installing and changing the saw blade on your Dewalt Table Saw is essential for maintaining optimal cutting performance and versatility. Whether you need to replace a worn-out blade or switch to a different type of blade for a specific task, understanding the proper procedure will ensure smooth operation and accurate cuts.
Safety Precaution
Ensure the table saw is turned off and unplugged before installing or changing the saw blade. This step is crucial to prevent any accidental start-ups and ensure your Safety.
4. Removing the Existing Saw Blade
- Locate the blade arbour lock near the blade housing on the Dewalt Table Saw.
- Engage the blade arbour lock by pressing it down or following the manufacturer’s instructions. This will prevent the blade from spinning while you remove the arbour nut.
- Using a wrench or the provided arbour nut wrench, turn the arbour nut counterclockwise to loosen it. Remove the arbour nut, washer, and other components securing the blade to the arbour.
- Carefully remove the existing saw blade from the arbour, ensuring not to touch the sharp teeth.

5. Installing a New Saw Blade
- Before installing a new blade, ensure it is compatible with your Dewalt Table Saw and suitable for the task.
- Inspect the arbour for any debris or buildup. Clean it if necessary to ensure smooth operation.
- Place the new saw blade onto the arbour, ensuring the teeth are facing in the correct direction as the manufacturer indicates.
- Place the washer and the arbour nut onto the arbour, ensuring they are properly aligned with the blade.
- Using a wrench or the provided arbour nut wrench, tighten it clockwise, ensuring it is securely fastened. Be cautious not to overtighten, as this can cause damage.
6. Verifying Blade Alignment
- Once the new blade is installed, visually inspect it to ensure it is properly aligned with the table saw’s components.
- Check for any wobbling or misalignment of the blade. If you notice any issues, stop immediately and recheck the installation steps.
- Rotate the blade manually to ensure it spins freely and smoothly without obstructions or interference.
Installing and changing the saw blade on your Dewalt Table Saw is necessary to maintain optimal cutting performance and versatility. Following the proper safety precautions and step-by-step procedures outlined above, you can safely and effectively install and change the saw blade as needed. Always consult the manufacturer’s instructions and use the appropriate blades for your woodworking tasks.
7. Turning on the table saw and understanding the controls
Turning on a table saw and understanding its controls are essential before using the machine for any woodworking project. By following proper procedures and becoming familiar with the controls, you can ensure a safe and efficient operation, allowing you to make accurate cuts with your table saw.
Safety Precautions
- Before turning on the table saw, wear appropriate personal protective equipment (PPE), including safety glasses, hearing protection, and possibly a dust mask or respirator.
- Ensure the table saw is placed on a stable and level surface to prevent any wobbling or instability during operation.
- Keep the workspace clear of clutter and ensure there are no obstructions around the table saw that may interfere with its operation.
8. Powering On the Table Saw
- Locate the power switch on the table saw
- double-check the power cord
- Once you have confirmed the power connection, press or toggle the power switch to the “On” position. This will activate the electrical power to the table saw.
9. Understanding the Controls
- Blade Height Adjustment: Most table saws feature a handwheel or crank that raises or lowers the blade to the desired height. Turning the handwheel clockwise raises the blade while counterclockwise lowers the blade.
- Blade Tilt Adjustment: Depending on your table saw model, a handwheel or lever may allow you to tilt the blade to the desired angle.
- Fence Adjustment: The fence is an essential component that provides support and helps guide the cut material. Familiarize yourself with the fence adjustment mechanism on your table saw, including locks, clamps, or handwheels for precise positioning.
- On/Off Switch: The on/off switch controls the power supply to the table saw. Understanding the location and operation of the on/off switch is crucial for safe and efficient use.
Testing and Familiarization
- After turning on the table saw, listen for unusual noises or vibrations.
- With the table saw running, observe the rotation of the blade and ensure it spins smoothly without any wobbling or vibrations.
- Practice adjusting the blade height, tilt, and fence position to familiarise yourself with the controls and their operation. This will help you gain confidence and precision in using the table saw.
Turning on a table saw and understanding its controls are fundamental steps in operating the machine safely and effectively. Following proper safety precautions, powering the saw, and familiarizing yourself with the controls, you can confidently use your table saw for woodworking projects. Always prioritize Safety and consult the manufacturer’s instructions for your specific table saw model.
10. Making rip cuts using the fence
Making rip cuts is a common woodworking task, and using the fence as a guide on a table saw is an effective method for achieving straight and consistent cuts. This section will discuss the steps and techniques involved in making rip cuts using the fence, enabling you to accomplish this essential woodworking operation.
Setting up the Fence
- Locate the fence on your table saw, which is typically a long, straight guide parallel to the blade.
- Position the fence according to the desired width of your rip cut. Measure and mark the desired distance from the blade to the fence using a tape measure or a reliable fence positioning tool.
- Adjust the fence by loosening the locks or clamps, aligning it with the marked measurement, and securely tightening the locks or clamps.
Aligning the Workpiece
- Select the material you wish to rip and inspect for defects or irregularities. Ensure that the workpiece is free from any foreign objects or obstructions.
- Position the workpiece on the table saw’s surface against the fence. The edge of the workpiece that will be cut should be flush against the fence, ensuring a straight and accurate rip cut.
Making the Rip-Cut
- Ensure that you are standing in a comfortable and balanced position with your body position to the side of the blade, away from the potential kickback zone.
- Turn on the table saw and let the blade reach full speed before cutting.
- Using both hands, gently push the workpiece along the table saw’s surface, firmly pressing against the fence throughout the cut. Apply steady and even pressure to guide the workpiece through the blade.
- Maintain control and avoid forcing or pushing the material too quickly, which can cause kickback or result in an uneven cut.
- Continue pushing the workpiece until the length has passed beyond the blade.
Making rip cuts using the fence on a table saw is a fundamental woodworking technique. You can achieve precise and consistent rip cuts by properly setting up the fence, aligning the workpiece, and following safe-cutting practices.
With practice, you will develop the skills necessary to create accurate and professional-looking rip cuts for your woodworking projects.
11. Making crosscuts using the mitre gauge
Making accurate crosscuts is an essential woodworking skill, and a mitre gauge is a valuable tool for achieving precise angles and cuts. This section will discuss the steps and techniques involved in making crosscuts using the mitre gauge on a table saw, allowing you to create clean and precise cuts for your woodworking projects.
Setting up the Miter Gauge
- Ensure the table saw is turned off and unplugged before adjusting or installing the mitre gauge.
- Locate the mitre gauge slot on the table saw’s surface. It is typically a rectangular groove positioned perpendicular to the blade.
- Insert the mitre gauge into the slot, ensuring it fits securely and slides smoothly without wobbling or looseness.
- Adjust the mitre gauge to the desired angle for your crosscut. Most mitre gauges have preset detents for common angles, while others allow precise angle adjustments. Align the gauge with the desired angle and lock it using the provided mechanism.

Aligning the Workpiece
- Select the material you wish to crosscut and inspect for defects or irregularities. Ensure that the workpiece is free from any foreign objects or obstructions.
- Place the workpiece against the mitre gauge, positioning it securely and ensuring it is flush against the gauge’s fence.
- Hold the workpiece firmly against the mitre gauge’s fence with one hand while keeping your other hand away from the blade and the path of the cut.
Making the Crosscut
- Ensure that you are standing in a comfortable and balanced position with your body position to the side of the blade, away from the potential kickback zone.
- Turn on the table saw and let the blade reach full speed before cutting.
- Using both hands, gently push the workpiece along the mitre gauge, firmly pressed against the gauge’s fence throughout the cut. Apply steady and even pressure to guide the workpiece through the blade.
- Maintain control and avoid forcing or pushing the material too quickly, which can cause kickback or result in an uneven cut.
- Continue pushing the workpiece until the entire cut is complete, keeping your hands clear of the blade’s path.
Making crosscuts using the mitre gauge on a table saw allows you to achieve precise and angled cuts for your woodworking projects. You can create clean and accurate crosscuts by properly setting up the mitre gauge, aligning the workpiece, and following safe-cutting practices.
Remember to prioritize Safety by wearing appropriate protective equipment and adhering to the manufacturer’s guidelines for your specific table saw model. With practice, you will develop the skills necessary to make professional-looking crosscuts using the mitre gauge on your table saw.
12. Making bevel cuts using the tilt mechanism
Making bevel cuts is a valuable woodworking skill, and using the tilt mechanism on a table saw enables you to achieve angled cuts with precision. This section will discuss the steps and techniques of making bevel cuts using the tilt mechanism on a table saw, helping you add versatility to your woodworking projects.
Safety Precautions
- Before making any adjustments or operating the table saw, ensure it is turned off and unplugged.
- Wear appropriate personal protective equipment (PPE), including safety glasses and possibly a dust mask or respirator, to protect yourself from potential hazards.
Adjusting the Tilt Mechanism
- Locate the tilt mechanism on your table saw. It is usually a handwheel, lever, or crank located near the blade housing or at the front or rear of the saw.
- Identify the direction of rotation required to achieve the desired bevel angle. Refer to the manufacturer’s instructions for the specific mechanism of your table saw.
- Adjust the tilt mechanism by turning the handwheel, moving the lever, or using the crank to tilt the blade to the desired angle. The angle may be indicated on a scale near the tilt mechanism or the table saws surface.
Aligning the Workpiece
- Select the material you wish to make a bevel cut on and inspect it for any defects or irregularities. Ensure that the workpiece is free from any foreign objects or obstructions.
- Place the workpiece on the table saw’s surface, positioning it against the fence or mitre gauge, depending on the desired cut and the guidance required.
- Ensure that the portion of the workpiece to be cut is properly supported and stable, either with the assistance of additional supports or by adjusting the table saw’s extension wings.
Making the Bevel Cut
- Ensure that you are standing in a comfortable and balanced position with your body position to the side of the blade, away from the potential kickback zone.
- Turn on the table saw and let the blade reach full speed before cutting.
- Using both hands, gently push the workpiece through the blade, maintaining control and pressure against the fence or mitre gauge as necessary.
- Keep a steady pace while feeding the workpiece through the blade, allowing the blade to cut through the material smoothly.
- Exercise caution and maintain control over the workpiece as it exits the blade to prevent kickback or binding.
Safety and Clean-up
- Inspect the cut for accuracy and smoothness, making necessary adjustments to the bevel angle if required.
- Remove any debris or waste from the table saw and the work area to maintain a clean and safe workspace.
Making bevel cuts using the tilt mechanism on a table saw allows you to achieve angled cuts with precision and versatility. By following the proper safety precautions, adjusting the tilt mechanism accurately, and aligning the workpiece correctly, you can create clean and accurate bevel cuts for your woodworking projects.
Remember to prioritize Safety, wear appropriate personal protective equipment, and consult the manufacturer’s instructions for your specific table saw model. With practice, you will develop the skills necessary to make professional-looking bevel cuts using the tilt mechanism on your table saw.
13. Using the table saw for dado cuts and rabbets
Dado cuts and rabbets are common woodworking techniques used to create joints, grooves, or recesses in wood. A table saw can be a valuable tool for making these cuts accurately and efficiently.
Safety Precautions
- Before using the table saw, ensure it is turned off and unplugged. This step is crucial to prevent accidental start-ups while setting up or making adjustments.
- Wear appropriate personal protective equipment (PPE), including safety glasses, hearing protection, and possibly a dust mask or respirator, to protect yourself from potential hazards.
Setting up the Dado Stack
- Choose a dado stack suitable for the desired width and depth of the cut. A dado stack consists of two outer blades and a series of chippers that can be adjusted to create different-width dado cuts.
- Install the dado stack on the table saw, following the manufacturer’s instructions and ensuring the blades and chippers are securely in place.
- Adjust the width of the dado stack by adding or removing chippers to match the desired width of the dado cut. Secure the chippers and blades tightly.
Making Dado Cuts
- Mark the location and width of the dado cut on the workpiece, ensuring it is aligned with the intended joint or groove.
- Set the table saw fence to the desired distance from the blade, ensuring it provides proper support and guidance for the workpiece.
- Adjust the blade height to match the desired depth of the dado cut. Start with a shallower cut and make multiple passes to achieve the desired depth if needed.
- Hold the workpiece securely against the fence and use a push stick or push block to guide it through the blade, ensuring your hands are clear of its path.
- Push the workpiece through the blade in a steady and controlled manner, maintaining even pressure against the fence throughout the cut.
- Repeat the process for additional dado cuts as required, adjusting the fence and blade height.
Making Rabbet Cuts
- Set the table saw fence to the desired width of the rabbet cut, ensuring it provides proper support and guidance for the workpiece.
- Adjust the blade height to match the rabbet cut’s desired depth, considering the workpiece’s thickness.
- Hold the workpiece securely against the fence and use a push stick or push block to guide it through the blade, ensuring your hands are clear of its path.
- Push the workpiece through the blade in a steady and controlled manner, maintaining even pressure against the fence throughout the cut.
- Repeat the process for additional rabbet cuts, adjusting the fence and blade height.
Safety and Clean-up
- Inspect the cuts for accuracy and smoothness, making necessary adjustments or refinements.
- Remove any debris or waste from the table saw and the work area to maintain a clean and safe workspace.
Using a table saw for making dado cuts, and rabbets can greatly enhance the quality and versatility of your woodworking projects. You can create clean and precise dado cuts and rabbets by following the proper safety precautions, accurately setting up the dado stack, and aligning the workpiece correctly.
Remember to prioritize Safety, wear appropriate personal protective equipment, and consult the manufacturer’s instructions for your specific table saw model. With practice, you will develop the skills necessary to make professional-looking joints and grooves using a table saw.