
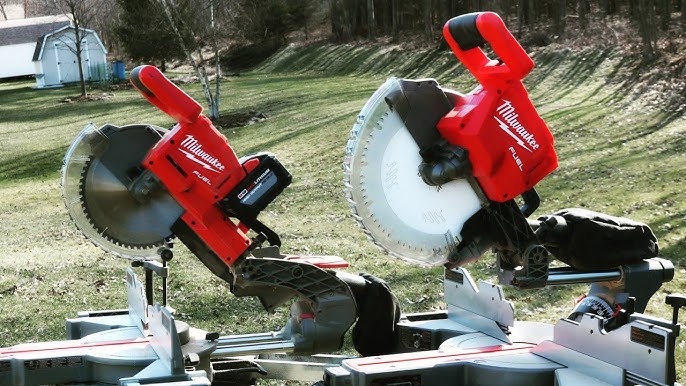
Milwaukee miter saws are renowned for their precision and durability, making them essential tools for woodworking and construction enthusiasts. However, like any mechanical device, even the most reliable equipment can encounter issues over time.
This guide will delve into joint Milwaukee miter saw problems users may encounter during their woodworking projects. Whether you’re an old pro or a Do-It-Yourself devotee, understanding and addressing these challenges can help you maintain your miter saw’s performance and extend its lifespan. So, let’s explore the world of Milwaukee miter saw problems and discover practical solutions to keep your projects on track.
Common Milwaukee Miter Saw Problems
Milwaukee miter saws are known for their quality and performance, but like any power tool, they can encounter issues over time. Here are some common problems you may encounter with a Milwaukee miter saw and potential solutions:
1. Inaccurate Cuts:
- Issue: Your miter saw needs to make precise cuts, resulting in angles or lengths that are off.
- Solution:
- Check the blade for sharpness and alignment.
- Ensure the miter and bevel angles are correctly set and locked in place.
- Make sure the workpiece is held securely against the fence and bed.
2. Blade Wobble or Vibration:
- Issue: The blade wobbles or vibrates excessively during operation.
- Solution:
- Inspect the blade for damage or wear and replace if necessary.
- Ensure it’s tightened adequately onto the arbor.
- Check the arbor for any defects or foreign objects that may cause wobbling.
3. Blade Stuck or Won’t Raise/Lower:
- Issue: The blade is stuck in one position and won’t raise or lower.
- Solution:
- Lubricate the blade raising/lowering mechanism with a suitable lubricant.
- Check for debris or sawdust buildup around the raising/lowering components.
- If the issue persists, consult the user manual or contact Milwaukee’s customer support.
4. Dust Collection Problems:
- Issue: The dust collection system needs to capture sawdust and debris more effectively.
- Solution:
- Ensure the dust collection port is connected correctly and not clogged.
- Check the dust bag or vacuum system for blockages or full bags.
- Consider moving up to a more proficient residue assortment framework if necessary.
5. Motor Overheating or Overload:
- Issue: The motor overheats or experiences frequent overloads.
- Solution:
- Allow the motor to cool down between heavy use.
- Ensure the workpiece is not binding the blade, which can lead to overloading.
- Check for any obstructions in the blade or motor housing. If the problem persists, consult the user manual or seek professional servicing.
6. Electric Brake Malfunction:
- Issue: The electric brake, which is supposed to stop the blade quickly, doesn’t work as expected.
- Solution: Inspect the brake mechanism for damage or wear. If the brake is not functioning correctly, contact Milwaukee’s customer support or a qualified repair technician.
7. Laser Guide Not Working:
- Issue: If your Milwaukee miter saw has a laser guide, it may stop working.
- Solution: Check the laser’s power source and ensure it’s properly connected. If the laser malfunctions, consult the user manual for troubleshooting steps or contact Milwaukee’s customer support.
8. Power Cord or Switch Problems:
- Issue: Issues with the power cord or switch, such as intermittent power or failure to start.
- Solution:
- Check the power cord for damage or fraying and replace it if necessary.
- Inspect the switch for defects or loose connections.
- Ensure the saw is correctly plugged into a functioning electrical outlet.
- For persistent issues or problems that you cannot resolve through basic troubleshooting, it’s advisable to consult the user manual or contact Milwaukee’s customer support for guidance and potential repairs. Regular maintenance, such as keeping the saw clean and well-lubricated, can also help prevent many common problems.
Miter and Bevel Angle Adjustments
Miter and bevel angle adjustments are essential functions of a miter saw, allowing you to make precise and angled cuts in various woodworking and construction projects. Here’s an explanation of miter and bevel angle adjustments:
Miter Angle Adjustment:
What Is a Miter Angle? A miter angle refers to the angle at which the saw blade is tilted horizontally relative to the workpiece. It allows you to make cuts angled across the material’s width.
How to Adjust the Miter Angle?
- Unlock the miter adjustment on your miter saw. This is usually a knob or lever near the base of the saw.
- Rotate the miter saw’s base to the desired angle. Most miter saws have positive stops at joint angles (e.g., 45 degrees, 30 degrees) to make it easier to set precise angles.
- Lock the miter adjustment securely in place.
Common Uses: Miter angle adjustments are used for making angled cuts for tasks such as framing, creating corner joints, and installing moldings.
Bevel Angle Adjustment:
What Is a Bevel Angle? A bevel angle refers to the angle at which the saw blade tilts vertically relative to the workpiece. It allows you to make cuts angled through the material’s thickness.
How to Adjust the Bevel Angle:
- Unlock the bevel adjustment on your miter saw. This is typically a lever or knob near the back of the saw.
- Tilt the saw’s blade to the desired bevel angle. Most miter saws allow you to tilt the blade to the left for bevel cuts. Some advanced models also tilt to the right.
- Lock the bevel adjustment securely in place.
Common Uses: Bevel angle adjustments are used to create beveled edges on trim pieces, make compound cuts, and achieve intricate joinery work.
Compound Angle Adjustments:
In some cases, you may need to simultaneously make miter and bevel angle adjustments, known as compound angle cuts. Compound angle adjustments are necessary for tasks like creating complex joints, crown molding installations, and other intricate woodworking projects.
When making compound angle cuts:
- First, adjust the miter angle to the desired angle.
- Then, adjust the bevel angle to the desired angle.
- Lock both adjustments securely in place.
Following safety precautions and using precision when making miter and bevel angle adjustments is crucial to achieve accurate and safe cuts. Refer to your miter saw’s user manual for specific instructions and guidelines on setting angles and performing compound angle cuts.
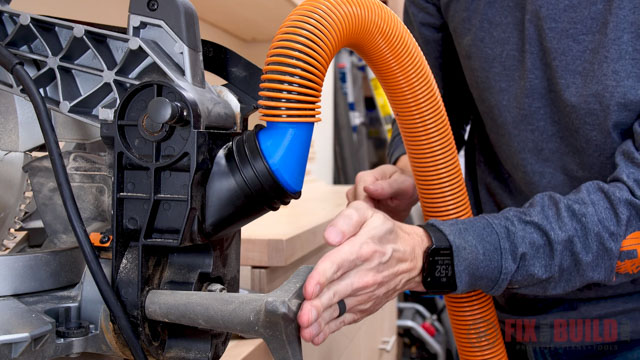
Dust Collection Problems in Miter Saw
Dust collection problems in a miter saw can be frustrating and lead to a messy workspace, reduced visibility, and potential health hazards from inhaling fine dust particles. Here are common dust collection issues and how to address them:
1. Poor Collection Efficiency:
- If your miter saw dust collection system needs to capture dust effectively, check if the dust bag or collection port is connected correctly and not clogged.
- Ensure there are no leaks in the dust collection system.
- If the saw has a small dust port, consider upgrading to a larger one for better performance.
2. Dust Spillage:
- Dust can spill out of the miter saw’s collection bag or port, creating a mess.
- Ensure the pack or holder is safely appended and adequately sealed.
- Empty it regularly to prevent overfilling, which can lead to dust escaping.
3. Inadequate Suction:
- If your miter saw has a built-in dust collection system but isn’t providing sufficient suction, check the filter and dust collection bag for clogs. Clean or replace them as needed.
- You can upgrade to a more powerful shop vacuum or dust extractor for better suction.
4. Limited Range:
- Some miter saws have a limited dust collection range, resulting in dust being thrown beyond the collection area.
- Add a secondary dust hood or attachment behind the saw blade to capture more dust.
5. Dust Blockage:
- Dust can accumulate inside the miter saw’s blade guard, blocking the collection path.
- Regularly clean the blade guard and the area around the blade to prevent blockages.
6. Hose Kinks and Obstructions:
- Check the hose for kinks or obstructions if using an external dust collection system.
- Ensure the hose is the correct diameter and length for efficient dust extraction.
- Straighten any kinks and remove any clogs.
7. Poorly Designed Dust Chute:
- Some miter saws have poorly designed dust chutes that don’t effectively direct dust into the collection system.
- You can improve this by adding a custom dust chute or using a commercially available one designed for your saw model.
8. Operator Technique:
- How you operate the miter saw can affect dust collection.
- Make slow and controlled cuts to minimize the generation of airborne dust.
- Allow the blade to come to a complete stop before lifting it out of the cut to prevent dust from being thrown.
9. Regular Maintenance:
- To prevent dust collection problems, perform regular maintenance on your miter saw.
- This includes cleaning the collection system, inspecting hoses for wear or damage, and replacing filters and bags as needed.
Addressing these dust collection issues will help maintain a clean and healthy workspace using your miter saw. Remember that a combination of measures, including proper setup, regular maintenance, and suitable dust collection equipment, may be needed to achieve efficient dust extraction.
Blade Dullness and Wear Problems in Miter Saw
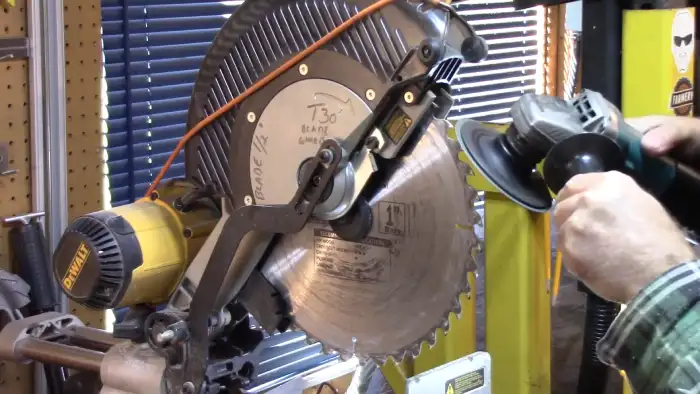
Blade dullness and wear are common issues that can affect the performance of a miter saw. Here’s an explanation of these problems and how to address them:
Blade Dullness:
Causes: Blade dullness occurs over time as the cutting edges of the saw blade wear down due to friction, heat, and contact with various materials. Cutting abrasive materials like hardwoods, laminates, or metals can accelerate blade dullness.
Symptoms: Signs of a dull blade include rough or burnished cuts, increased effort required to make cuts, excessive splintering or tear-out on the workpiece, and slower cutting speeds.
Solution: To address blade dullness, you can either sharpen the blade or replace it with a new one. A professional should do sharpening unless you have experience and the proper equipment. Otherwise, opt for a high-quality replacement blade that matches your cutting needs.
Blade Wear Problems:
Uneven Wear: Blades can wear unevenly, leading to an imbalance in the saw. This can cause vibrations and poor cut quality. Uneven wear may result from cutting materials with embedded debris, like nails or screws, or accidental contact with complex objects.
Warped Blade: Excessive heat or incorrect storage can cause a blade to warp. A warped blade won’t produce accurate cuts and can be dangerous.
Chipped Teeth: Chipped or damaged teeth can compromise the blade’s cutting performance. This can happen if the blade strikes a foreign object or encounters excessive stress during cutting.
Addressing Blade Wear Problems:
- Inspect the Blade: Regularly inspect your miter saw blade for signs of wear, uneven wear, warping, or damaged teeth.
- Clean the Blade: Remove resin, sap, or debris from the blade’s teeth using a blade cleaning solution or a specialized tool.
- Replace Damaged Blades: If you notice chipped or damaged teeth, replace the blade immediately. Damaged blades are unsafe and produce poor-quality cuts.
- Balancing: Consider having the blade professionally sharpened and balanced to address uneven wear or balance issues. Some blades have removable inserts or teeth that can be replaced.
- Proper Use: To prevent wear problems, always use the appropriate blade for your cutting material, and avoid cutting through materials with hidden metal objects.
- Cooling and Lubrication: Use a blade lubricant or wax stick to reduce heat and friction during cutting, which can prolong blade life.
- Storage: Store your blades properly when not in use. Please keep them dry and protect them from rust by applying a light oil coating.
Blade dullness and wear issues in a miter saw can lead to poor cut quality, safety concerns, and reduced lifespan. Regular maintenance, proper blade selection, and safe-cutting practices ensure your miter saw blades remain in good condition and deliver reliable results. When in doubt, replacing a severely worn or damaged blade is often safer and more efficient.
Laser Guide Malfunctions
Laser guide malfunctions in a miter saw can hinder precision and accuracy in your cuts. When troubleshooting these issues, ensure the power source is secure, whether through a plug or charged batteries for cordless models.
Check that you’ve correctly activated the laser using the designated switch or button, referring to the user manual if needed. Dim laser issues might stem from weak batteries, so replace them if necessary. Alignment problems can lead to inaccurate laser guides; calibrate the laser following the manufacturer’s instructions.
Make sure no obstructions or debris are obstructing the laser lens. For intermittent operation, investigate loose connections, damaged wires, or overheating as potential causes. If the laser flickers or fluctuates, inspect the wiring for damage or loose connections and ensure a stable power supply. Permanently on lasers could result from a stuck or malfunctioning switch or wiring issues.
If the laser doesn’t align with the cut line, adjustments may be necessary, so consult your user manual for alignment instructions. Prioritize safety throughout the troubleshooting process, and if you’re uncertain or encounter persistent issues, consider seeking manufacturer support or professional assistance.
Preventative Maintenance of Miter Saw
Preventative maintenance is essential to keep your miter in excellent working condition and broaden its life expectancy. Here are some fundamental support assignments to perform regularly:
Cleaning: Dust and debris can accumulate in and around the miter saw, affecting its performance. Regularly clean the saw, including the blade guard, motor housing, and base, to remove sawdust and dirt. Use compressed air or a brush to clean hard-to-reach areas.
Blade Inspection:
- Check the condition of the saw blade regularly.
- Look for any signs of wear, chipping, or dullness.
- If the blade is damaged or not cutting smoothly, replace it promptly.
Alignment: Ensure the saw blade is aligned correctly with the fence and miter gauge. Misalignment can result in inaccurate cuts. Most miter saws have adjustment screws or knobs to fine-tune the alignment.
Lubrication: Check the moving parts of the miter saw for any signs of excessive friction or stiffness. Lubricate the pivot points and moving parts as the user manual recommends to maintain smooth operation.
Belt and Motor: If your miter saw is belt-driven, inspect the drive belt for wear and tension. Ensure the motor is clean and free from dust buildup, which can lead to overheating.
Safety Features: Test the saw’s safety features, including the blade guard and the trigger switch. Ensure they function correctly and are not damaged or obstructed.
Dust Collection System: Regularly clean or replace the components to maintain effective dust control. A clogged system can reduce visibility and create a messy workspace.
Electrical Connections: Inspect the power cord and plug for any damage, fraying, or exposed wires. Guarantee the electrical associations are secure and free from corrosion.
Bolts and Fasteners: Check all bolts, screws, and fasteners for tightness. Vibration from cutting can cause them to loosen over time. Tighten any that have become loose.
Table Surface: Ensure the miter saw’s table surface is clean and smooth. Sand out any imperfections that may affect the stability of your workpieces.
Storage: If you’re not using the miter saw for an extended period, store it in a dry and relaxed environment to prevent rust and corrosion.
Troubleshooting Tips
Troubleshooting a miter saw is essential to maintain its functionality and safety. If your cuts are inaccurate, check the blade alignment and adjust it following the user manual’s instructions.
Dull blades can lead to rough cuts, so consider sharpening or replacing them as needed. Unusual noises or motor struggles may indicate debris around the motor or blade area, necessitating a thorough cleaning or professional motor inspection.
Ensure effective dust collection to prevent a messy workspace. For sliding compound miter saws, address sluggish sliding by inspecting rails for obstructions and lubricating the sliding mechanism.
Accurate cuts rely on a well-aligned fence, so adjust it to be square with the blade. Troubleshoot power supply issues by checking the cord, outlet, and circuit breaker. Safety features like blade guards should always function correctly, so do not disable them.
Tighten the miter and bevel locks if they’re not holding the saw securely. When cutting dense materials, be cautious of binding and adjust your cutting speed accordingly.
Inspect your saw for loose parts and fasten them securely to minimize vibrations. Finally, consult your user manual and consider seeking professional assistance, prioritizing safety throughout the troubleshooting process.
Conclusion
While Milwaukee miter saws are known for their quality and performance, like any piece of machinery, they may encounter issues over time. These problems range from calibration and alignment issues to electrical and motor-related concerns.
However, users must remember that many of these problems can be resolved through proper maintenance, troubleshooting, and, in some cases, seeking professional repair services.
Regular maintenance, such as blade checks, cleaning, and calibration, can help prevent issues from arising in the first place. Overall, understanding the common problems associated with Milwaukee miter saws and knowing how to address them is essential to keep these versatile tools operating efficiently and effectively for various woodworking and construction projects.