
Are you wondering, “Can I use a miter saw to cut pavers?” If you’ve got a miter saw and some pavers that need trimming, you might be tempted to try it. But before you embark on your DIY project, it’s fundamental to comprehend the capacities and limits of a miter saw for this particular task.
In this guide, we’ll explore whether a miter saw is the right tool for cutting pavers and provide the information you need to make an informed decision. So, let’s discover if your trusty miter saw can handle the challenge of cutting pavers.
Understanding Pavers of miter saw
Understanding using pavers with a miter saw is crucial for achieving accurate and stable cuts, mainly when dealing with delicate or small workpieces.
In this context, Pavers refer to supplementary materials placed under or beside the workpiece to provide support and prevent tear-out or splintering during cutting. Here’s a detailed explanation:
1. Purpose of Pavers
Pavers serve several essential purposes when used in conjunction with a miter saw:
Support: Pavers significantly provide additional support to the workpiece when cutting small or thin materials that might otherwise sag or vibrate during the cut.
Preventing Tear-Out: When making cuts with a miter saw, the rotation of the blade can cause tear-out or splintering on the underside of the workpiece. Placing pavers underneath helps reduce or eliminate this issue by providing solid backing.
Minimizing Chip-Out: For materials like laminate, veneer, or plywood, pavers can prevent chip-out on the top surface, resulting in cleaner cuts.
2. Types of Pavers
Pavers can take various forms and materials, contingent upon the particular necessities of the task and the type of material you’re cutting. Common types of pavers include:
Scrap Wood: Thin strips or wood offcuts are often used as pavers. They can be handily modified to fit the workpiece’s size and shape.
MDF or Plywood: Medium-density fiberboard (MDF) or plywood sheets are excellent choices for pavers when cutting veneered or laminated materials. They offer a smooth, stable surface.
PVC or Plastic Sheets: For materials that might stick to wood or require a non-marring surface, plastic sheets or PVC can be used as pavers.
Clamps or Hold-Downs: In some cases, clamps or hold-downs can serve as pavers by securing the workpiece and preventing it from moving during the cut.
3. How to Use Pavers
Using pavers with a miter saw is relatively straightforward:
- Measure and cut the pavers to the appropriate size to fit under or beside the workpiece. Ensure they are wide enough to provide adequate support.
- Place the pavers on the saw’s table or position them beneath the workpiece, depending on your cut.
- Align the workpiece on the pavers, ensuring it is securely positioned and won’t move during the cut.
- Lower the saw blade slowly and cut as usual. The pavers will provide additional support and minimize tear-out or splintering.
4. Safety Considerations
- When using pavers with a miter saw, consider these safety precautions:
- Ensure the pavers are securely placed and won’t shift during the cut.
- Continuously wear fitting well-being gear, including security glasses and hearing protection.
- Maintain proper hand placement and keep your hands and body clear of the blade’s path.
- Follow all manufacturer’s instructions and safety guidelines provided in the user manual.
Can You Use a Miter Saw for Cutting Pavers?
While a miter saw is primarily designed for cutting wood and certain soft materials, it is not typically recommended for cutting pavers or other rigid materials such as concrete or stone.
Attempting to cut pavers with a standard miter saw designed for woodworking can be unsafe and damaging to the saw. Here are several reasons why using a miter saw for cutting pavers is discouraged:
Blade Compatibility: Miter saws typically have blades for cutting wood or soft materials. These blades are not designed for the hardness and abrasiveness of pavers. Attempting to cut pavers with such a blade can lead to premature wear and potential blade damage.
Lack of Power: Miter saws may need more power or torque to cut through dense pavers efficiently. This can strain the saw’s motor and may result in overheating or damage.
Safety Concerns: Cutting hard materials like pavers generates a significant amount of dust and debris, posing health risks if proper dust collection measures are not in place. Additionally, using a miter saw for unintended applications can increase the gamble of mishaps and injuries.
Inaccurate Cuts: Miter saws are designed for precision woodworking and may not provide the accuracy and stability required for cutting pavers evenly and cleanly. This can lead to uneven or jagged cuts.
If you need to cut pavers or other rigid materials, it’s advisable to use a specialized saw designed for the task, such as a masonry saw, concrete saw, or a tile saw with a diamond-tipped blade. These tools are equipped with blades specifically designed to handle the hardness of pavers and ensure clean, accurate cuts.
Continuously focus on well-being while working with power instruments, and use the right tool to accomplish the best outcomes while limiting the gamble of harm or injury.
Tools and Materials needed for cutting pavers with a miter saw
You’ll need specific tools and materials to cut pavers with a miter saw to ensure clean and accurate cuts. Here’s a list of what you’ll need:
Tools:
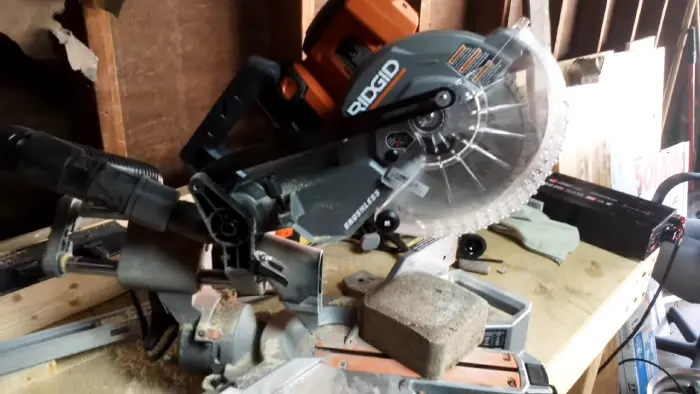
Miter Saw: Ensure your miter saw has a diamond-tipped blade suitable for cutting hard materials like pavers. A 12-inch or 14-inch miter saw is commonly used for this purpose.
Diamond-Tipped Blade: You’ll need a high-quality diamond blade for cutting pavers. These blades have diamond-embedded segments that can handle the hardness of the material. Make sure the blade’s size matches your miter saw’s specifications.
Safety Gear: Always prioritize safety. Wear appropriate safety gear, including safety glasses, hearing protection, a dust mask or respirator, and work gloves to safeguard yourself from residue and flotsam and jetsam.
Clamps: Use clamps to secure the paver in place on the saw’s table, preventing it from moving during the cut. This ensures both safety and accuracy.
Measuring Tools: A tape measure, pencil, and straightedge will help you accurately measure and mark the cut lines on the paver.
Dust Collection System: Paver cutting generates a significant amount of dust. A dust collection system, shop vacuum, or dust shroud attachment for your saw can help manage dust and maintain visibility.
Materials:
Pavers: Select the pavers you intend to cut to the desired size and shape. Ensure they are clean and free of any debris before cutting.
Wooden Blocks: You can use wooden blocks or scraps as supports under the paver to keep it level and stable during the cut. These blocks should be large enough to support the entire paver.
Paver Sand or Gravel: Prepare a stable, level work surface by placing a layer of paver sand or gravel on your workbench or sawhorse.
Optional Tools:
Workbench or Sawhorse: A stable work surface is essential for safe and accurate cutting. A dedicated workbench or sawhorse can provide the necessary support.
C-clamps: If you don’t have clamps, C-clamps or other types of clamping devices can be used to secure the paver in place.
Straightedge or Guide: A straightedge or guide can help you achieve straight cuts. You can clamp it to the paver to serve as a cutting guide.
Goggles and Respirator: For enhanced safety and comfort, consider using safety goggles that provide better eye protection against dust and a respirator with appropriate filters to reduce dust inhalation.
Always follow safety guidelines and the manufacturer’s instructions for your miter saw and diamond blade. Proper setup, securing the paver, and wearing the necessary safety gear are crucial when cutting pavers to ensure precise cuts and personal safety.
Step-by-Step Guide to Cutting Pavers with a Miter Saw
Cutting pavers with a miter saw requires precision and safety precautions. Follow this step-by-step guide to ensure accurate cuts:
Tools and Materials You’ll Need:
- Miter saw with a diamond-tipped blade
- Safety gear (safety glasses, hearing protection, dust mask, work gloves)
- Clamps or C-clamps
- Measuring tools (tape measure, pencil, straightedge)
- Wooden blocks
- Paver sand or gravel
- Optional: workbench or sawhorse, straightedge or guide
Step 1: Safety Preparations
Wear your safety gear, including safety glasses, hearing insurance, a residue cover, and work gloves.
Set up your work area on a stable, level surface. Lay down a layer of paver sand or gravel to create a solid base if needed.
Step 2: Measure and Mark
Measure the paver and mark the cut lines accurately using a tape measure and pencil. You can use a straightedge or guide to ensure straight lines.
Step 3: Prepare the Miter Saw
Ensure your miter saw has a high-quality diamond-tipped blade designed for cutting pavers. Ensure the edge is safely joined and appropriately adjusted.
Step 4: Secure the Paver
Position the paver on the saw’s table, aligning the marked cut lines with the path of the saw blade.
Place wooden blocks under the paver to support and prevent it from sagging or vibrating during the cut. These blocks should extend beyond the paver’s edges.
Use clamps or C-clamps to securely secure the paver and wooden blocks to the saw’s table. Ensure that the paver is stable and won’t move during the cut.
Step 5: Make the Cut
Stand to the Side of the miter saw, away from the blade’s path. Do not position yourself directly behind the saw.
Start the miter saw and let the blade reach full speed.
Slowly and steadily lower the saw’s blade into the paver along the marked cut lines. Keep a firm grip on the saw’s handle.
Let the blade do the cutting, applying gentle downward pressure. Avoid forcing the saw through the paver, leading to chipping or blade damage.
Step 6: Complete the Cut
After completing the cut, release the saw’s trigger and permit the cutting edge to reach a standstill previously raising it.
Step 7: Check the Cut
Inspect the cut to ensure it meets your desired specifications. Use sandpaper or a record to smooth any harsh edges if that is vital.
Step 8: Safety Precautions
Turn off the miter saw and unplug it if you have finished cutting all your pavers.
Remove any dust or debris from the saw and the work area.
By following these steps carefully and using the appropriate safety precautions, you can achieve precise and clean cuts when cutting pavers with a miter saw. Focus on security and double-check your measurements and cut lines before making each cut.
Alternative Methods for Cutting Pavers
If you don’t have access to a miter saw with a diamond-tipped blade or prefer alternative methods for cutting pavers, several effective options are available. Here are some alternative methods to consider:
Angle Grinder with Diamond Blade
A point processor with a jewel cutting edge is a versatile tool for cutting pavers. It allows for precise straight cuts and can also create curved or notched cuts. Wear appropriate safety gear and follow safety guidelines when using an angle grinder.
Wet Tile Saw:
A wet tile saw with a sharp stone edge can cut pavers cleanly and with minimal dust. These saws use water to cool the blade and suppress dust, making them suitable for indoor or outdoor use. Wet tile saws are handy for cutting thinner pavers.
Chisel and Hammer
You can use a chisel and a hammer for small cutting tasks or when a straight edge is not required. Score the paver along the desired cut line, then use the chisel and hammer to break it along the scored line carefully. This method is suitable for making irregular cuts or adjustments on-site.
Paver Splitter:
A paver splitter is a manual tool designed explicitly for splitting pavers. It uses a lever mechanism to exert force on the paver, creating a clean break along the desired cut line. Paver splitters are ideal for straight cuts and are easy to use.
Circular Saw with Masonry Blade
A roundabout saw fitted with a brickwork sharp edge can be used for cutting pavers. This method is particularly effective for making straight cuts in thicker pavers. Ensure that the saw has proper dust control measures to minimize airborne dust.
Block Splitter or Guillotine
Consider using a block splitter or guillotine for larger pavers or when you need to make consistent straight cuts. These tools pressure the paver to create straight breaks along the cut line.
Abrasive Saw
An abrasive or cut-off saw can be used with an abrasive masonry blade to cut pavers. These powerful saws can handle thick pavers, but they generate more dust and noise than other methods.
Handheld Paver Cutter
Handheld paper cutters are specifically designed for cutting pavers. These manual tools use a guillotine-style blade to make clean, straight cuts. They are ideal for small DIY projects and are easy to transport.
When using alternative methods, follow safety guidelines, wear proper security, and work in a very ventilated region.
Maintenance and Blade Care for the miter saw
Proper maintenance and blade care are crucial for keeping your miter saw in optimal condition and ensuring accurate cuts. Begin with blade care by cleaning it after each use, removing pitch, resin, and debris that could hinder its performance. Regularly inspect the blade for damage, such as chipped or missing teeth, and replace it when necessary.
Dull blades should be sharpened or replaced to maintain cutting efficiency. Verify that the blade is correctly tensioned to prevent wobbling. In general, maintenance, apply lubricant to moving parts and pivot points, clean the entire saw, and check the power cord for damage. Tighten fasteners to prevent loosening due to vibrations and follow the manufacturer’s instructions for periodic calibration to preserve cutting accuracy.
Consider replacing carbon brushes if your saw has them, clean the dust collection system, and store the miter saw in a dry environment when not in use. Prioritize safety throughout these maintenance tasks, using protective gear as needed and consulting your user manual for specific guidelines. Proper care ensures that your miter saw remains reliable and delivers precise cuts for your woodworking projects.
Safety Considerations while using a miter saw
Security is central while utilizing a miter saw or any power tool. Adhering to safety guidelines helps prevent accidents and ensures a secure working environment. Here are essential safety considerations while using a miter saw:
1. Read the User Manual:
Always start by reading and understanding the user manual provided by the manufacturer for your specific miter saw model. The manual contains essential safety information and instructions for proper operation.
2. Workspace Preparation:
Clear the work area of clutter, debris, and tripping hazards. Ensure proper lighting and ventilation.
3. Secure Workpiece:
Always securely clamp or hold down the workpiece to prevent it from moving during cutting. Unsecured materials can kick back or bind the blade.
5. Stand to the Side:
Position yourself to the Side of the miter saw, not in line with the blade’s path. This minimizes the risk of injury if a kickback occurs.
6. Use Blade Guards:
Ensure that the blade guard is in place and functioning correctly. The guard should cover the blade when unused and retract automatically during cutting.
7. Keep Hands Clear:
Keep your hands and fingers well away from the blade’s path. Use push sticks or hold-downs for controlling the workpiece, especially when making narrow cuts.
8. Maintain a Firm Grip:
Maintain a firm grip on the saw’s handle with both hands throughout the cutting process. Wait to remove your hands from the handle until the blade has completely stopped.
9. Mind Blade Depth:
Set the blade depth to the appropriate level. The blade should extend slightly below the workpiece to minimize the risk of kickback and maximize cutting efficiency.
10. Use a Sharp Blade:
Guarantee that the saw edge is sharp and looking great. Dull blades can lead to unsafe cutting and may cause the saw to bind.
11. Beware of Kickback:
Be aware of the possibility of kickback, which can occur if the saw blade binds or catches on the material. To reduce the risk of kickback, ensure the workpiece is secured correctly and use a sharp blade.
12. Wait for the Blade to Stop:
After completing a cut, release the trigger and wait for the blade to come to a complete stop before raising it. Avoid lifting the blade while it’s still spinning.
13. Dust Collection:
If your miter saw has a dust collection system, use it or connect the saw to a dust extraction system to reduce airborne dust. A clean work area improves visibility and safety.
14. Disconnect Power:
When not in use, unplug the miter saw to prevent accidental starts, especially when changing blades or making adjustments.
15. Keep Children and Bystanders Away:
Ensure that children and bystanders are safe from the work area and the miter saw during the operation.
Conclusion
While a miter saw is a flexible device for making exact cuts in different materials, it is unsuitable for cutting pavers or other dense masonry materials. Attempting to use a miter saw for pavers can lead to equipment damage, subpar results, and safety hazards.
Instead, it is advisable to use specialized equipment such as a wet tile saw, masonry saw, or a diamond blade-equipped circular saw designed for cutting pavers. Prioritizing safety and selecting the right tool for the job will ensure both efficient cutting and the longevity of your equipment.