
Ensuring the cleanliness of your table saw top is crucial for its optimal performance and durability. By keeping the surface of your table saw clean, you guarantee smooth and precise cuts while minimizing the risk of rust and damage. If you’re seeking guidance on how to clean table saw top, you’ve arrived at the right resource.
This concise guide will outline straightforward steps to clean your table saw top, enabling you to maintain a tidy and efficient work area. Let’s delve into the simple and effective methods for preserving the pristine condition of your table saw top.
The Significance of Maintaining a Clean Table Saw Surface
Regularly cleaning your table saw’s top is crucial for proper maintenance. A clean table saw top ensures optimal performance, accuracy, and safety.
Importance of Cleaning a Table Saw Top
Ensures Smooth and Accurate Cuts
A clean table saw top allows workpieces to glide smoothly across the surface, ensuring precise and accurate cuts. Dust, debris, and resin buildup can cause friction, resulting in uneven or jagged cuts.
By keeping the surface clean, you enhance the overall performance of your table saw and achieve smoother, more professional results.
Prevents Workpiece Damage
Residues like sawdust, pitch, or adhesive can accumulate on the table saw top during use. If left uncleaned, these substances may transfer onto your workpiece, potentially causing blemishes or imperfections.
Regularly cleaning the surface minimizes the risk of contaminants adhering to your materials, preserving their quality and appearance.
Enhances Safety
A clean table saw top contributes to a safer working environment. Accumulated debris near the blade can interfere with its operation and cause kickbacks, jeopardizing your safety. Diligently cleaning the table saw top improves visibility and reduces the likelihood of accidents.
Extends the Lifespan of the Table Saw
Maintaining a clean table saw top is crucial for the tool’s longevity. Regularly cleaning the table saw top prevents the buildup of harmful particles and extends the lifespan of your valuable tool.
Promotes Efficient Dust Collection
Many table saws feature built-in dust collection systems or require external dust extraction. A clean table saw top ensures the effectiveness of these systems.
If the surface is covered in debris, the dust collection mechanism may become clogged or less efficient, compromising its ability to capture airborne particles effectively.
Cleaning the table saw top facilitates the proper functioning of the dust collection system, minimizing airborne dust and promoting a healthier work environment.
Cleaning the table saw top is a crucial maintenance task with numerous benefits. It ensures smooth and accurate cuts, prevents workpiece damage, enhances safety, extends the lifespan of the table saw, and promotes efficient dust collection.
By incorporating regular cleaning into your woodworking routine, you optimize your table saw’s performance, reliability, and safety, enabling you to achieve exceptional results.
Examining the Composition of Table Saw Tabletops
Table saw tops play a crucial role in the functionality and performance of the tool. Understanding the materials used to construct table saw tops provides valuable insights into their durability, stability, and maintenance requirements. This article explores the materials used for table saw tops, highlighting their characteristics and advantages.
Materials Used for Table Saw Tops
Cast Iron
Cast iron is popular for table saw tops due to its exceptional durability and stability. It provides a flat and rigid surface that facilitates accurate cuts. Cast iron is highly resistant to warping, reducing the tabletop’s risk of unevenness over time.
It also offers a smooth and low-friction surface, allowing workpieces to glide effortlessly during cutting operations. However, cast iron tops require regular maintenance to prevent rust formation, such as applying protective coatings or lubricants.
Aluminum
Aluminum is another commonly used material for table saw tops. It is lightweight, making the table saw more portable and maneuverable.
Aluminum tops often feature extruded channels or tracks for accessories like miter gauges or sleds, enhancing versatility. While aluminum tops generally provide good stability, they may not match the same level of vibration dampening as cast iron.
Steel
Some table saw tops are made of steel, balancing durability and affordability. Steel provides a sturdy and rigid surface, suitable for various cutting tasks. It is less susceptible to warping compared to other materials.
Phenolic Resin
Phenolic resin is a synthetic material known for its durability and moisture, chemicals, and wear resistance. Phenolic resin offers a smooth and low-friction surface, making it easier to slide workpieces during cutting. It is less prone to rusting and requires minimal maintenance.
Hybrid or Composite Materials
Table saw tops made from hybrid or composite materials have recently gained popularity. These tops combine materials, such as laminated wood, resin, or plastic composites, to balance strength, stability, and affordability.
Hybrid tops often provide good durability, resistance to warping, and a smooth surface for cutting operations. They may require specific care instructions provided by the manufacturer to maintain their performance.
Table saw tops can be constructed from various materials, each offering unique characteristics and advantages. Cast iron tops provide exceptional durability and stability but require regular maintenance to prevent rust. Aluminum tops are lightweight and portable, while steel tops offer a balance between durability and cost.
Phenolic resin surfaces are resistant to moisture and wear. Hybrid or composite materials combine different properties to balance strength and affordability. By understanding the materials used for table saw tops, you can make informed decisions based on your needs and preferences.
Essential Cleaning Supplies for Maintaining a Clean Table Saw Surface
Maintaining a clean table saw top is vital for optimal performance and longevity. To effectively clean a table saw top, specific products are required to remove debris and preserve the surface’s quality. This article explores the necessary cleaning supplies for a table saw top, ensuring a pristine working surface.
Products for Cleaning a Table Saw Top
Cleaning Solution
A suitable cleaning solution is essential for removing grime, sawdust, and other residues from the table saw top. Ensure that the cleaning solution is compatible with the material of your table saw top to prevent any damage.
Soft Cloths or Microfiber Towels
Soft cloths or microfiber towels are ideal for wiping down the table saw top. These materials are gentle on the surface and won’t leave lint or scratches. Avoid using rough or abrasive materials like steel wool, which can damage the tabletop.
Scrub Brushes or Toothbrushes
A small scrub brush or toothbrush can be useful for stubborn stains or hard-to-reach areas. Choose brushes with soft bristles to avoid scratching the surface.
Dust Collection System or Vacuum Cleaner
A dust collection system or a vacuum cleaner with a brush attachment is essential for removing loose sawdust and debris from the table saw top.
Before cleaning, ensure the saw is turned off and unplugged, and the dust collection system is disconnected. Use the vacuum cleaner or dust collection system to suction the loose debris from the surface, making cleaning easier.
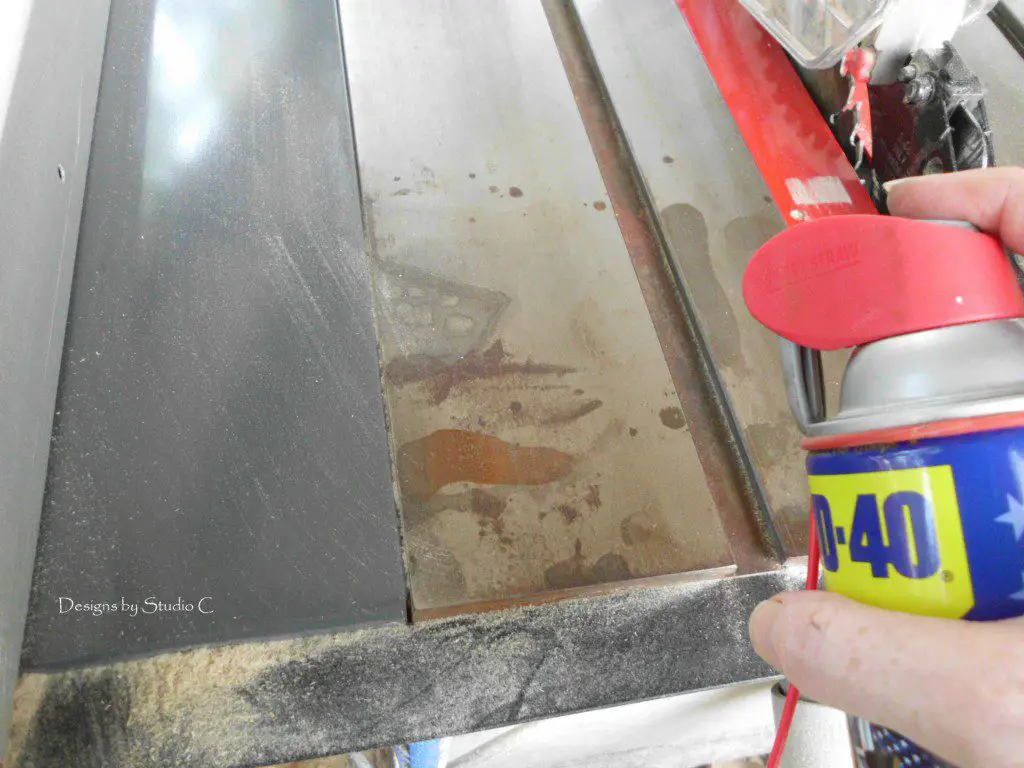
Wax or Lubricant
After cleaning the table saw top, applying a protective wax or lubricant can help prevent rust and maintain the surface’s smoothness. Use a wax specifically designed for woodworking tools or a recommended lubricant. Apply a thin, even layer according to the product instructions, and buff the surface gently with a soft cloth.
To clean a table saw top effectively, you need specific products that remove debris and preserve the surface’s quality. Essential cleaning supplies include a suitable cleaning solution, soft cloths or microfiber towels, scrub brushes or toothbrushes, a dust collection system or vacuum cleaner, wax or lubricant for protection, and water and mild soap optionally.
Using these products and following proper cleaning techniques, you can maintain a clean and well-functioning table saw top for precise and safe woodworking operations.
Cleaning a Table Saw Top in 3 Simple Steps
Maintaining a clean table saw top is crucial for optimal performance and accurate cuts. Regular cleaning will enhance the performance, extend the lifespan of your table saw, and ensure precise cuts for your woodworking projects.
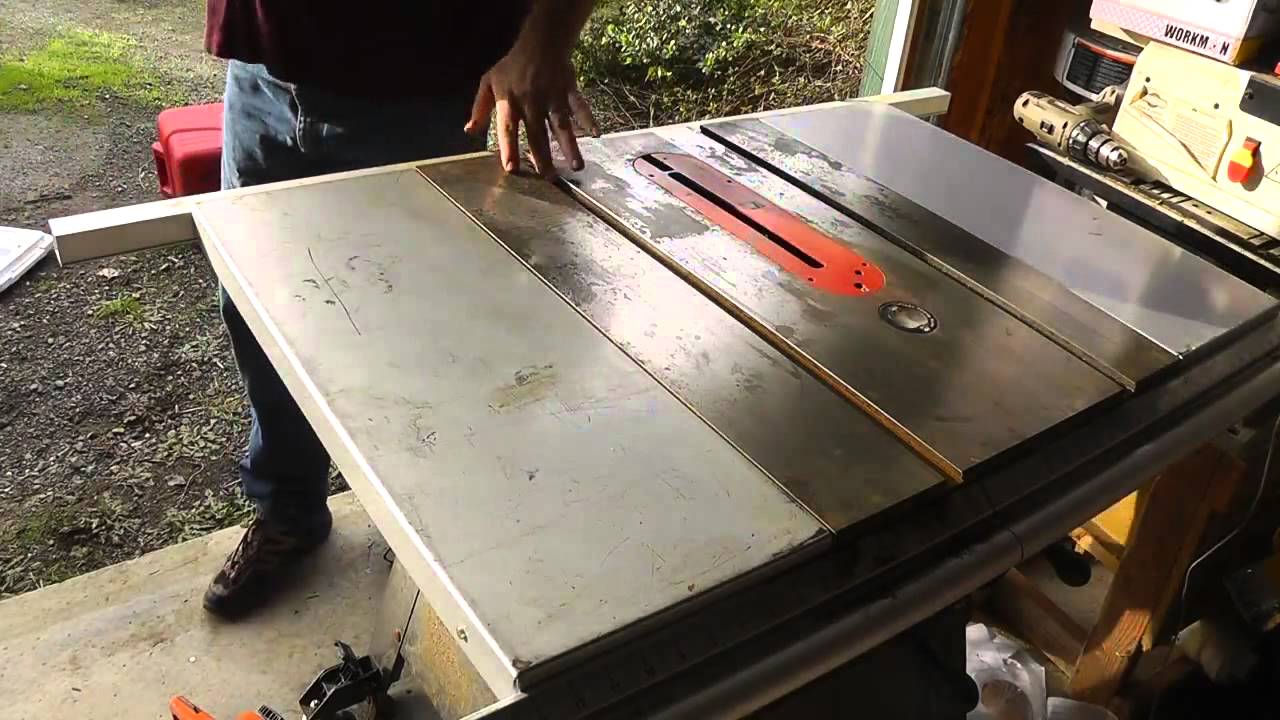
Step 1: Prepare the Cleaning Area and Gather Supplies
Before beginning the cleaning process, ensure the area around the table saw is clear of any loose debris or objects that may hinder the cleaning.
Gather the necessary cleaning supplies, including a suitable cleaning solution, a soft cloth or microfiber towel, and a dust collection system or vacuum cleaner.
Step 2: Remove Debris and Clean the Surface
Use the dust collection system or vacuum cleaner to remove loose sawdust and debris from the table saw top. Ensure the saw is turned off, unplugged, and the dust collection system is disconnected.
Once the loose debris is eliminated, dampen a soft cloth or microfiber towel with the chosen cleaning solution. Gently wipe down the entire surface, paying special attention to any stubborn stains or residues.
Step 3: Dry and Protect the Table Saw Top
After cleaning, thoroughly dry the table saw top using a clean cloth. Once dry, apply a thin layer of wax or a woodworking tool-specific lubricant. Follow the instructions provided by the product for proper application.
Gently buff the surface with a soft cloth to evenly distribute the protective layer. This final step helps prevent rust and maintains the smoothness of the table saw top.
You can maintain a clean and high-performing table saw by preparing the cleaning area, removing debris, cleaning the surface with a suitable solution, and protecting it with wax or lubricant. Regular cleaning will extend your table saw’s lifespan and ensure accurate cuts for all your woodworking projects.
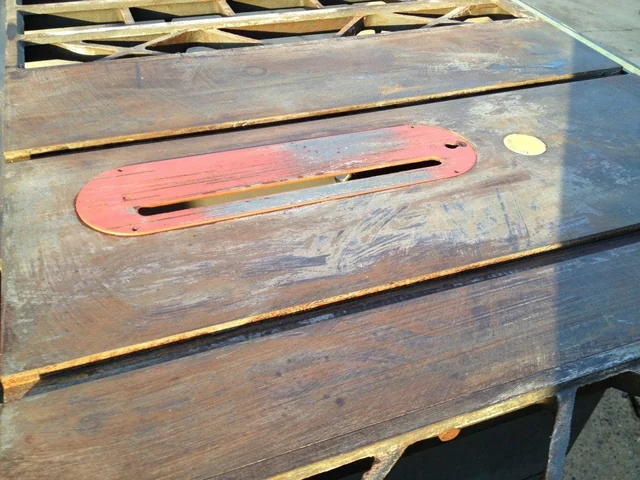
Cleaning a Cast iron Table Saw Top
Cleaning a cast iron table saw top is crucial for longevity and optimal performance. Regular maintenance, including cleaning, helps remove sawdust and residue and prevents rust formation.
Step 1: Prepare the Cleaning Area and Gather Supplies
First, clear the area surrounding the table saw to create a clean workspace. Gather the necessary cleaning supplies, including a soft cloth or microfiber towel, a scrub brush with soft bristles, a suitable cleaning solution (such as a mild household cleaner or a specific cast iron cleaner), warm water, and a protective wax or lubricant.
Step 2: Remove Debris and Clean the Surface
Ensure the saw is turned off, unplugged, and the dust collection system is disconnected. Next, dampen the soft cloth or microfiber towel with the cleaning solution or a mixture of warm water and mild detergent.
Gently wipe down the entire surface, paying special attention to stubborn stains or residues. For more persistent stains, use the soft-bristle scrub brush to gently scrub the affected areas.
Step 3: Dry and Protect the Cast Iron Surface
After cleaning, thoroughly dry the cast iron table saw top using a clean cloth to eliminate any moisture. Preventing moisture from lingering on the surface is crucial to avoid rust formation.
Once dry, apply a thin, even layer of protective wax or lubricant specifically designed for cast iron surfaces. Follow the instructions provided by the product for proper application. This protective layer will help prevent rust and maintain the smoothness of the cast iron table saw top.
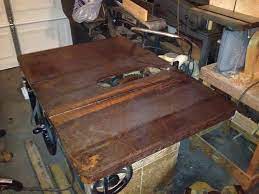
Removing Rust from a Table Saw
Rust can develop on the surface of a table saw due to moisture exposure or improper storage. Removing rust is essential to maintain the performance and longevity of your table saw.
Step 1: Prepare the Work Area and Gather Supplies
Before starting the rust removal process, clear the area around the table saw to create a clean workspace. Gather the necessary supplies, including a wire brush or steel wool, rust remover solution or vinegar, protective gloves, safety glasses, a soft cloth, and a rust inhibitor or protective coating.
Step 2: Safety Precautions
To ensure your safety, wear protective gloves and safety glasses before handling chemicals or using the wire brush or steel wool.
Step 3: Remove Loose Rust and Debris
Work in small, circular motions to remove loose rust and any debris. Be careful not to apply excessive pressure that could damage the table saw surface.
Step 4: Apply Rust Remover Solution or Vinegar
If the rust remains after Step 3, apply a rust remover solution directly to the affected areas.
Step 5: Remove Rust and Residue
Gently scrub the rusted areas again using the wire brush or steel wool. This time, focus on removing the remaining rust and any residue left by the rust remover solution or vinegar. Continue until the surface is smooth and free from rust.
Step 6: Clean and Dry the Surface
Thoroughly dry the surface using a dry cloth or allow it to air dry completely. Ensuring the surface is dry is crucial to prevent new rust from forming.
Step 7: Apply Rust Inhibitor or Protective Coating
To protect the table saw from future rusting, apply a rust inhibitor or a protective coating. Follow the instructions provided by the product for proper application.
Removing rust from a table saw is necessary to maintain its performance and appearance. By following these steps, including preparing the work area, removing loose rust and debris, applying a rust remover solution or vinegar, scrubbing away the rust, cleaning and drying the surface, and applying a rust inhibitor or protective coating, you can effectively remove and prevent its recurrence.
Maintaining the Shine of Your Aluminum Table Saw Top: Easy Cleaning Steps
An aluminum table saw top is a crucial tool for woodworking and a valuable investment. Regular cleaning is essential to ensure its longevity and optimal performance. While cleaning might appear daunting, following the right approach and using suitable tools can make the process straightforward.
Step 1: Prioritize Safety
Begin by prioritizing safety. Switch off and unplug the table saw to prevent accidental starts. Also, wear appropriate safety gear, including gloves and eye protection.
Step 2: Remove Debris and Dust
Start by removing loose debris and dust from the table saw top. Gently sweep the surface using a soft brush or a clean cloth. Thoroughly perform this step to eliminate any debris that could cause scratches during the cleaning process.
Step 3: Prepare a Mild Cleaning Solution
Create a mild and effective cleaning solution by mixing a few drops of dish soap or a specialized aluminum cleaner with warm water.
Step 4: The Cleaning Solution
Pay special attention to stubborn stains or grime, applying additional pressure if necessary. Ensure the cleaning solution reaches all corners and edges.
Step 5: Rinse with Water
After scrubbing, thoroughly rinse the table saw top with clean water. This step removes any remaining cleaning solution, preventing residue or streaks. Use a separate cloth or sponge dampened with water to wipe down the surface until it is completely clean.
Step 6: Dry the Surface
Thoroughly dry the aluminum table saw top to prevent water spots or potential rust. Pay close attention to corners and edges, as these areas are more prone to water accumulation.
Step 7: Apply a Protective Coating
Consider applying a thin layer of wax or a specialized metal protectant to further safeguard your aluminum table saw top.
Follow the manufacturer’s instructions and evenly apply the coating using a clean cloth. This step repels dust, prevents corrosion, and maintains the shine of the aluminum surface.
Cleaning an aluminum table saw top doesn’t have to be a daunting task. Regular cleaning ensures accurate and smooth cuts while extending the lifespan of your valuable tool.
Remember to prioritize safety, use a gentle cleaning solution, and protect the surface with a suitable coating. With proper maintenance, your aluminum table saw top will continue to shine and serve you well in your woodworking endeavors.
Safeguarding Your Table Saw Top: Effective Rust Prevention Techniques
Rust is a persistent threat that can damage both the appearance and functionality of your table saw top. By implementing these techniques, you can safeguard your investment and maintain a rust-free surface that facilitates smooth and precise cuts for years.
Tip 1: Keep the Table Saw Top Dry
Moisture is a primary catalyst for rust formation. If the table saw top comes into contact with water or other liquids during operation, promptly dry it to prevent rust from taking hold.
Tip 2: Apply a Protective Coating
A protective coating forms a barrier that shields the metal surface from moisture and prevents rust formation. Several options, such as wax, silicone spray, or specialized rust inhibitors, are available.
Follow the manufacturer’s instructions to evenly apply the coating. This additional layer of protection will effectively repel moisture and inhibit rust.
Tip 3: Utilize Rust Inhibitor Products
Rust inhibitor products are specifically formulated to prevent rust on metal surfaces. They are commonly available as sprays or wipes. Before storing your table saw, apply a rust inhibitor according to the product instructions.
Tip 4: Store in a Dry Environment
Proper storage in a dry environment is crucial for rust prevention. Areas with high humidity levels or excessive moisture can accelerate rust formation.
Store your table saw in a climate-controlled workshop or use dehumidifiers to maintain optimal humidity levels. If storing the table saw for an extended period, consider covering it with a breathable cloth to protect it from dust and moisture.
Tip 5: Regular Cleaning and Inspection
Regular cleaning and inspection play a vital role in rust prevention. After each use:
- Remove sawdust, debris, or metal shavings from the table saw top.
- Thoroughly inspect the surface for any signs of rust or damage, addressing them promptly.
- By keeping the table saw top clean and conducting regular inspections, you can detect and resolve potential rust issues early on, preventing further damage.
Protecting your table saw top from rust is crucial for its durability and performance. You can successfully prevent rust formation by implementing these effective techniques, including keeping the surface dry, applying a protective coating, utilizing rust inhibitor products, storing in a dry environment, and conducting regular cleaning and inspections.
Remember that rust prevention is ongoing, and consistent maintenance is key to maintaining a rust-free table saw top. Doing so ensures smooth, precise cuts and prolongs the lifespan of your valuable woodworking tool.
Establishing an Effective Cleaning Schedule for Your Table Saw Top
Regular cleaning of your table saw top is essential for maintaining its performance and prolonging its lifespan. However, determining how often to clean it can depend on various factors, such as usage frequency and the workshop environment. By following these recommendations, you can ensure a clean and efficient workspace while preserving the integrity of your valuable tool.
Factors to Consider
When determining how often to clean your table saw top, consider the following factors:
Frequency of Use
If you use your table saw daily or for extended periods, it is more likely to accumulate dust, debris, and residues. In such cases, more frequent cleaning may be necessary.
Dust and Debris Generation
The type of materials you work with and the cutting techniques employed can impact the dust and debris generated. Materials like MDF or plywood produce finer dust particles that can accumulate on the table saw top. If you frequently work with such materials, more regular cleaning may be required.
General Cleaning Recommendations
Based on the factors mentioned above, consider the following general recommendations for cleaning your table saw top:
Daily/Regular Cleaning
After each use or at the end of the day, perform a quick cleaning routine. This involves removing loose debris, sawdust, and residues from the table saw top using a brush or vacuum. This prevents the accumulation of debris that can affect the accuracy and performance of your cuts.
Weekly Cleaning
For moderate usage and average workshop environments, a more thorough cleaning can be done on a weekly basis.
Monthly Cleaning
A monthly cleaning routine may suffice when your table saw sees less frequent use or is located in a clean and controlled environment. This involves a more comprehensive cleaning, including a mild cleaning solution to thoroughly clean the table saw top.
Rust Prevention
Inspect the table saw top, regardless of usage frequency, for any signs of rust. If any rust spots are detected, address them promptly using appropriate rust removal techniques and apply a protective coating to prevent further rusting.
Establishing an effective cleaning schedule for your table saw top is essential for its optimal performance and longevity. Consider the appropriate cleaning frequency, such as usage frequency, dust generation, and workshop environment.
Regular daily or regular cleaning, combined with weekly or monthly thorough cleanings, will help maintain a clean and efficient workspace while preserving the integrity of your valuable tool. Additionally, stay vigilant in inspecting for rust and take necessary measures to prevent rust formation. By following these recommendations, you can ensure a clean and well-maintained table saw top for years.
CAN THE PASTE WAX DAMAGE OR STAIN THE WOOD?
When used correctly, paste wax should not cause damage or stain to the wood. It can provide protection and enhance the appearance of wood surfaces.
To prevent damage or staining, consider the following guidelines:
Select the Appropriate Paste Wax
Choose a high-quality paste wax specifically formulated for wood surfaces. Avoid using automotive or industrial waxes that may contain harsh chemicals or additives unsuitable for wood.
Conduct a Test in a Hidden Area
Before applying paste wax to a visible area, perform a small test in an inconspicuous spot on the wood surface.
Ensure a Clean Surface
Before applying paste wax, ensure the wood surface is clean and free from dust, dirt, and other contaminants. Use a mild wood cleaner or a damp cloth to remove any residues.
Apply the Paste Wax Correctly
Apply a thin and even layer of paste wax using a soft cloth or an applicator pad. Follow the manufacturer’s instructions regarding the application technique and the recommended drying time.
Buff the Surface
Once the paste wax has dried to a haze, gently buff the wood surface using a clean, soft cloth. This step helps to evenly distribute the wax and create a smooth and glossy finish.
Remove Excess Wax
If you notice any excess wax or a sticky residue, carefully remove it using a clean cloth. Avoid applying excessive pressure or using abrasive materials that could damage the wood.
By adhering to these guidelines and using a suitable paste wax, you can effectively protect and enhance the appearance of wood surfaces without causing any damage or staining.