
Chainsaws are handy tools that make cutting trees and limbs a breeze. However, like all machines, they require regular maintenance to perform at their best. One essential part of maintaining a chainsaw is replacing the chain when it becomes dull or damaged.
It may seem hectic to put on a chain on a chainsaw, but it can be done easily and quickly with a few simple steps. Next time this will not bother you because we are here to cover up How to Put a Chain on a Chainsaw?
How to put a Chain on a Chainsaw? Complete Guide
Correct direction of the chain
When putting a chain on a chainsaw, it’s essential to make sure that you’re installing it in the correct direction. The correct direction of the chain is essential for the chainsaw to operate safely and efficiently. To determine the right direction of the chain, you need to look at the teeth on the chain.
The teeth should face the front of the chainsaw and point in the direction of the chainsaw’s rotation. The rotation of the chainsaw is usually indicated by an arrow on the chainsaw’s housing or by the rotation direction specified in the user manual.
Ensure the chain is installed with the cutting teeth facing toward the chainsaw’s bar. This ensures that the chain cuts effectively and reduces the risk of kickback.

Before installing the chain, ensure the chainsaw is turned off, and the chain brake is engaged. Then, place the chain on the bar, ensuring the drive links fit into the sprocket. Next, adjust the chain’s tension to fit snugly on the bar, allowing you to pull it easily by hand.
Once you’ve ensured that the chain is tensioned correctly and installed in the right direction, you can disengage the chain brake and start the chainsaw to test its operation. If you notice any issues or abnormalities, turn off the chainsaw immediately and inspect the chain to ensure it’s installed correctly.
Steps to Follow
Installing a new chain on a chainsaw can be challenging, but it can be done quickly and easily with guidance.
Step 1: Safety first. Before you begin the installation, ensure the chainsaw turns off, and the spark plug is disconnected. This is necessary to prevent any accidents while you work on the chainsaw.
Step 2: Remove the old chain. To remove the old chain, loosen the nuts holding the guide bar. This will release the tension on the old chain, allowing you to remove it from the guide bar and chainsaw sprocket.
Step 3: Clean the chainsaw. Cleaning the chainsaw ensures that the new chain fits properly and operates efficiently.
Step 4: Install the new chain. Take the new chain and lay it out on a flat surface. Ensure the teeth on the chain face the correct direction by checking the user manual or the arrow on the chainsaw housing. Then, place the chain on the chainsaw’s guide bar and loop it over the chainsaw sprocket.
Step 5: Adjust the chain tension. You will have to adjust the tension by tightening or loosening the tensioning screw or knob. The chain should be snug around the guide bar but not too tight. Ensure the chain tension is set correctly by pulling the chain away from the guide bar.
Step 6: Tighten the nuts. Once you have the new chain and the correct tension, tighten the nuts that hold the guide bar in place. Make sure that the guide bar is straight and level.
Step 7: Test the chainsaw. Finally, start the chainsaw and test it out to ensure that the chain is operating correctly. Ensure the chain is properly lubricated and not overly tight or loose.
Can you put a Chainsaw Chain on the wrong?
Yes, it’s possible to put a chainsaw chain on wrong, a common mistake that can cause safety issues and damage the chainsaw. The most common mistake is installing the chain backward, which means the cutting teeth will face the wrong direction.
This can cause the chainsaw to kick back, which is a dangerous situation that can lead to injury. Additionally, a backward chain will not cut efficiently and may cause damage to the chainsaw’s guide bar and sprocket.
Another mistake is installing the chain too loose or too tight. A loose chain can slip off the guide bar or cause the chainsaw to malfunction, while a tight chain can cause damage to the guide bar, sprocket, and chain, resulting in reduced cutting efficiency and increased wear and tear.

Using the wrong size or type of chain can also lead to problems. Different chainsaws require different chains, so using the correct chain for your chainsaw is essential to ensure safe and effective operation.
Following the manufacturer’s instructions carefully when installing the chain is essential to avoid these mistakes.
Double-check that the chain is installed correctly before using the chainsaw. Ensuring the chain is correctly installed will help you operate your chainsaw safely and extend its lifespan.
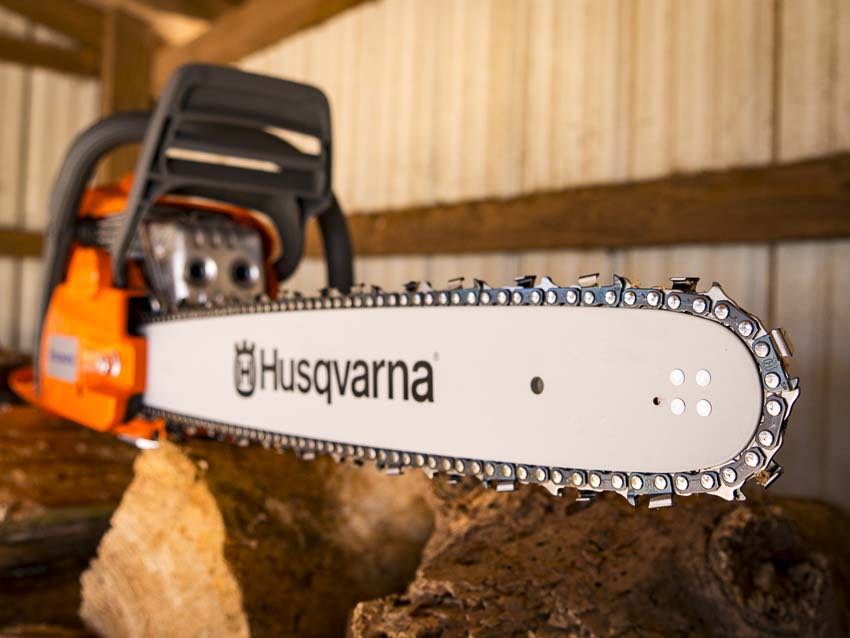
Putting a chain on a Husqvarna Chainsaw
Installing a new chain on a Husqvarna chainsaw is a simple process that can be done quickly and easily. Here are the steps you can follow:
Step 1: Safety first. This is essential to prevent accidents while you work on the chainsaw.
Step 2: Remove the old chain. To remove the old chain, loosen the nuts holding the guide bar and chain. This will release the tension on the old chain, allowing you to remove it from the guide bar and chainsaw sprocket. Use pliers or a screwdriver to detach the old chain from the chainsaw.
Step 3: Clean the chainsaw. To remove dirt, use a clean cloth or some brush Cleaning the chainsaw ensures that the new chain fits properly and operates efficiently.
Step 4: Install the new chain. Take the new chain and lay it out on a flat surface. Ensure the teeth on the chain face the correct direction by checking the user manual or the arrow on the chainsaw housing. Then, place the chain on the chainsaw’s guide bar and loop it over the chainsaw sprocket.
Step 5: Adjust the chain tension. The chain should be snug around the guide bar but not too tight. Ensure the chain tension is set correctly by pulling the chain away from the guide bar.
Step 6: Tighten the nuts. Once you have the new chain and the correct tension, tighten the nuts that hold the guide bar and chain in place. Ensure that the guide bar is straight and level.
Step 7: Test the chainsaw. Finally, start the chainsaw and test it out to ensure that the chain is operating correctly. Ensure the chain is properly lubricated and not overly tight or loose
How should the Chain be tensioned on a Husqvarna Chainsaw?
Proper chain tension is essential for a Husqvarna chainsaw’s efficient and safe operation. Here’s how you should tension the chain on a Husqvarna chainsaw:
Step 1: Check the tensioning screw or knob. Locate the tensioning screw or knob on your Husqvarna chainsaw. This is usually located near the guide bar on the chainsaw’s side.
Step 2: Loosen the nuts.

Step 3: Adjust the chain tension. Turn the tensioning screw or knob to adjust the chain tension. Tighten the chain until it fits snugly around the guide bar, but ensure it’s not too tight.
Step 4: Check the tension. Once you’ve adjusted the tension, check the chain tension by pulling the chain away from the guide bar. The too-tight chain will not move freely around the guide bar, and whether too loose chain may come off the guide bar during operation.
Step 5: Tighten the nuts. Once you’ve set the correct tension, tighten the nuts holding the guide bar and chain. Ensure that the guide bar is straight and level.
A loose chain can cause damage to the guide bar and sprocket, while an overly tight chain can cause the chainsaw to malfunction. You can ensure it operates efficiently and safely by adequately tensioning the chain on your Husqvarna chainsaw.