
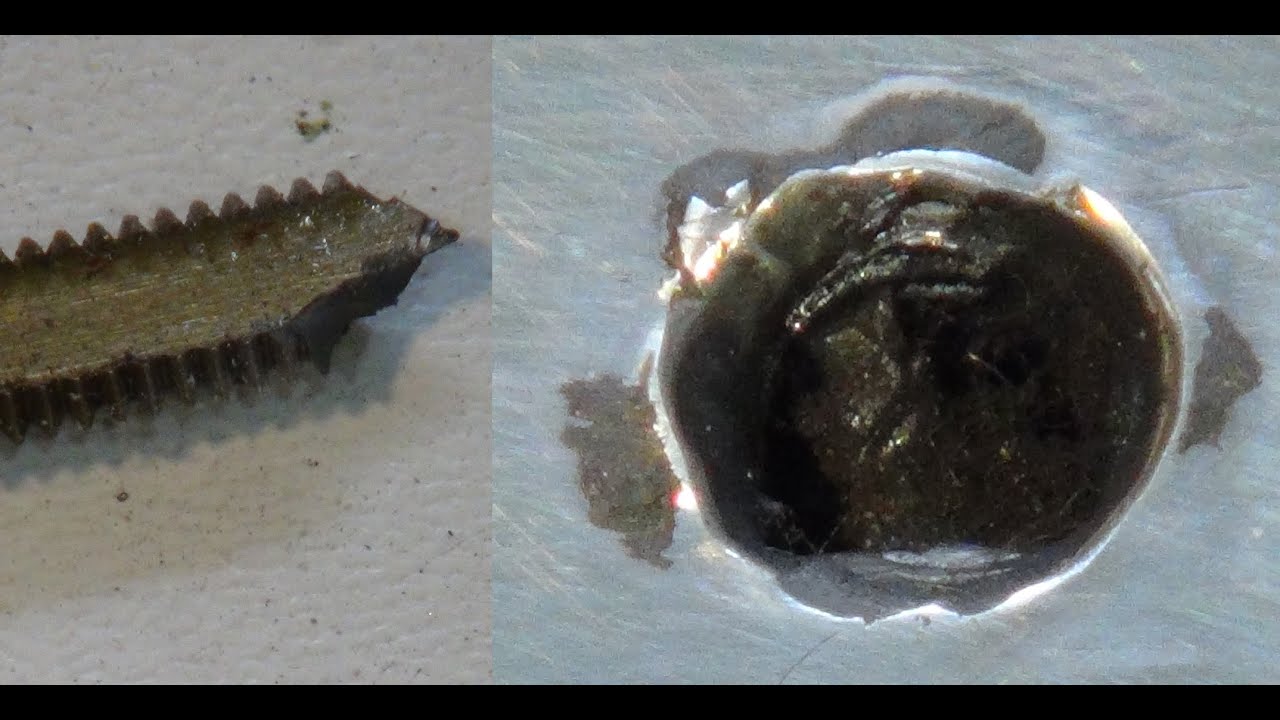
Dealing with a broken drill bit can frustrate anyone who enjoys DIY projects or woodworking. Whether it snapped due to excessive pressure or got stuck in the material you were working on, knowing how to remove a broken drill bit is a valuable skill that can save you time, cash, and a ton of migraines.
This guide will walk you through the bit-by-bit course of safely and effectively removing a broken drill bit from various surfaces. Whether you’re a seasoned craftsman or a novice, mastering this technique can help you confidently return to your project.
Tools and Materials Required
Removing a broken drill bit from a workpiece can be challenging, but having the right tools and materials can make the process more manageable. Here’s a list of tools and materials you may need to remove a broken drill bit:
- Needle-nose Pliers: Needle-nose pliers with fine tips can help grasp and extract the broken drill bit.
- Drill or Tap Extractor: A drill or tap extractor is a specialized tool to remove broken bits or taps from a hole.
- Left-Handed Drill Bit Set: Left-handed drill bits are designed to rotate counterclockwise, which can help extract a broken bit.
- Vice Grips or Locking Pliers: Vice grips or locking pliers can securely grip the broken drill bit for extraction.
- Center Punch: A center punch can help create a starting point for drilling into the broken bit.
- Drill: A power drill with variable speed control will be necessary for using drill extractors or left-handed drill bits.
- Lubricant/Penetrating Oil: A lubricant or penetrating oil can help ease the extraction process by reducing friction and preventing further damage.
- Hammer: A hammer can gently tap the extractor or pliers to loosen the broken bit.
- Thread Taps (Optional): In some cases, if the broken drill bit is deeply embedded in a threaded hole, a thread tap may remove the bit by threading it into the broken piece and then extracting it.
- Spare Drill Bits (Optional): Sometimes, using a minor drill bit to create a starter hole in the broken bit can make extraction easier.
- Vise or Clamps (Optional): If the workpiece can be secured in a vice or clamped down, it can provide stability during extraction.
- Heat Source (Optional): In cases where the broken bit is stuck due to adhesive or corrosion, gentle heating with a heat gun may help expand the material, making it easier to remove.
Before removing a broken drill bit, carefully assess the situation and choose the appropriate method and tools. Working slowly and patiently is essential to avoid damaging the workpiece further. If you need help with the best approach, consider seeking advice from a professional or a skilled technician.
Method 1: Using Pliers to Remove a Broken Drill Bit
Removing a broken drill bit with pliers can be effective when the fractured part protrudes from the workpiece. Here’s a step-by-step guide on how to do it:
- Assess the Situation: Examine the broken drill bit to determine if it protrudes from the workpiece. Consider alternative removal methods if it’s flush with the surface or below.
- Select the Right Pliers: Choose a pair of needle-nose pliers with fine tips. The finer the recommendations, the better they can grip the broken bit.
- Grip the Broken Bit: Use the needle-nose pliers to grip the exposed part of the broken drill bit firmly. Ensure the pliers clamp onto the bit as close to the workpiece surface.
- Rotate Counterclockwise: While maintaining a secure grip with the pliers, gently rotate the pliers counterclockwise (left) to loosen and extract the broken bit. Use steady, even pressure without excessive force.
- Use Lubrication (Optional): If the bit is stubborn or appears stuck due to corrosion or adhesive residue, applying a lubricant or penetrating oil to the area can help ease the extraction process.
- Tap and Turn (Optional): In some cases, lightly tapping the pliers with a hammer while turning counterclockwise can help break loose a stubborn bit.
- Inspect for Damage: After successfully removing the broken bit, inspect the workpiece for any damage. You may need to clean or re-drill the hole if it’s damaged during extraction.
Tips
- If the broken bit is too short to grip with pliers or the pliers cannot get a secure hold, consider using an alternative extraction method, such as a drill extractor or a left-handed drill bit.
- Ensure that the pliers grip the bit tightly to prevent slipping, which could cause further damage or injury.
- If the bit is coated with rust or adhesive residue, clean it before extracting it to improve grip.
- If the bit is located in a tight or hard-to-reach space, you may need needle-nose pliers with a long reach or a specialized tool for extraction.
- Remember to work slowly and patiently during the extraction process to avoid causing additional damage to the workpiece.
Method 2: Using Needle-Nose Pliers to Extract Small Fragments
Needle-nose pliers are a handy tool for extracting small fragments of a broken drill bit, especially when dealing with intricate or delicate workpieces. Here’s how to effectively use needle-nose pliers for this purpose:
Why Needle-Nose Pliers are Effective: Needle-nose pliers have long, slender jaws with fine tips that provide excellent precision for grasping and extracting small fragments. They are ideal for the broken bit flush with or slightly below the workpiece surface.
Process for Using Needle-Nose Pliers Safely
- Assess the Situation: Carefully examine the broken drill bit to determine if it is flush with the surface or slightly below it. Needle-nose pliers are most effective in such scenarios.
- Select the Right Needle-Nose Pliers: Choose a pair of needle-nose pliers with fine, pointed tips. The precision of these pliers is essential for gripping small fragments.
- Secure the Workpiece: Secure the workpiece in a bad habit or clasp to keep it from moving during extraction.
- Grasp the Fragment: Use the needle-nose pliers to grasp the exposed part of the broken drill bit carefully. Position the pliers as close to the workpiece surface as possible.
- Apply Steady Pressure: Apply steady and even pressure while gently pulling upward with the pliers. Be patient and avoid excessive force, which could cause the fragment to break further.
- Rotate if Necessary: If the fragment is stubborn and won’t come out with straight pulling, consider rotating it slightly to help loosen it. Continue to pull gently as you turn.
- Use Lubrication (Optional): Applying a lubricant or penetrating oil can help ease the extraction process if the fragment appears stuck due to corrosion or adhesive residue.
- Inspect for Remaining Fragments: After successfully removing the fragment, carefully inspect the hole to ensure no remaining pieces. Clean the area if necessary.
Tips for Safe Extraction:
- Be patient and gentle during the extraction process to avoid further damage to the workpiece.
- If the fragment is lodged tightly, do not force it. Seek professional assistance if needed.
- Keep a steady hand and firmly grip the pliers to prevent slipping and potential injury.
- When using lubrication, use it sparingly and avoid getting it on surrounding surfaces or materials.
Using needle-nose pliers to extract small fragments of a broken drill bit is a precise and effective method. However, consider alternative methods like drill extractors or left-handed drill bits for more significant or challenging extraction tasks. Continuously focus on security by wearing suitable defensive stuff and working circumspectly and cautiously.
Method 3: Using a Screwdriver
Using a screwdriver to remove a broken drill bit can be effective, particularly when the fractured portion is slightly exposed or protruding from the workpiece. To employ this method safely:
- Assess the situation, ensuring the broken drill bit is indeed slightly visible.
- Choose a screwdriver with a flat or slotted head that matches the width of the bit’s slot or groove.
- Secure the workpiece, ideally clamped in place, helps maintain stability during extraction.
- Position the screwdriver’s tip into the slot or groove of the broken bit, ensuring proper alignment.
- Applying gentle but consistent downward pressure while turning the screwdriver counterclockwise helps create the necessary leverage to loosen the bit.
- Rotate the screwdriver slowly and smoothly to remove the broken bit from the hole.
- Optionally, if the bit is stuck due to corrosion or adhesive residue, applying a lubricant or penetrating oil can aid extraction.
- After successful removal, inspect the hole for any remaining pieces or damage and clean the area as needed.
- Be patient and cautious to avoid further harm to the workpiece. If the broken bit proves stubborn, consider alternative extraction methods like drill extractors or left-handed drill bits. Always prioritize safety by using appropriate protective gear and working carefully.
Method 4: Lubricants and Heat
When faced with a stubbornly stuck drill bit due to corrosion or adhesive residue, employing lubricants and heat can be a practical solution for extraction. To do this safely, wear safety glasses and gloves to protect yourself from potential debris and heat. Assess the situation to confirm that the bit’s resistance is due to these factors.
Begin by applying a liberal amount of penetrating oil, such as WD-40 or a similar product, directly onto the stuck portion of the drill bit. Allow the oil to work into the tight spaces for several minutes or longer, reapplying if necessary. If the bit remains firmly stuck, applying heat is the next step. Gradually heat the area around the stuck bit using a heat gun or propane torch, ensuring an even heat distribution.
Remember that metal expands when heated, which may break the bond between the bit and the workpiece. Once heated, allow the area to cool slightly; as the metal contracts, it may further loosen the bit. Using pliers, vice grips, or a wrench, securely grip the exposed part of the drill bit and turn it counterclockwise (left) to attempt removal.
Apply steady, controlled force without excessive pressure. Following successful extraction, inspect the hole and the bit for any damage or remaining residue and clean the area as necessary. Throughout this process, exercise caution when working with heat to prevent damage to the workpiece or injury. Be aware of the flammability of lubricants or penetrating oils, following safety instructions on product labels.
Method 5: Tap and Extract
Utilizing a tap and extractor set is a method of choice for extracting a broken drill bit, particularly when the bit is deeply embedded or flush with the workpiece. To execute this procedure safely, wear safety glasses to safeguard your eyes from potential debris.
Assess the suitability of this method, ensuring it aligns with the nature of the broken bit. Select an appropriately sized tap and extractor set that matches the diameter of the broken drill bit, as these sets come in various sizes. Secure the workpiece in a bad habit or clasp to prevent unintended movement.
Begin by drilling a starter hole into the center of the broken drill bit using the drill bit provided in the tap and extractor set. Proceed slowly and with gentle pressure to avoid damaging the workpiece. Afterwards, insert the tap, which features reverse threads, into the starter hole and turn it counterclockwise (left) to create threads in the broken bit, enhancing its grip.
Attach the extractor tool with corresponding reverse lines and turn it counterclockwise using pliers or a wrench to apply upward pressure, aiding in loosening and ultimately extracting the broken piece. Upon successful removal, meticulously inspect the hole and the bit for any damage or residue and clean the area as necessary.
Be patient during the process, and if the bit is deeply embedded, consider drilling a deeper starter hole before tapping. Always prioritize safety throughout extraction, ensuring you have the right tools and protective gear.
Method 6: Drilling Out the Broken Bit
Drilling out a broken drill bit can be practical, especially when other extraction methods have proven ineffective or when the bit is deeply embedded in the workpiece. To perform this method safely, wear safety glasses or goggles to shield your eyes from any debris that might dislodge during the process.
Assess the situation to confirm that drilling is appropriate, mainly when dealing with a flush or deeply embedded broken bit. Pick a bore somewhat more modest in width than the broken one to prevent damage to the surrounding material while creating a path for removal. If possible, secure the workpiece in a vice or clamp to prevent movement during drilling.
Using the minor drill bit, begin by drilling a starter hole into the centre of the broken bit. Progressively increase the drill bit size, choosing more significant bits each time and preparing slowly and steadily while periodically clearing away debris.
As you continue, monitor your progress, and when you feel the broken bit beginning to rotate, it indicates that it’s loosening. Now, use pliers or vice grips to manually turn the fractured bit counterclockwise for extraction.
Inspect the hole and the bit carefully after extraction, looking for damage or residue, and clean the area as necessary. Remember to prioritize safety throughout the process, including selecting the right tools, securing the workpiece, and working carefully to avoid damage or injury.
Method 7: Professional Help
When DIY methods prove insufficient or the situation becomes too complex, seeking professional assistance is a prudent action for removing a broken drill bit. There are several critical scenarios in which calling in a professional is advisable:
- DIY techniques would be challenging to apply effectively when the stuck drill bit is exceptionally deep or in a structurally intricate environment.
- If multiple attempts at DIY removal have been unsuccessful, professional expertise is needed to address the issue.
- When there’s a substantial risk of causing damage to the workpiece or the surrounding structures during the extraction process, professionals can mitigate this risk.
In cases involving complex materials, such as hardened steel, or sensitive environments where safety is paramount, experts have the essential abilities and devices to guarantee a safe and efficient extraction. Furthermore, when specialized equipment, not readily available to DIYers, is required, professionals are equipped to handle the task effectively.
Finally, time and cost considerations also favour professional assistance, significantly when potential damage outweighs the expense of hiring a professional. Professionals possess the experience and knowledge to assess the situation and select the most appropriate extraction method, all while ensuring the integrity of the workpiece and the safety of all involved parties.
Preventative Measures
Preventing broken drill bits is essential for a smooth and efficient drilling process. Here are some tips and considerations to help avoid breaking drill bits:
Use the Right Drill Bit for the Job:
- Always select a drill bit appropriate for the material you’re drilling. Different materials require specific bits, such as wood, metal, concrete, or masonry. Using the wrong bit can lead to breakage.
Maintain Your Drill Bits:
- Keep your drill bits sharp and in good condition. Dull bits are more likely to get stuck and break. Regularly inspect and sharpen or replace worn-out bits.
Mark Drill Depths:
- Use a masking tape or a depth stop on your drill to mark the desired depth. This prevents over-drilling and reduces the risk of pushing the bit too hard.
Apply Proper Pressure:
- Let the drill do the work. Avoid excessive force or leaning on the training when drilling. Apply steady, moderate pressure, and let the bit’s cutting edges do the cutting.
Steady Speed and Technique:
- Maintain a consistent drilling speed and technique. For more complex materials, use a slower pace and steady pressure. Avoid rapid changes in speed or direction.
Lubricate When Needed:
- When drilling through metal or other rigid materials, consider using a lubricant or cutting oil to reduce friction and heat, which can cause bit damage.
Pre-Drill Pilot Holes:
- Pre-drill a smaller pilot hole for more significant drill bits or when working with hard materials. This helps guide the more substantial bit and reduces the risk of wandering off-centre.
Check for Obstructions:
- Before drilling, ensure no hidden obstructions, like screws, nails, or knots in wood. These can cause the bit to jam or break if encountered unexpectedly.
Keep a Firm Grip:
- Keep a firm grip on the drill and use both hands for stability and control. Avoid gripping the training near the chuck, leading to less control and stability.
Conclusion
Removing a broken drill bit is valuable for any DIY enthusiast or professional tradesperson. While encountering a fractured drill bit can be frustrating, it is not an insurmountable problem.
Following the steps outlined in this guide and exercising patience and caution, you can successfully extract the broken bit from the material, preserving your workpiece and tools.
Remember to prioritize safety throughout the process by wearing appropriate protective gear and using the right tools for the job. Whether you’re dealing with a wood, metal, or concrete surface, the techniques discussed can be adapted to suit your specific situation.