
Unlocking the full potential of your trusty Ryobi drill is a task that every DIY enthusiast encounters. Yet, there comes a time when you need to switch out that drill bit to tackle a new project or replace a dull one.
Navigating the intricacies of how to remove drill bit from Ryobi drill can sometimes feel like deciphering a puzzle. But fear not, as we’re about to delve into the step-by-step process that will have you mastering this essential skill in no time.
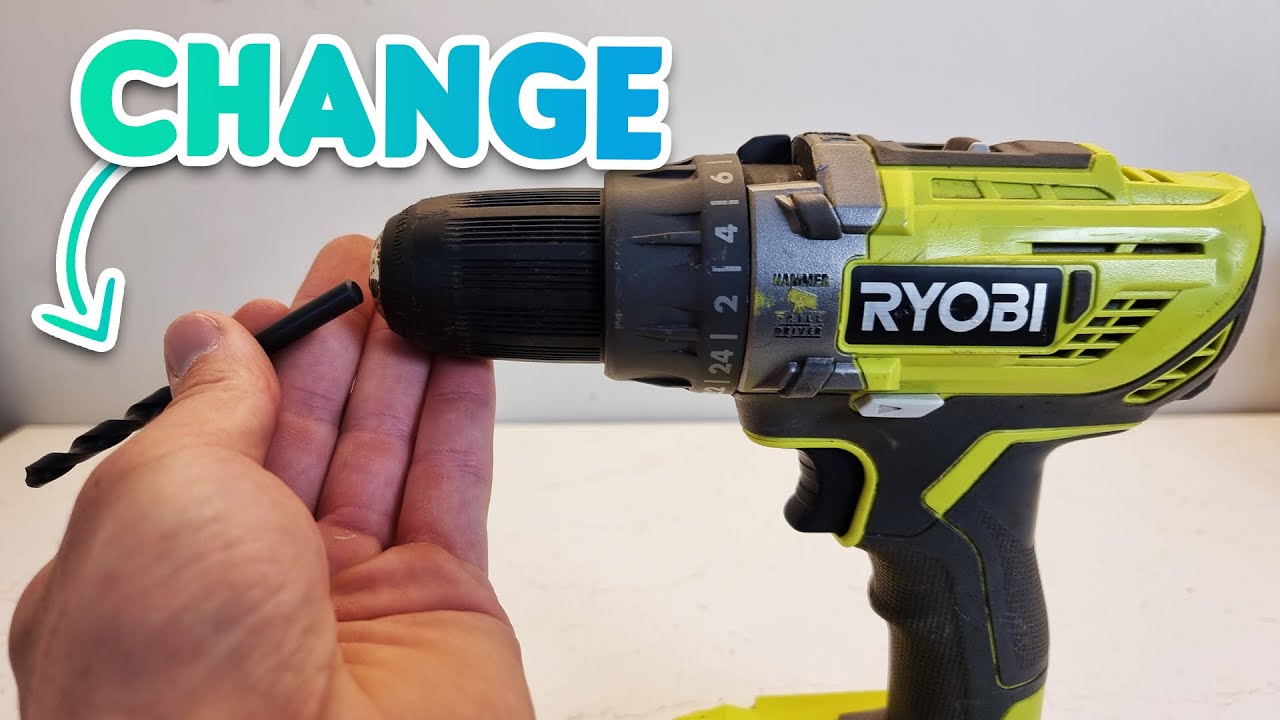
Ryobi Drill How to Change Bit
- Changing the bit on a Ryobi drill is a straightforward process. Follow these steps to safely and effectively change the drill bit:
- Note: Ensure the drill is unplugged or the battery is removed before changing the bit to prevent accidental starts.
- Release the Chuck: The chuck is the drill part that holds the bit in place. It typically consists of three jaws that grip the bit. To release the chuck, locate the chuck key or sleeve on your Ryobi drill.
Chuck Key
- If your drill has a chuck key, insert it into one of the holes on the side of the chuck.
- Rotate the chuck key counterclockwise to loosen the jaws and open the chuck.
- Do this a few times to fully open the chuck.
- Chuck Sleeve: If your drill has a keyless chuck (a chuck without a chuck key), hold the drill’s body firmly and grasp the chuck sleeve with your other hand. Rotate the chuck sleeve counterclockwise to loosen and open the chuck.
- Remove the Old Bit: Pull the old drill bit from the chuck jaws with the chuck open. You may need to wiggle it slightly to release it.
- Insert the New Bit: Take your new drill bit and insert it into the chuck jaws. Make sure it is centered and fully seated in the jaws.
Tighten the Chuck
- If you’re using a chuck key, insert it into the holes on the side of the chuck again, but this time, rotate it clockwise to tighten the jaws around the new bit.
- Make sure it’s snug and secure.
- If you have a keyless chuck, rotate the chuck sleeve clockwise to tighten it around the bit.
- Double-Check Tightness: Give the chuck one final twist to hold the bit securely. You want it to stay upright while using the drill.
- Plug in or Reattach the Battery: If you had to remove the power source, now is the time to plug in the cord or reattach the battery.
- Test the Drill: Before using the drill for your project, briefly run it to ensure the bit is properly secured and there’s no wobbling.
Gather Necessary Tools
Have the right tools before removing a drill bit from your Ryobi drill. Here’s a list of what you’ll need
A. Safety Gear
Work gloves: Ensure a firm grip and protect your hands.
B. Required Tools
- Ryobi drill: The one you need to work on.
- Drill bit set: If replacing the bit, have the new one ready.
- Chuck key: Typically provided with your Ryobi drill.
- Flathead screwdriver: Useful for specific Ryobi models.
- Adjustable wrench or pliers: Helps with loosening the chuck.
C. Optional but Handy
- Lubricating oil: For smoother chuck operation (if applicable).
- Soft cloth: Wipe down the drill and chuck for cleanliness.
- Workbench or stable surface: Provides a secure working area.
Understanding Ryobi Drill Components
To master the art of removing a drill bit from your Ryobi drill, it’s essential to familiarize yourself with the critical components of this versatile tool. Each part plays a crucial role in the process:
Chuck
The chuck is the cylindrical part at the front of the drill that holds the drill bit in place. It’s designed to secure the bit tightly during operation, ensuring stability and precision. Understanding how the chuck works is fundamental to removing and replacing drill bits.
Chuck Key
Some Ryobi drills feature a chuck key, a small tool used to loosen and tighten the chuck. The chuck key fits into the holes on the sides and allows you to manipulate it. Not all Ryobi drills require a chuck key, so check your model to see if it’s necessary.
Chuck Jaws
The chuck jaws are the gripping mechanism inside the chuck that holds the drill bit. Depending on your needs, they can be tightened or loosened using the chuck key or the drill’s built-in mechanism. Understanding how to control the chuck jaws is vital in removing and inserting drill bits.
Clutch
The clutch is typically found on cordless Ryobi drills and allows you to control the drill’s torque or power output. Adjusting the clutch setting is essential for various drilling tasks, such as driving screws or drilling into different materials.
Forward/Reverse Switch
This switch, often located near the trigger, determines the rotation direction of the drill bit. It’s crucial for loosening or tightening the chuck and changing the bit.
Trigger and Speed Control
The trigger is the central control for the drill’s operation, allowing you to adjust the speed and power. Understanding how to vary the speed and control the trigger is essential for safe and effective drilling.
Step-by-Step Guide
Now that you’re well-acquainted with the components of your Ryobi drill let’s dive into the precise steps for removing a drill bit:
Select a Suitable Location
Choose a well-lit and stable work area to perform the task. Ensure there’s enough space for maneuvering your drill.
Power Off
Ensure your Ryobi drill is switched off or disconnected from its power source, especially for corded drills.
Determine Chuck Type
Check whether your Ryobi drill has a keyless chuck (no chuck key required) or a keyed chuck (requires a chuck key). This will affect the removal process.
For Keyless Chuck
- Grasp the chuck firmly with one hand.
- Rotate the chuck counterclockwise (left) to release the jaws’ grip on the drill bit.
For Keyed Chuck
- Insert the chuck key into one of the holes on the sides of the chuck.
- Turn the chuck key counterclockwise (left) to loosen the jaws.
- Repeat this step until the jaws release the drill bit.
Remove the Drill Bit
Once the chuck is loosened sufficiently, carefully pull the drill bit out of the chuck jaws. If it’s stuck, wiggle it gently while pulling.
Inspect and Clean
Examine the removed drill bit for damage or wear. Replace it if necessary.
Insert a New Drill Bit (Optional)
If replacing the old bit, insert the new drill bit into the chuck jaws. Ensure it’s centered and secure within the chuck.
For Keyless Chuck
- Hold the chuck firmly with one hand.
- Rotate the chuck clockwise (right) to tighten the jaws securely around the drill bit.
For Keyed Chuck
- Insert the chuck key into one of the holes on the sides of the chuck.
- Turn the chuck key clockwise (right) to tighten the jaws securely around the drill bit.
Test the Drill
Power on your Ryobi drill and test it briefly to ensure the new drill bit is securely in place and operates smoothly.
Troubleshooting
Even with the straightforward process of removing a drill bit from a Ryobi drill, occasional challenges may arise. Here’s how to troubleshoot common issues:
Stuck Drill Bit
Problem: The drill bit is stuck in the chuck and will come out slowly.
Solution:
- Gently tap the chuck with a rubber mallet to release the bit.
- Apply a small amount of penetrating oil to the chuck and let it sit for a few minutes to loosen any corrosion.
- Use pliers to grip and wiggle the stuck bit while turning the chuck counterclockwise (left).
Chuck Won’t Loosen
Problem: You can’t seem to loosen the chuck jaws.
Solution:
- For keyless chucks, ensure you have a firm grip on the chuck while turning it counterclockwise (left).
- For keyed chucks, double-check that you’re using the correct chuck key and that it’s properly engaged in the holes on the chuck.
Difficulty Inserting a New Drill Bit
Problem: The new drill bit doesn’t fit properly into the chuck.
Solution:
- Ensure the drill bit shank matches the chuck size (e.g., a 3/8-inch chuck for a 3/8-inch drill bit).
- Check for any obstructions or debris inside the chuck that might prevent the bit from seating correctly.
Chuck Key Won’t Turn
Problem: You cannot turn the chuck key in a keyed chuck.
Solution:
- Ensure the chuck key is fully inserted into one of the holes on the sides of the chuck.
- Apply steady and even pressure while turning the chuck key counterclockwise (left).
Chuck Jaws Won’t Grip the Drill Bit
Problem: The chuck jaws don’t hold the drill bit securely.
Solution:
If using a keyless chuck, ensure you’ve tightened it sufficiently by turning it clockwise (right).
Excessive Wobbling or Vibration
Problem: The drill bit wobbles excessively when in use.
Solution:
Ensure the drill bit is seated securely and centered within the chuck.
Check for any damage or wear on the drill bit that may cause instability.
Safety Precautions
Ensuring safety while working with tools like a Ryobi drill is paramount to prevent accidents and injuries. This section will outline essential safety precautions always to follow when using your drill.
Wear Appropriate Safety Gear
Use work gloves to maintain a secure grip on the drill and reduce the risk of blisters.
Power Off When Not in Use
Ensure your Ryobi drill is powered off or disconnected from its power source when not in use. Unplug corded drills from electrical outlets before performing maintenance or changing bits.
Secure Workpiece
Secure your workpiece firmly using clamps or a vice to prevent it from moving during drilling.
Proper Workspace
Choose a well-ventilated and well-lit workspace with ample space for maneuvering your drill. Clear the area of tripping hazards, clutter, and flammable materials.
Inspect the Drill
Before use, inspect your Ryobi drill for any damage or loose parts. Ensure that the power cord (for corded drills) or battery connections (for cordless drills) are in good condition.
Chuck Key Removal (Keyed Chucks)
Never leave the chuck key inside the chuck during operation.
Use the Right Drill Bit
Please select the appropriate drill bit for your task, ensuring it matches the material you’re drilling into. Ensure the bit is securely seated in the chuck.
Mind the Chuck
Keep your hands away from the chuck and drill bit while the drill is in operation. Do not attempt to adjust or remove the bit while the drill runs.
Steady Handling
Maintain a firm and stable grip on the drill’s handle while operating it. Use both hands to control the drill, especially when drilling into hard materials.
Safe Start
Avoid excessive force, which can lead to bit breakage or loss of control.
Battery Safety (Cordless Drills)
- Store rechargeable batteries in a cool, dry place away from direct sunlight and extreme temperatures.
- Use only the charger recommended by the manufacturer.
Ventilation
When working with materials that produce dust or fumes, ensure adequate ventilation or wear a dust mask if necessary.
Training and Experience
If you’re new to using a Ryobi drill or any power tool, seek guidance or training from an experienced individual before starting complex projects.
Maintenance and Care
Let’s discuss the importance of maintaining and caring for your Ryobi drill and drill bits, helping you extend their lifespan and keep them in optimal working condition.
Proper maintenance and care of your Ryobi drill and drill bits ensure their longevity and contribute to safe and efficient operation. Follow these guidelines to keep your tools in top shape:
Regular Cleaning
- After each use, clean your Ryobi drill and drill bits. Remove dust, debris, and any material buildup.
- Use a soft cloth or a brush to wipe down the drill’s exterior and chuck.
- Inspect the chuck jaws for any residue and clean them if necessary.
Lubrication
For drills with a keyed chuck, periodically apply a small amount of lubricating oil to the chuck’s keyhole and teeth. This prevents rust and ensures smooth operation.
Storage
Use a carrying case or toolbox to protect it from dust and impact damage. Hang your drill on a wall-mounted tool rack or store it on a shelf to prevent it from being knocked over.
Bit Storage
Keep your drill bits organized and clean by storing them in a designated bit case or organizer. Avoid mixing drill bits with other tools or materials, which can cause damage and dulling.
Inspect Bits Regularly
Before each use, inspect your drill bits for signs of wear, damage, or dullness. Replace any worn or damaged bits to ensure efficient drilling and prevent accidents.
Battery Maintenance (for cordless drills)
Charge cordless drill batteries as recommended by the manufacturer to prevent overcharging.
Safety Checks
Periodically check the drill’s cord (for corded drills) or the battery connections (for cordless drills) for any damage or wear. Ensure the power switch and trigger are working correctly and without sticking.
Chuck Maintenance
Ensure keyless chucks are tightened securely to prevent slippage during operation. For keyed chucks, keep the chuck key in a safe and easily accessible place to prevent loss.
Periodic Calibration
Some advanced Ryobi drills may require periodic calibration or adjustment, especially if you notice decreased performance or accuracy. Refer to your user manual for guidance.
Conclusion
In conclusion, mastering removing a drill bit from your Ryobi drill is essential to your DIY toolkit. This simple yet crucial task allows you to adapt your drill to various projects, ensuring precision and efficiency in your work.
Throughout this guide, we’ve covered the fundamentals of safely and effectively removing drill bits from keyless and keyed chucks, understanding the components of your Ryobi drill, and troubleshooting common issues that may arise during the process. Additionally, we emphasized the importance of regular maintenance and care to extend the life of your drill and drill bits.