

Discover the art of precision cuts with the remarkable Ryobi Circular Saw. Are you eager to harness the full potential of this powerful tool and bring your woodworking projects to life?
-you’re a woodworking enthusiast or a seasoned professional, this tutorial will equip you with the abilities and information to become the best at using a Ryobi Circular Saw.
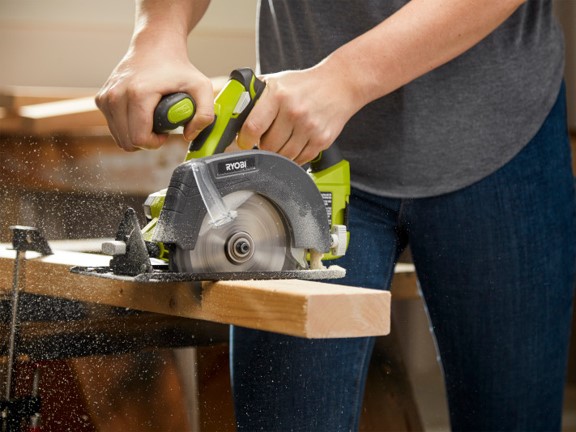
So, let’s dive into the world of “how to use Ryobi Circular Saw” and unlock the secrets to achieving exceptional results with this cutting-edge tool.
Safety Measures When Using a Ryobi Circular Saw Edge
Working with a Ryobi circular saw edge can be a rewarding experience, but it’s crucial to prioritize safety at all times. Circular saws are powerful tools that require caution and proper safety measures to prevent accidents and ensure a safe working environment.
We will discuss important safety measures when using a Ryobi circular saw edge. Adhering to these guidelines can protect yourself and others while achieving successful and injury-free projects. Let’s delve into the safety measures.
1. Personal Protective Equipment (PPE)
Appropriate personal protective equipment is essential when operating a Ryobi circular saw. Here are the key PPE items to consider:
- Safety Glasses: Safeguard your eyes from flying trash, wood chips, or dust by wearing impact-resistant safety glasses with side shields.
- Ear Protection: Circular saws can generate high noise levels that can damage hearing. Use earplugs or earmuffs to safeguard your ears.
- Gloves: Choose sturdy work gloves that offer a good grip and protect your hands from cuts, splinters, or vibrations.
- Dust Mask: When cutting materials that produce dust or particles, wear a dust mask or respirator to avoid inhaling harmful substances.
- Protective Clothing: Wear snug-fitting, non-loose clothing to avoid getting caught in the saw’s moving parts. Avoid wearing jewellery or loose accessories.
2. Saw and Work Area Preparation
Before starting any cutting task with your Ryobi circular saw, ensure that the saw and work area are properly prepared:
- Inspect the Saw: Before each use, check the saw for any loose or damaged parts. Verify that the blade guard operates smoothly and springs back into place.
- Workspace Organization: Keep your work area clean and organized, removing potential tripping hazards. Maintain good lighting to enhance visibility.
- Secure the Workpiece: Secure it using clamps or other suitable methods to prevent it from moving during the cut. This ensures stability and reduces the risk of accidents.
3. Safe Operating Techniques
Implementing safe operating techniques is essential when using a Ryobi circular saw edge. Follow these guidelines:

- Two-Handed Grip: Maintain a firm, two-handed grip on the saw. Use one hand on the main handle and the other on the auxiliary handle for better control and stability.
- Positioning: Stand in a balanced position with your feet shoulder-width apart. Maintain a comfortable stance that allows you to have control over the saw’s movement.
- Start-Up Safety: Ensure the saw is switched off and unplugged (or the battery removed) when adjusting or changing the blade. Only plug in or insert the battery when ready to make cuts.
- Blade Clearance: Allow the saw blade to reach full speed before starting the cut. Keep a protected separation between your hands and the sharp edge throughout the cutting process.
- Controlled Cutting Motion: Guide the saw steadily along the marked cutting line, avoiding sudden or jerky movements. Let the saw’s blade do the cutting—do not force the saw through the material.
- Post-Cut Safety: Once the cut is complete, release the trigger or power switch, and trust that the sharp edge will reach a standstill before waiting for the edge to reach a standstill before setting the saw down.
4. Additional Safety Precautions
Consider these extra safety precautions for a secure working environment:
- Children and Pets: Keep kids and pets off the work area to prevent accidental injuries. Store the saw in a secure location when not in use.
- Electrical Safety: If using a corded saw, review the power rope for any harm before use. Ensure the cord is properly grounded, and never operate the saw in wet conditions.
- Blade Handling: Handle the saw blade carefully when installing or removing it. Use appropriate tools, such as a wrench, to secure the blade.
- Safety Manual: Familiarize yourself with the safety guidelines in the Ryobi circular saw’s user manual. It contains manufacturer-specific safety instructions and recommendations.
Steps to Set Up a Ryobi Circular Saw Edge
Setting up the edge of a Ryobi circular saw’s edge is essential to ensure precise and accurate cuts. Whether you’re a novice or an accomplished client, properly configuring the edge of your circular saw is crucial for achieving clean and efficient cuts.
We will direct you through the bit-by-bit course of setting up the edge of your Ryobi circular saw. Let’s get started.
Step 1: Assemble the Necessary Apparatuses and Gear
Before beginning the setup process, gathering the necessary tools and equipment is important. For setting up the edge of your Ryobi circular saw, you’ll need the following:
- Ryobi circular saw
- Combination square or speed square
- Screwdriver or Allen wrench (depending on your saw’s adjustment mechanism)
- Safety glasses and gloves (always prioritize safety when working with power tools)
Step 2: Check the Blade Alignment
The first step in setting up the edge of your Ryobi circular saw is to ensure that the blade is aligned properly. Follow these steps:
- Unplug or remove the battery from your circular saw to prevent accidental start-ups during setup.
- v edge of the saw’s base. You can use a combination square or speed square to verify the alignment.
- Locate the adjustment screws or knobs on your circular saw if the blade is not parallel. These are usually found near the blade housing.
- Use a screwdriver or Allen wrench to make the necessary adjustments. Turn the adjustment screws or knobs incrementally until the blade is perfectly parallel to the edge of the saw’s base.
- Double-check the alignment using the combination square or speed square.
Step 3: Set the Cutting Depth
After ensuring the blade alignment, the next step is to set the cutting depth of your Ryobi circular saw. Follow these steps:
- Locate the cutting depth adjustment lever or knob on your circular saw. This is normally seen as an afterthought or front of the saw’s base.
- Loosen the lever or turn the knob to adjust the cutting depth.
- Consult the depth scale on the saw’s base and set it to the desired cutting depth.
- Tighten the lever or knob securely to lock the cutting depth in place.
Step 4: Verify the Bevel Angle
In addition to the cutting depth, the bevel angle of your Ryobi circular saw may also need adjustment for certain cuts. Here’s how to verify and adjust the bevel angle:
- Locate the bevel adjustment lever or knob on your circular saw. This is typically located near the front or rear of the saw’s base.
- Loosen the lever or turn the knob to adjust the bevel angle.
- Consult the bevel angle scale on the saw’s base and set it to the desired angle (e.g., 0 degrees for straight cuts).
- Tighten the lever or knob securely to lock the bevel angle in place.
Essential Cutting Techniques When Using a Ryobi Circular Saw Edge
Mastering the cutting techniques using a Ryobi circular saw edge can enhance your woodworking skills and help you achieve precise and efficient cuts.
We will explore some essential cutting techniques that can be applied using a Ryobi circular saw edge. You can improve your cuts’ quality and work confidently by getting it and executing these strategies. Let’s dive in.
1. Straight Cuts
Straight cuts are the most basic and commonly used cutting technique for a circular saw. To achieve clean and straight cuts with your Ryobi circular saw, follow these steps:
Step 1: Mark your cutting line: Utilize an estimating tape and pencil to check the ideal cutting line on the workpiece. Ensure that the line is straight and visible.
Step 2: Align the saw: Position the edge of the base along the marked cutting line, ensuring that the blade is parallel to the line.
Step 3: Adjust the cutting depth: Set the cutting depth of your Ryobi circular saw according to the thickness of the material you’re cutting. Refer to the depth scale on the saw’s base and adjust it accordingly.
Step 4: Secure the workpiece: If possible, clamp the workpiece to a stable surface to prevent movement during the cut. This will enhance safety and accuracy.
Step 5: Start the cut: Hold the saw’s handle firmly and activate the trigger or power switch. Permit the blade to reach maximum speed, previously engaging it with the workpiece.
Step 6: Guide the saw: Maintain a steady grip on its handle and carefully guide it along the marked cutting line, applying gentle downward pressure. Let the saw’s blade cut—avoid forcing or pushing too hard.
2. Crosscuts
Crosscuts are perpendicular cuts made across the grain of the material. When performing crosscuts with a Ryobi circular saw, consider the following steps:
Step 1: Measure and mark: Utilize an estimating tape and pencil to gauge and stamp the desired length of the crosscut on the workpiece.
Step 2: Position the saw: Position the edge of the base against the marked line, aligning the blade with the cutline.
Step 3: Adjust cutting depth: Set the cutting depth on the saw’s base to ensure that it extends slightly beyond the thickness of the workpiece.
Step 4: Secure the workpiece: If possible, secure the workpiece to a stable surface to minimize movement during the cut.
Step 5: Start the cut: Start the saw and guide it along the marked line, ensuring a smooth and controlled motion.
3. Bevel Cuts
Bevel cuts are angled cuts made along the edge of the workpiece. The Ryobi circular saw allows you to adjust the bevel angle to achieve precise bevel cuts. Follow these steps:
Step 1: Mark the angle: Measure the desired bevel angle on the workpiece using a protractor or angle guide.
Step 2: Adjust the bevel angle: Loosen the bevel adjustment lever or knob on your Ryobi circular saw. Set the bevel angle according to your mark and securely tighten the lever or knob.
Step 3: Align the saw: Position the base along the marked line, ensuring the blade aligns with the desired bevel angle.
Step 4: Secure the workpiece: Clamp the workpiece securely to prevent any movement during the cut.
Step 5: Start the cut: Activate and guide the saw along the marked line, maintaining control and a steady cutting motion.