
Miter saw not Cutting Straight? Don’t worry; you’re not alone. Misalignment issues with miter saws can be frustrating, but fear not! We’ve got you covered with this step-by-step guide to troubleshoot and correct those pesky misalignment problems.
Understanding the Miter Saw
Before diving into troubleshooting, let’s get acquainted with the key components of a miter saw. It’s like knowing the players in a game before you start:
Base and Table: The sturdy foundation where your magic happens, complete with extension wings for those longer materials.
- Vertical Fence: The workpiece’s best friend, keeping it snug and secure, ensuring precision.
- Circular Blade: The star of the show, designed to cut through various materials.
- Blade Guard: This protective knight covers the blade, retracting when it’s time to cut.
- Handle and Trigger: Your control center and power activator.
- Bevel Adjustment: Allows the blade to tilt for bevel cuts, adding versatility.
- Miter Scale: For angled cuts across the width of your workpiece.
- Bevel Scale: Indicates the blade’s angle for bevel cuts along the thickness.
Signs of Trouble
How do you know your miter saw is acting up? Look out for these telltale signs:
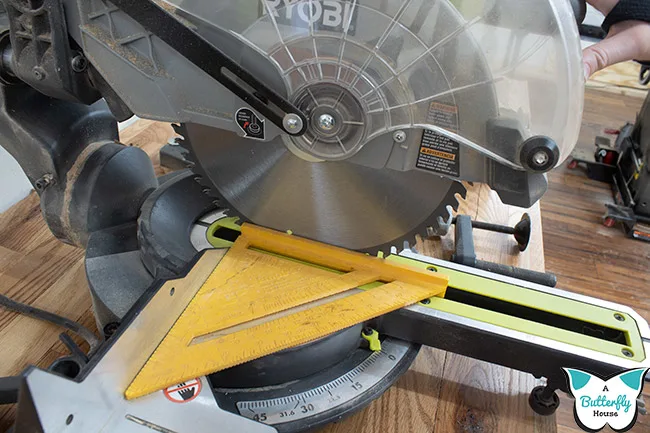
- Blade Alignment: Ensure the blade is perfectly perpendicular to the saw’s base and fence. If not, consult your user manual for adjustment instructions.
- Blade Condition: Inspect the blade; if it’s dull or damaged, it’s time for a replacement or a sharpening session.
- Fence Alignment: The fence should align precisely with the blade; if not, adjust it accordingly.
- Bevel Adjustment: If your saw offers bevel cuts, set it to the desired angle or 0 degrees.
- Material Clamping: Always securely clamp your workpiece to prevent movement during cuts.
- Blade Wobble: No blade should wobble or play; check for issues with the arbor or blade attachment.
- Cleanliness: Keep your work area free from debris and sawdust to ensure smooth operation.
- Miter Saw Quality: Sometimes, cheaper saws come with inherent alignment issues; consider upgrading.
- Operator Technique: Ensure you’re using proper techniques and maintaining steady pressure during cuts.
- Calibration: Some saws need periodic calibration; consult your manual for guidance.
- Test Cuts: Perform test cuts on scrap material before your actual project to fine-tune your saw’s settings.
- Professional Help: If all else fails, don’t hesitate to seek expert advice or contact the manufacturer’s support.
Remember, safety should always be your top priority when working with power tools. Wear the appropriate safety gear, follow manufacturer instructions, and take precautions to avoid accidents.
The Culprits of Misalignment
Misalignment can sneak up for various reasons, so let’s uncover the usual suspects:
- Blade Misalignment: When the blade isn’t in sync with the fence or table, expect non-square, non-straight cuts.
- Fence Misalignment: Your fence should dance to the blade’s tune; if not, adjust it to keep things in line.
- Bevel Adjustment Issues: Misalignment might stem from incorrect bevel settings; get that angle right!
- Dull or Damaged Blade: A blade showing signs of wear can lead to wandering cuts; keep it sharp.
- Material Clamping: Don’t let your workpiece roam free; secure it with clamps to prevent misalignment.
- Blade Wobble: Any blade shimmy or play spells trouble; inspect and address arbor or blade issues.
- Inadequate Power: An underpowered saw can struggle, causing misalignment; match the saw to the task.
- Operator Technique: Uneven pressure and shaky hands can send your cuts astray; practice good form.
- Saw Quality: Cheap saws may come with inherent alignment quirks; invest in quality for precision.
- Environmental Factors: Vibrations, wobbly surfaces, or power hiccups can disrupt precise cuts; stabilize your workspace.
- Calibration: Some saws need a little TLC to stay accurate; follow your manual’s calibration instructions.
- Wear and Tear: Over time, even the best saws can wear out; regular checks can catch and fix wear-related issues.
- Manufacturing Defects: Rare but possible, a faulty saw off the assembly line can wreak havoc; consult professionals if you suspect this.
Troubleshooting Misalignment
Now that you know the culprits, let’s roll up our sleeves and fix that misalignment.
- 1. Safety First: Power off, unplug, gear up, and work in a well-ventilated area.
- 2. Check Blade Alignment: Ensure the blade’s perpendicular to the table and fence; if not, it’s time for adjustment.
- 3. Adjust Blade Alignment: Follow your user manual to tweak the blade alignment, typically involving loosening screws and minor adjustments.
- 4. Verify Fence Alignment: Your fence should square up with both the blade and table; make any needed adjustments.
- 5. Adjust Fence Alignment: Depending on your saw’s design, screws or knobs should help square the fence.
- 6. Check Bevel Adjustment: If you’re into beveled cuts, make sure that angle’s set correctly.
- 7. Adjust Bevel Setting: Correct any bevel angle discrepancies following your manual.
- 8. Inspect Blade Condition: Look for damage or dullness; replace or sharpen the blade as needed.
- 9. Replace or Sharpen the Blade: Swap out damaged or dull blades with a sharp, suitable replacement, following safety precautions.
- 10. Verify Material Clamping: Clamp your workpiece tightly to prevent unwanted movement.
- 11. Check for Blade Wobble: Inspect the blade for any wobble or play; fix loose arbor nuts or blade issues.
- 12. Ensure Adequate Power: Use a saw that matches your material to prevent misalignment due to power issues.
- 13. Practice Operator Technique: Maintain steady pressure and follow proper cutting techniques.
- 14. Environmental Factors: Eliminate vibrations, stabilize your workspace, and ensure a consistent power source.
- 15. Perform Test Cuts: Fine-tune your saw’s settings with test cuts on scrap material.
- 16. Seek Professional Help: If all else fails or if certain adjustments make you uneasy, consult professionals or the manufacturer’s support.
With these steps, your miter saw should be back on track, delivering those precise, straight cuts you crave. Happy woodworking, and may your projects be flawlessly aligned.
Continuously focus on security while working with power instruments. Follow the manufacturer’s guidelines and recommendations in your user manual for your specific miter saw model.
Maintaining Your Miter Saw: A Recipe for Longevity and Precision
Maintaining and preserving your trusty miter saw is the secret ingredient to ensuring its longevity, accuracy, and safe operation. Think of it like caring for a cherished recipe – attention to detail is key.
In this section, we’ll explore the essential maintenance steps and preventive measures to keep your miter saw performing at its best.
The Cleaning Ritual
Like any treasured possession, your miter saw deserves a good cleaning. After each use, make it a habit to give it a once-over:
- Sawdust & Debris: Remove sawdust and debris that may have taken residence on your saw. These can affect its performance and alignment.
- Lubrication Love: Show some love to the moving parts and pivot points. Consult your user manual for the right lubricants. This reduces friction and extends your saw’s life.
- Blade Check-Up: Regularly inspect the blade for wear, damage, or dullness. If it’s showing signs of wear, don’t hesitate to replace or sharpen it.
- Blade Guard Care: Ensure the blade guard operates smoothly, returning to its place after each cut. Cleaning and lubricating the blade guard mechanism can keep it in tip-top shape.
- Cord Vigilance: Keep an eye on the power cord for any damage or fraying. Promptly replace it if needed to avoid electrical hazards.
- Fastener Tightening: Periodically check and tighten all fasteners—nuts, bolts, screws, and knobs. Vibrations during operation can make them seek greener pastures.
- Calibration Choreography: Follow your user manual’s instructions for calibration. This ensures your saw maintains its accuracy, a crucial element for precision cuts.
- Blade Swap Safety: When changing the blade, always follow safety procedures outlined in your user manual. Safety first!
- Storage Sanctuary: Proper storage is vital. Keep your saw in a dry environment to avoid rust and damage.
- Operator Training: Knowledge is power. Ensure anyone operating the saw is well-trained in its use and safety practices.
- Cord Scrutiny: Regularly inspect the extension cord for any damage or wear, as it can affect the saw’s performance.
Preventive Measures
Prevention is often the best cure. Here are some proactive steps to ensure your miter saw stays in top shape:
- Avoid Overloading: Don’t push your saw beyond its limits. Overloading can strain the saw and lead to misalignment.
- Sturdy Work Surface: Always use a stable, level work surface to guarantee accurate cuts. It’s like having a steady hand.
- Prompt Issue Resolution: If you notice any issues or unusual sounds during operation, don’t procrastinate. Address them promptly to prevent costly repairs down the road.
- Read the Manual: Lastly, but importantly, read and follow the user manual provided by the manufacturer for your specific miter saw model. It contains the essential information on maintenance, safety, and operation. Ignoring it is like trying to cook without a recipe!
Essential Accessories for Precision
To ensure your miter saw consistently delivers those precise and straight cuts, consider these handy tools and accessories:
- Miter Saw Stand: Provides a stable, level work surface, enhancing accuracy and safety. Adjustable stands can accommodate different miter saw models.
- Extension Wings or Rollers: These add-ons help support long workpieces, reducing the chances of them sagging or shifting during cuts.
- Digital Angle Gauge: For precise measurement and setting of angles, ensuring accurate bevel and miter cuts.
- Stop Blocks: Perfect for making repetitive cuts of the same length. They serve as a reference point for consistent cuts.
- Material Clamps: Securing your workpiece to the fence and table is essential for straight cuts. Material clamps do the job efficiently.
- Laser Guide: These project a line onto your workpiece, making it easier to align your cuts accurately. Some miter saws come with built-in guides, or you can purchase aftermarket systems.
- Dust Collection System: A clean workspace is a safe workspace. A dust collection system or shop vacuum attachment helps keep things tidy and improves visibility while cutting.
- Zero-Clearance Insert: Reduces tear-out on the underside of your workpiece, enhancing the quality of your cuts.
- High-Quality Blades: Invest in top-notch blades suitable for the materials you’re cutting. They can significantly enhance the precision of your cuts.
- Digital Readout: Provides precise measurements down to a fraction of an inch, ensuring your cuts are accurate.
- Tape Measure and Marking Tools: Accurate measurements and markings are your allies. Quality tape measures, combination squares, and marking tools ensure your cuts are spot on.
- Push Sticks and Hold-Downs: Safety first! These tools help keep your hands safe from the blade and provide better control over the workpiece.
- Sacrificial Fence: Attachable to the saw’s existing fence, it reduces tear-out and provides a fresh cutting surface.
- Safety Gear: Last but not least, always wear the right safety gear—safety glasses, hearing protection, and dust masks—to safeguard yourself during sawing adventures.
Conclusion
When it comes to your miter saw, maintenance isn’t just a chore—it’s a recipe for success. By following these meticulous steps, your miter saw will remain your loyal partner in precision cuts, ensuring your woodworking projects shine with accuracy and quality. So, sharpen those blades, tighten those screws, and keep your saw in tip-top shape for many projects to come.