
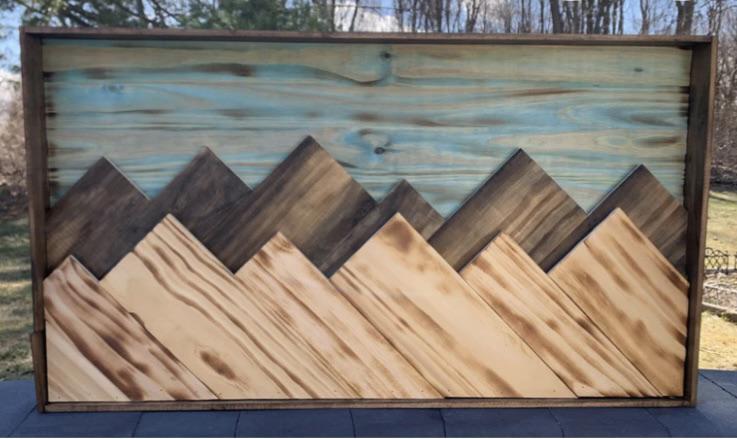
Scroll saw
Scroll saws are primarily used for precision cutting and are often used in crafting, woodworking, and hobbyist projects requiring detailed and curved cuts.
Here are some key features and uses of a scroll saw
1. Precision Cutting: Scroll saws are designed for precision cutting, allowing you to make intricate and detailed cuts easily. The fine blade enables tight curves and complex patterns to be cut accurately.
2. Variable Speed Control:
3. Blade Types: Scroll saw blades come in various types and sizes, including plain end and pin-end blades. The choice of blade depends on the project and the material you are working with.
4. Scrollwork and Inlays: Scroll saws are commonly used for creating scrollwork, fretwork, marquetry, and inlays in woodworking projects. They excel at making intricate, decorative designs.
5. Thin Cuts: Scroll saws can make thin, delicate cuts, making them suitable for creating jigsaw puzzles, wooden ornaments, wooden letters, and other acceptable woodworking applications.
6. Bevel Cuts: Some scroll saws can be tilted to make bevel cuts at different angles, allowing for more versatile cutting options.
7. Safety Features: Many modern scroll saws have features like blade guards and hold-down clamps to ensure safe operation.
8. Dust Collection: Some scroll saws have built-in dust collection systems or can be connected to a dust extractor to keep the work area clean.
Router
A router can refer to different things depending on the context. In the context of computers and networking, it refers to a device connecting different computer networks, directing data traffic between them.
In woodworking and carpentry, a router is a power tool used to hollow out an area or create decorative edges and shapes in wood, plastic, and other materials. Let’s focus on the woodworking router:
Woodworking Router:
It consists of a motor connected to a base and uses various bits or cutters to remove material from the workpiece. Here are some key features and uses of woodworking routers:
1. Types of Routers:
- · Fixed-Base Router: This type of router has a fixed base, and the cutting depth is set before use. It’s ideal for tasks that require consistent depth, such as edge profiling and dado cutting.
- · Plunge Router: Plunge routers have a base that can be adjusted up and down during operation, allowing you to start a cut in the middle of the workpiece rather than just at the edge. They are suitable for tasks like mortising and deep grooves.
2. Router Bits: Common types include straight bits, round-over bits, chamfer bits, dovetail bits, and more. Choosing the right bit is crucial for achieving the desired result.
3. Edge Profiling: Routers are commonly used to create decorative edges on wooden surfaces. You can use round-over, ogee, or other specialized bits to shape the edges of tabletops, cabinets, and more.
4. Joinery: Routers are essential for creating precise and strong joints in woodworking. Dovetail joints, mortise and tenon joints, and box joints are some examples of joints made with the help of routers.
5. Inlays and Template Work: Routers are used for inlay work, where a design or pattern is set into the surface of a piece. They are also used with templates to replicate shapes and patterns accurately.
6. Hollowing and Grooving: Routers can hollow out areas or create grooves in wood for various purposes, including creating recesses for hardware or making channels for wires.
7. Safety: Following safety guidelines when using a router is essential. This includes wearing safety glasses, hearing protection, and dust masks. Proper router table setup and control of the workpiece are also essential for safe operation.
8. Router Tables: Many woodworkers use router tables and stationary platforms with a mounted router. Router tables offer better control and precision for specific tasks and can be equipped with additional features like fence systems and feather boards.
Scroll saw vs router
Scroll saws and routers are both versatile woodworking tools, but they serve different purposes and excel in distinct areas of woodworking. Here’s a comparison of the two tools:
Scroll Saw:
1. Cutting Precision: Scroll saws are primarily used for making precise, intricate, and detailed cuts in various materials, including wood, plastic, and metal. They excel at creating intricate shapes, curves, and patterns.
2. Blade Type: Scroll saws use a thin, reciprocating blade that moves up and down. This allows for highly detailed and tight curves, making them ideal for fine woodworking and crafting tasks.
3. Intricate Designs: Scroll saws are commonly used for scrollwork, fretwork, marquetry, inlays, and other decorative and artistic woodworking applications.
4. Thin Cuts: Scroll saws can make thin, delicate cuts, making them suitable for projects like wooden ornaments, jigsaw puzzles, and wooden letters.
5. Safety: Scroll saws are significantly safer to use when cutting small and intricate pieces, as the blade is enclosed and less exposed than a router bit.
Router
1. Versatility: Routers are versatile woodworking tools for many tasks, including hollowing out areas, edge profiling, joinery, inlay work, and shaping. They can handle various materials, including wood, plastic, and metals.
2. Edge Profiling: Routers excel at creating decorative edges on wooden surfaces. They can produce a variety of edge profiles using different router bits.
3. Joinery: Routers are essential for creating solid and precise joints like dovetails, mortise and tenon, and box joints. They are also used for dadoes, grooves, and rabbets.
4. Template Work: Routers are often used with templates to replicate shapes and patterns accurately. This is useful for batch production of identical pieces.
5. Variable Depth: Routers offer variable depth control, allowing you to adjust the cutting depth during operation. This is particularly useful for tasks like dado cutting and mortising.
6. Safety Considerations: Routers can be more intimidating for beginners due to the high-speed rotating bits, and they require proper safety precautions, including hearing protection, eye protection, and dust collection.
Router Vs Scroll Saw: Choosing Between These Two Tools
Choosing between a router and a scroll saw depends on your woodworking needs and the projects you plan to tackle. Both tools have distinct functions and excel in different areas of woodworking. Here are some factors to consider when deciding between a router and a scroll saw:
When to Choose a Scroll Saw:
1. Intricate and Detailed Cuts: If your primary woodworking focus is on creating intricate and detailed cuts, such as scrollwork, fretwork, marquetry, inlays, or crafting tasks that require precise curves and patterns, a scroll saw is an excellent choice. Scroll saws are specifically designed for such tasks and provide exceptional cutting precision.
2. Thin Cuts: Scroll saws are well-suited for making thin and delicate cuts in various materials, making them ideal for projects like wooden ornaments, jigsaw puzzles, wooden letters, and other acceptable woodworking applications.
3. Safety: Scroll saws are generally considered safer, especially when working on small, intricate pieces. The blade is enclosed and less exposed than a router bit, reducing the risk of accidents.
4. Artistic and Decorative Woodworking: If you’re more interested in artistic and decorative woodworking projects, a scroll saw is essential for creating intricate designs and patterns.
When to Choose a Router
1. Versatility: Routers are highly versatile woodworking tools capable of handling various tasks. A router is the better choice if you need a tool that can perform edge profiling, joinery, inlay work, template routing, hollowing out areas, shaping, and more. It can work with various materials, including wood, plastic, and metals.
2. Edge Profiling: Routers excel at creating decorative edges on wooden surfaces. They can produce a variety of edge profiles using different router bits.
3. Joinery: Routers are essential for creating solid and precise joints like dovetails, mortise and tenon, and box joints. They are also used for dadoes, grooves, and rabbets.
4. Template Work: If you require the ability to replicate shapes and patterns accurately, routers are often used with templates for batch production of identical pieces.
5. Variable Depth Control: Routers offer variable depth control, allowing you to adjust the cutting depth during operation. This is particularly useful for tasks like dado cutting and mortising.
6. Production Work: Routers are suitable for large-scale projects due to their efficiency and versatility.
Consider Owning Both: Many experienced woodworkers find having a scroll saw and a router in their workshops beneficial. These tools complement each other, allowing you to cover a broader range of woodworking projects and tasks. If your budget and workshop space allow, having both tools can significantly enhance your woodworking capabilities.
Edge Profiling
Edge profiling in woodworking refers to the process of shaping the edges of a wooden workpiece to create decorative, functional, or aesthetic profiles.
This technique is commonly used to enhance the appearance of furniture, cabinets, and other woodworking projects by giving the edges a finished and polished look. Edge profiling can also add strength to joints and edges. Here’s an overview of edge profiling in woodworking:
Tools for Edge Profiling
1. Router: A router is the primary tool used for edge profiling. It is equipped with various router bits designed for specific edge profiles. Standard router bits for edge profiling include round-over, chamfer, cove, ogee, and beading bits.
2. Router Table: A router table is a stationary platform that holds the router upside down, with the bit protruding through the table’s surface. It provides better control and stability when working on narrow or small pieces. Router tables are commonly used for edge profiling tasks.
Steps for Edge Profiling:
1. Select the Router Bit: Choose the appropriate router for the desired edge profile. The choice of bit will determine the final shape of the edge.
2. Adjust the Router: Set the router’s cutting depth to achieve the desired profile. This can usually be done using the router’s depth adjustment mechanism.
3. Secure the Workpiece: Secure the workpiece to a stable surface, such as a workbench or router table, to prevent it from moving during the profiling process. You may use clamps or a router table fence to hold the workpiece in place.
4. Router Bit Positioning: Position the router bit so that it contacts the edge of the workpiece at the desired location to begin the profiling cut.
5. Safety Gear: Wear appropriate safety gear, including safety glasses, hearing protection, and dust protection, when operating a router.
6. Start Routing: Move the router steadily and smoothly and maintain control over the tool.
7. Finishing Pass: After the initial pass, you may need to make a finishing pass to ensure a smooth and consistent edge profile. This pass should remove any roughness or imperfections left by the initial cut.
8. Sand and Finish: After complete edge profiling, sand the profiled edge to remove tool marks and achieve a smooth finish. Apply finish or stain to the wood for added protection and aesthetics.
Common Edge Profiles
- · Round-over: Creates a curved, rounded edge.
- · Chamfer: Produces a beveled edge, typically at a 45-degree angle.
- · Cove: Forms a concave, curved edge.
- · Ogee: Creates a complex S-shaped profile, often used for decorative molding.
- · Beading: Adds a series of tiny, rounded beads along the edge.
Edge profiling is a fundamental technique in woodworking that allows craftsmen to add elegance and functionality to their projects. Woodworkers can achieve various design possibilities in their creations by mastering various edge profiles and using the right router bits.
Joinery
Proper joinery is essential for furniture, cabinets, structures, and various woodworking projects. Different types of joinery techniques are used depending on the specific requirements of the project and the desired aesthetic. Here are some standard joinery methods used in woodworking:
1. Mortise and Tenon Joint:
- · A mortise is a rectangular or square hole cut into one piece of wood.
- · A tenon is a corresponding protrusion or tab on another piece of wood that fits snugly into the mortise.
2. Dovetail Joint:
- · Dovetail joints are characterized by interlocking, wedge-shaped pins and tails.
- · These joints are prized for their strength and resistance to pulling apart and are often used in drawers and boxes.
3. Biscuit Joint:
- · A biscuit joiner (or plate joiner) is used to cut slots in the edges of two pieces of wood.
- · A biscuit, typically made of compressed wood, is inserted into the slots, and glue is applied.
- · The biscuit expands When the pieces are clamped together, creating a robust and hidden joint.
4. Dado Joint:
- · A groove (dado) is cut across one piece of wood in a dado joint.
- · Another piece of wood with a matching thickness fits into the dado.
- · This joint is often used for shelving and cabinetry.
5. Rabbet Joint:
- · A rabbet joint is created by removing a portion of the edge or end of one piece of wood, leaving a step-like profile.
- · The other piece of wood fits into the recess created by the rabbet.
- · This joint is commonly used for making the backs of cabinets and bookshelves.
- · It involves joining two pieces of wood at their ends or edges, forming a right angle.
- · Butt joints are often reinforced with screws, dowels, or nails for added strength.
7. Pocket Hole Joinery:
- · Pocket hole joinery involves drilling angled holes (pocket holes) into one piece of wood.
- · Screws are driven through these holes into another piece of wood to create a robust, hidden joint.
- · This method is commonly used for assembling face frames and cabinets.
8. Tongue and Groove Joint:
- · This joint is commonly used for edge-to-edge flooring, paneling, and joining boards.
9. Half-Lap Joint:
- · Half-lap joints involve notching out half the thickness of each piece of wood, creating a flush, flat surface when the pieces are joined together.
- · These joints are used in frameworks and other applications where two pieces of wood need to overlap evenly.
Sand and Finish
“Sanding and finishing” is a critical step in woodworking that involves preparing the surface of the wood and applying a protective finish to enhance its appearance and durability. This process is essential for achieving a smooth, polished, professional look in your woodworking projects. Here’s an overview of the sanding and finishing process:
1. Sanding:
Sanding is the initial step in preparing the wood surface. It involves using abrasives, such as sandpaper or sanding machines, to smooth out imperfections, remove rough spots, and create a consistent and even surface. Here are the critical steps in the sanding process:
- · Selection of Sandpaper Grit: Start with coarse-grit sandpaper (e.g., 80 or 100 grit) to remove rough surfaces, tool marks, or irregularities. Gradually progress to finer-grit sandpaper (e.g., 150, 220, and beyond) to achieve a smoother finish.
- · Sanding Technique: Sand in the direction of the wood grain to avoid creating cross-grain scratches. Use even and consistent pressure to ensure a uniform surface. Pay special attention to edges and corners.
- · Sanding Machines: Power sanders, such as orbital sanders or random orbital sanders, can make the sanding process faster and more efficient. Hand sanding is also necessary for areas that power sanders cannot reach.
- · Progressive Sanding: This process eliminates scratches from coarser grits, resulting in a smoother surface.
- · Sanding Between Coats: When applying multiple coats of finish, sand lightly between coats with fine-grit sandpaper (e.g., 220 or 320 grit) to promote adhesion and ensure a smooth final finish.
2. Finishing:
Finishing involves applying a protective layer to the sanded wood surface. The finish serves several purposes, including enhancing the wood’s appearance, protecting it from moisture and wear, and adding depth and richness to the grain. Common wood finishes include:
- · Clear Varnish or Polyurethane: These finishes provide a glossy or satin sheen, depending on the desired look. They offer excellent protection against moisture and wear.
- · Oil-Based Finishes: Tung oil, linseed oil, and Danish oil are oil-based finishes that penetrate the wood to enhance its natural beauty while providing protection.
- · Water-Based Finishes: Water-based finishes are low in toxicity and provide a clear, non-yellowing coat. They dry relatively quickly and are easy to work with.
- · Shellac: Shellac is a traditional finish that offers a warm, amber tone. It dries quickly but may not provide as much protection as other finishes.
- · Wax: Wax finishes, such as paste wax or beeswax, can be applied over other finishes to add depth and a smooth, satin feel to the wood.
Applying the Finish:
- · Follow the manufacturer’s instructions for applying the chosen finish. Depending on the finish type, this may involve brushing, wiping, spraying, or dipping.
- · Be mindful of dust and debris during finishing, as they can mar the final result. Work in a clean and dust-free environment.
Conclusion
In conclusion, joinery is a fundamental aspect of woodworking, crucial for creating structurally sound and aesthetically pleasing wooden projects. Woodworkers use various joinery techniques to connect pieces of wood, each with its strengths and applications. The choice of joinery method depends on the specific project’s requirements, structural considerations, and the desired appearance.
Some standard joinery methods include mortise and tenon joints, dovetail joints, biscuit joints, dado joints, rabbet joints, butt joints, pocket hole joinery, tongue and groove joints, and half-lap joints.
By mastering the art of joinery and selecting the appropriate method for each project, woodworkers can achieve both functional and artistic results in their craftsmanship. Joinery ensures the final piece’s structural integrity and contributes to its overall aesthetic appeal.
Whether you’re building furniture, cabinets, or other woodworking projects, understanding and implementing proper joinery techniques is a critical skill that will enhance the quality and longevity of your creations.