
What to do with old hand saws: As time marches on and technology advances, cherished hand tools often find themselves relegated to the dusty corners of workshops and garages. Among these forgotten relics, old hand saws stand as a testament to craftsmanship of a bygone era.
Yet, the question persists: “What to do with old hand saws?” Instead of allowing these venerable tools to languish in obscurity, there are countless creative and practical possibilities for giving them a new lease on life.
In this exploration, we’ll uncover a multitude of inspiring and resourceful ways to breathe new vitality into these vintage instruments. Whether you’re a collector seeking to showcase their historical significance, a DIY enthusiast looking to repurpose them into functional works of art, or simply pondering how to responsibly dispose of them, this guide will offer you valuable insights into the remarkable potential that lies within old hand saws.
Old hand saws, no longer fit for their original purpose, can find new life through creative and practical repurposing. Here are several ideas for what you can do with old hand saws:
- Wall Art: Turn your old saw into a unique piece of wall art. You can clean, paint, or even incorporate it into a larger artwork or collage. The saw’s rusty patina and worn handle can add character to your decor.
- Knife Blade: Remove the saw’s teeth and reshape them into a blade.
- Coat Rack: Attach the saw horizontally to a wall and use it as a rustic coat rack. Add hooks to the saw’s teeth or hang items directly on the blade.
- Garden Decor: Use old hand saws as unique decorative elements in your garden.
- Clock: Transform the saw into a distinctive wall clock by attaching mechanisms to the blade’s center. Add numbers and clock hands to complete the look.
- Shelf Brackets: Cut the saw into smaller sections and use them as brackets for rustic shelves. They can provide both support and a charming industrial aesthetic.
- Table Legs: If you have several old saws, you can weld or attach them to create a base for a table or workbench. Add a wooden top for a functional piece of furniture.
- Tool Hanger: Hang your saw vertically and use it to store other hand tools or accessories. Attach hooks, clips, or magnets to the saw’s surface to hold various items securely.
- Custom Signage: Paint or etch custom signage onto the blade and use it to label areas in your workshop, garden, or home. It can be a practical and decorative way to convey Information.
- Gifts and Crafts: Old hand saws can be used in various craft projects. Make unique gifts like keychains, bottle openers, or decorative pieces for friends and family.
- Sculpture: Combine old saws with other discarded materials to create sculptures or assemblages. Let your creativity run wild, and experiment with different forms and themes.
- Saw Vases: Weld or attach a small container to the saw’s teeth, such as a metal cup or glass jar. Fill it with flowers or decorative items to make an eye-catching vase.
Importance of repurposing old hand saws
Repurposing old hand saws is essential for several reasons, as it not only offers practical benefits but also contributes to sustainability, creativity, and preservation of craftsmanship:
- Environmental Sustainability: Repurposing old hand saws helps reduce waste and lessens the demand for new materials. This sustainable practice plays a small but valuable part in conserving natural resources and reducing the environmental impact of manufacturing and mining.
- Preservation of History: Old hand saws often carry a rich history and craftsmanship that may be lost if discarded or left to deteriorate. Repurposing them allows their stories to continue, preserving a piece of the past for future generations to appreciate.
- Creative Expression: Repurposing encourages creativity and innovation. Turning an old hand saw into something new requires imagination and problem-solving skills. It can be a satisfying and artistic endeavor that lets you express your unique style.
- Unique and Personalized Items:
- Cost-Efficiency: By repurposing old hand saws, you can save money compared to purchasing new items. It’s an economical way to create functional pieces or decorations without the expense of buying new materials and tools.
- DIY Learning and Skill Development: Repurposing projects involving hand saws provide opportunities for learning and skill development. You can acquire new woodworking, metalworking, painting, and more skills, enhancing your DIY capabilities.
- Reduction of Clutter: Repurposing old tools can help declutter your space and reduce the accumulation of unused items. Instead of storing or discarding old saws, you can transform them into valuable objects or art.
- Conversation Starters: Repurposed hand saws often spark exciting conversations. Guests and visitors may be intrigued by the unique items you’ve created, leading to discussions about sustainability, craftsmanship, and creativity.
- Customization: Repurposing allows you to tailor items to your needs and tastes. You can choose colors, finishes, and designs that match your style and preferences.
- Community Building: You can exchange ideas, techniques, and tips with fellow enthusiasts.
Assessing Your Old Hand Saws
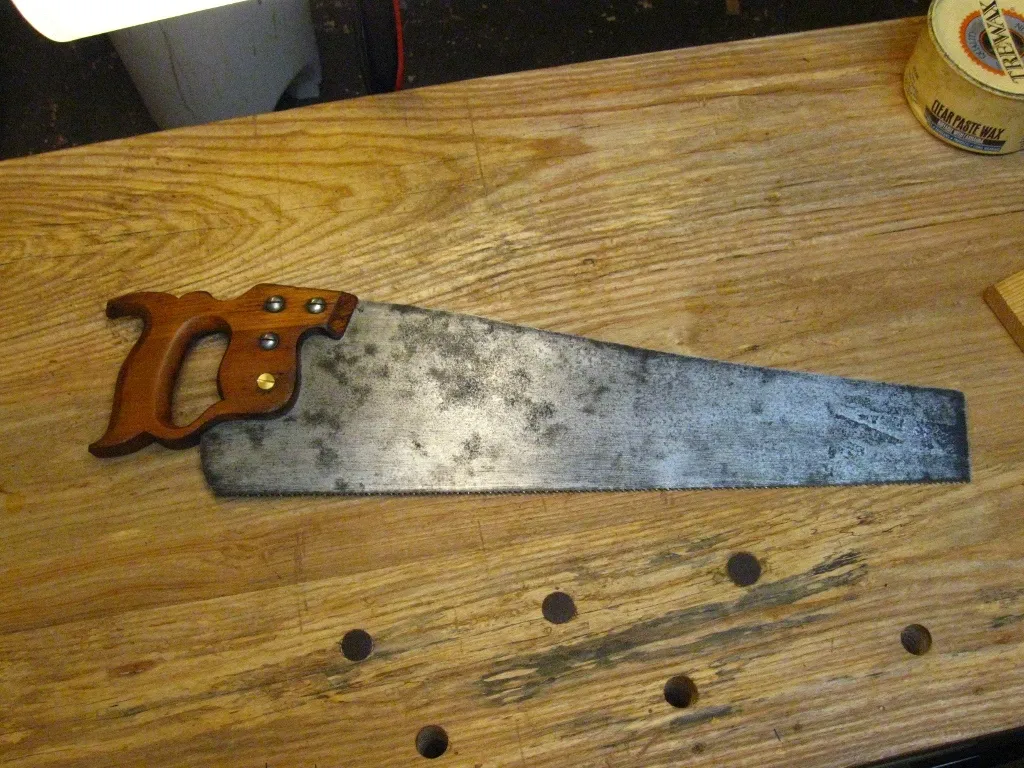
Before you decide how to repurpose your old hand saws, assessing their condition and characteristics is essential. This assessment will help you determine each saw’s best course of action and ensure that your repurposing project is as intended. Here’s how to assess your old hand saws:
- Clean the Saws: Clean the saws to get a clear view of their condition. Remove dirt, rust, and old paint or finishes using appropriate cleaning agents, wire brushes, sandpaper, or rust removers. Cleaning also helps reveal any maker’s marks or other identifying features.
- Inspect the Blade: Check the saw blade for cracks, bends, or missing teeth. Ensure that the edge is still securely attached to the handle. If the knife has significant issues, such as deep rust pitting or severe damage, consider replacing it or focusing on other parts of the saw.
- Handle Assessment: Examine the handle for cracks, splits, or other damage. Determine if the handle can be salvaged repaired, or if it needs replacement. The handle’s material (wood, plastic, or metal) may also influence your repurposing options.
- Teeth Condition: Evaluate the condition of the saw teeth. Are they still sharp, or are they excessively worn or damaged? Depending on the project, you may need to sharpen the teeth or consider removing them altogether.
- Size and Shape: Measure the length and width of the saw blade, as well as the spacing between the teeth. These dimensions will be crucial if you plan to repurpose the saw for specific projects like making knives or clock faces.
- Rust and Corrosion: Assess the extent of rust and corrosion on the blade and other metal parts. Light surface rust can often be removed, but deep decay may affect the structural integrity of the saw.
- Age and Rarity: Research the age and potential rarity of the saws. Older hand saws, especially those with unique designs or maker’s marks, may have historical or collector’s value. In such cases, consider preserving the saw’s original condition.
- Patina and Aesthetic Value: Take note of any patina, artwork, or decorative elements on the saws. These may influence your repurposing decisions, as they can add character to your final project.
- Purpose: Finally, determine your intended repurposing project and how the saw’s condition aligns with it. Some projects may be forgiving of imperfections, while others may require higher restoration and customization.
Identifying the type and purpose of the saw
Identifying the type and purpose of an old hand saw can be essential for repurposing it effectively. Here are some steps to help you determine the type and intended use of your saw:
1. Examine the Blade Teeth:
- Crosscut saws have teeth arranged in a way that makes them suitable for cutting across the grain of wood.
- Rip saws have teeth designed for cutting along the wood grain.
- Combination saws have a hybrid tooth pattern, making them versatile for crosscutting and ripping.
- Dovetail saws have fine teeth and are designed for precise joinery work.
2. Check the Teeth Per Inch (TPI):
- Count the number of teeth per inch on the saw blade. Different TPI counts are better suited for various tasks. For example:
- High TPI (more teeth per inch) saws are better for delicate, precision work.
- Low TPI saws are more suitable for rough, fast cuts.
3. Look for Manufacturer’s Marks:
- Many hand saws have manufacturer’s marks or logos stamped on the blade or handle. These marks can provide Information about the saw’s origin and type.
4. Measure the Blade Length:
- Measure the length of the saw blade from the tip to the base. Different saws have varying blade lengths depending on their intended use. For instance, panel saws have shorter blades for more manageable cuts, while larger saws are designed for longer cuts.
5. Inspect the Handle:
- Dovetail saws typically have smaller, more delicate handles, while larger saws have handles designed for two-handed use.
6. Research Online Resources:
- Utilize online resources, including vintage tool catalogs, websites, and forums, to identify your saw based on its characteristics, markings, and specifications.
7. Consult Experts:
- If you’re unsure about the type or purpose of your hand saw, consider reaching out to experts or collectors who specialize in vintage tools. They may be able to provide valuable insights.
8. Consider the Saw’s Age:
- Older saws may have specific design features that were common during their time, helping to identify their type and intended use.
9. Pay Attention to Blade Thickness:
- The thickness of the blade can indicate the saw’s suitability for heavy or light work. Thicker blades are often found on saws designed for more robust cutting tasks.
10. Check for Any Unique Features:
- Some saws may have unique features or design elements that make them distinctive. These features can also provide clues about their intended use.
Restoring Old Hand Saws
Restoring old hand saws can be a rewarding and practical project, especially if you want to bring these vintage tools back to their functional glory. Here’s a step-by-step guide on how to restore old hand saws:
Tools and Materials You’ll Need:
- Old hand saws
- Wire brushes or steel wool
- Sandpaper (various grits)
- Rust remover or naval jelly
- Safety goggles and gloves
- Scraper or putty knife
- Epoxy or wood glue
- Vise or clamp
- Files or sharpening stones
- Saw set or pliers
- Saw vise (optional but helpful)
- Oil or lubricant (e.g., machine oil)
- Paint or finish (if desired)
Step 2: Clean the Saw
Remove loose dirt, grime, and surface rust using a wire brush or steel wool.
Step 3: Disassemble if Necessary
If the saw is in bad shape, consider disassembling it by removing the handle and blade. This will make the restoration process more manageable and allow you to clean and repair each part separately.
Step 4: Repair and Restore the Handle
- Inspect the handle for cracks, splits, or loose parts. Repair any damage by applying epoxy or wood glue to the affected areas. Clamp the handle together and let it dry according to the adhesive’s instructions.
- Once the handle is repaired and dry, sand it to remove any rough or damaged areas, gradually moving from coarse to fine-grit sandpaper.
- Finish the handle with a coat of varnish or paint, depending on your preference and the desired look.
Step 5: Sharpen the Blade
- Secure the saw blade in a saw vise or a regular vise if available. This will make the sharpening process more stable.
- Use a file or sharpening stones to sharpen the teeth. Follow the original tooth geometry for crosscut or rip saws. Dovetail saws may have a unique tooth pattern.
- Maintain the angle of the existing teeth while sharpening. Use a saw set or pliers to ensure the teeth are uniformly set, alternating the set direction with each tooth.
Step 6: Assemble and Lubricate
Reassemble the saw by attaching the blade to the handle. Apply oil or lubricant to the joint and moving parts to reduce friction.
Step 7: Test and Adjust
Test the saw on scrap wood to ensure it cuts smoothly. If necessary, fine-tune the sharpening and tooth setting for optimal performance.
Step 8: Preserve and Protect (Optional)
To preserve the saw’s appearance and prevent future rust, apply a protective finish or paint to the blade. Be sure to mask off the teeth before applying any finish.
Step 9: Enjoy Your Restored Saw
Once your old hand saw is cleaned, sharpened, and restored, it’s ready to serve its intended purpose or become a functional and decorative addition to your workshop or home. Properly maintained, a restored hand saw can provide years of reliable service and become a cherished piece of history in your collection.
Repurposing Old Hand Saws
Repurposing old hand saws can breathe new life into these vintage tools while allowing you to create functional, decorative, or artistic pieces. Here are various repurposing ideas for old hand saws:
1. Wall Art:
- Attach the saw horizontally or diagonally to a wall to create a unique and rustic piece of wall art.
- Paint the saw blade with an artistic design or landscape scene to turn it into a customized art piece.
2. Coat Rack:
- Attach hooks to the saw’s teeth or handle to create a distinctive coat rack.
- Add a wooden shelf below the saw to hold hats, gloves, or decorative items.
3. Table Legs:
- Weld or bolt old hand saws together to create a base for a custom table. Add a tabletop for a functional piece of furniture.
4. Clock:
- Transform the saw blade into a clock by attaching mechanisms to the center. You can add numbers and clock hands for a unique timepiece.
5. Garden Decor:
- Use the saws as trellises for climbing plants in your garden.
- Paint the saws and place them strategically as garden markers or ornaments.
6. Shelf Brackets:
- Cut the saws into smaller sections and use them as brackets for rustic shelves. They can provide both support and an industrial look.
7. Tool Hanger:
- Hang the saws vertically on a wall and use them to organize and display other hand tools. Attach hooks, clips, or magnets to hold various items securely.
8. Custom Signage:
- Paint or etch custom signs onto the saw blade to label areas in your workshop, garden, or home. They can be practical and decorative.
9. Sculpture:
- Combine old saws with other discarded materials to create sculptures or assemblages. Let your creativity run wild, and experiment with different forms and themes.
10. Knife Blade:
- Remove the saw’s teeth and reshape it into a knife blade. You can create functional and decorative knives with the right tools and skills.
11. Saw Vases:
- Weld or attach a small container, such as a metal cup or glass jar, to the saw’s teeth. Fill it with flowers or decorative items to make an eye-catching vase.
12. Gifts and Crafts:
- Make unique gifts like keychains, bottle openers, or decorative pieces for friends and family using sections of the saw.
13. Custom Furniture:
- Incorporate old hand saws into custom furniture projects. For example, you can use them as drawer pulls, table legs, or decorative accents.
14. Mobiles and Wind Chimes:
- Suspend saw blades from a frame or branch to create mobiles or wind chimes that move with the breeze, adding a rustic touch to your outdoor space.
15. Conversation Pieces:
- Use old hand saws as conversation starters or centerpieces at events, workshops, or themed parties.
Donating Old Hand Saws
Donating old hand saws is a thoughtful way to give these vintage tools a second life while helping others who may need them for various projects. Here are steps to guide you through the process of donating old hand saws:
1. Assess the Saw’s Condition:
Before donating, inspect each hand saw to ensure it’s safe and usable. Look for damage, rust, or missing parts. Consider whether the saw needs any cleaning or restoration.
2. Clean and Restore if Necessary:
If the saws are in poor condition, consider cleaning and restoring them to a functional state. This will increase their value to the recipient and make them safer to use.
3. Identify a Recipient:
- · Determine who you’d like to donate the hand saws to. Joint recipients might include:
- · Local schools or vocational training programs that teach woodworking or carpentry.
- · Non-profit organizations or community workshops that provide tools and resources to those in need.
- · Craft or maker spaces where individuals can access tools for creative projects.
- · Individuals or hobbyists who may not have access to the necessary tools.
4. Contact Potential Recipients:
- Reach out to potential recipients to inquire if they are interested in receiving the hand saws. Explain the condition of the saws and their potential uses. Provide details such as the number of saws available.
5. Arrange for Donation:
- Once you’ve found an interested recipient, coordinate the donation. Depending on the recipient’s preference and location, this may involve arranging a drop-off or pick-up location.
6. Prepare Donation Documentation:
- Create a simple donation receipt or document that includes your name, contact information, a brief description of the donated items (e.g., number of hand saws, their condition), and the date of the donation. Both you and the recipient should sign and keep a copy for your records.
7. Transportation and Delivery:
- Transport the hand saws to the recipient’s location or arrange for a pick-up. Ensure that the saws are securely packaged, if necessary, to prevent any damage during transportation.
8. Provide Information:
- Offer Information or tips to the recipient on how to maintain and use the hand saws safely, especially if the recipient is an individual or group with limited experience.
9. Follow Up:
After the donation, consider following up with the recipient to ensure that the saws are being used and offer any additional assistance if needed.
10. Tax Deduction (if applicable):
Depending on your location and the recipient organization’s status, your donation may be eligible for a tax deduction. Keep records of the donation, including the receipt, for tax purposes.
Conclusion
Donating old hand saws is a thoughtful way to extend their usefulness, benefit others in need, and contribute to the spirit of craftsmanship and community. It’s a small act with a meaningful impact, giving these vintage tools a second life while fostering creativity and skill development among recipients.