
When tackling DIY home improvement projects, many tools are often at your disposal, each designed for a specific purpose. But what if you could have a versatile tool to handle multiple tasks efficiently?
That’s where the oscillating tool comes into play. In this article, we will delve into the world of oscillating tools and answer the burning question on everyone’s mind i.e (Can the Oscillating Tool Cut the Tile) :
Unlocking the Potential: What Is an Oscillating Tool?
Before we dive into the specifics of tile cutting, let’s start by understanding what an oscillating tool is and how it works. An oscillating tool, often called a multi-tool, is a versatile handheld device known for performing various tasks, from sanding and grinding to cutting and scraping.
This power tool operates by oscillating, which means it moves back and forth rapidly, usually in a side-to-side motion. This oscillation sets it apart from other agencies and allows it to handle various applications.
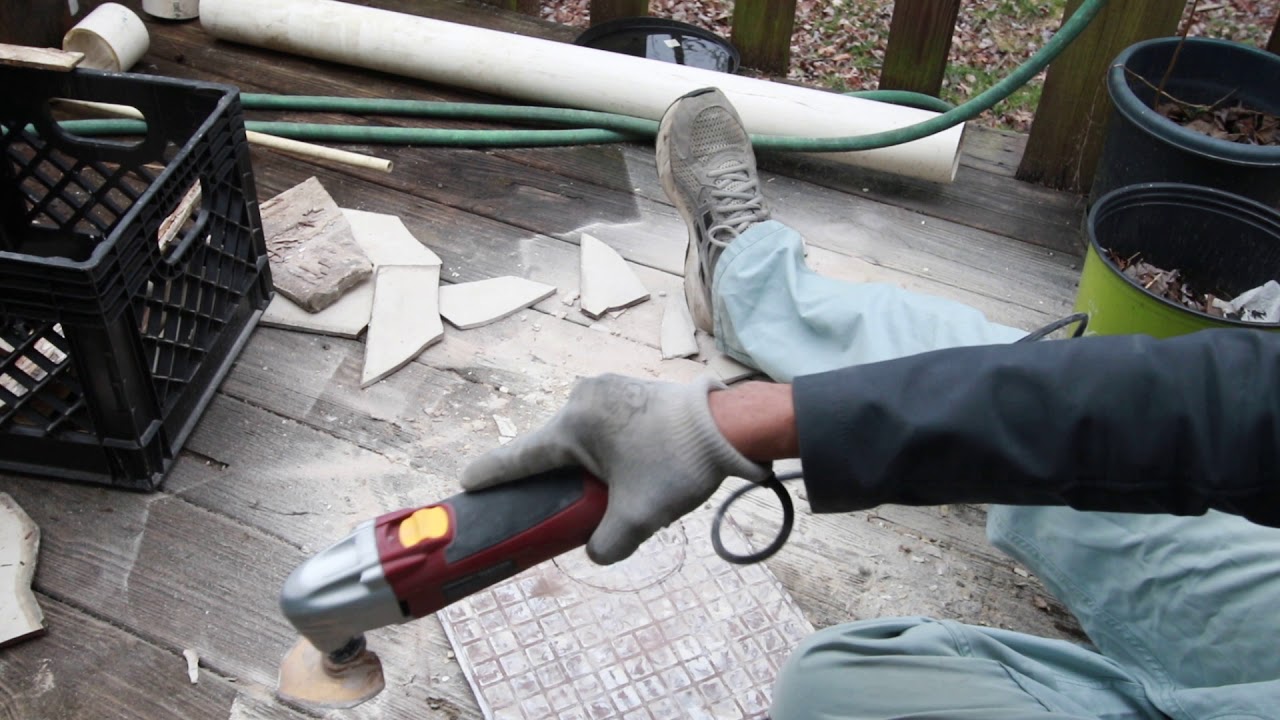
How to Cut Tile with an Oscillating Tool – Step-by-Step Guide
Cutting tile with the help of an oscillating tool can be a precise and efficient way to achieve clean edges and intricate cuts for your DIY or home improvement projects. Here’s a step-by-step guide on how to cut tile using an oscillating tool:
Tools and Materials You’ll Need:
- Oscillating tool with a tile-cutting blade (diamond-tipped or carbide-tipped)
- Safety gear: safety glasses and gloves
- Measuring tape
- Pencil or marker
- Straightedge or square
- Clamps (optional for securing the tile)
- Workbench or stable surface
Step 1: Prepare Your Workspace
Clear the area of any obstacles, and set up a stable workbench or surface to support the tile.
Step 2: Measure and Mark
Measure the dimensions of the tile cut you need and mark the cutting lines on the tile’s surface using a pencil or marker. Use a straightedge or square to make straight lines, ensuring accuracy.
Step 3: Secure the Tile
Suppose the tile is small or prone to movement. In that case, you can secure it in place using clamps or a suitable method to prevent it from shifting during the cutting process.
Step 4: Attach the Blade
Ensure your oscillating tool is turned off and unplugged. Attach the appropriate tile-cutting blade to the oscillating tool. Follow the manufacturer’s instructions for blade attachment.
Step 5: Adjust the Speed
Most oscillating tools come with variable speed settings. Start at a lower speed, especially if you’re new to tile cutting with an oscillating tool.
Step 6: Begin Cutting
Position the oscillating tool’s blade on the edge of the marked cutting line. Align it precisely to ensure accurate cutting. Hold the device firmly with both hands and, with a steady hand, guide the blade along the marked line.
Step 7: Control the Cut
Apply gentle, even pressure as you guide the oscillating tool along the cutting line. Allow the tool’s blade to cut, avoiding excessive force. Maintain control of the device to follow the line accurately.
Step 8: Check Progress
Periodically stop cutting to inspect your Progress. Ensure that the cut is following the marked line accurately. Make any necessary adjustments to maintain a straight and precise amount.
Step 9: Complete the Cut
Once you’ve completed the cut, switch off the oscillating tool and allow the blade to come to a complete stop.
Step 10: Inspect and Finish
Inspect the cut edge of the tile to ensure it meets your requirements. Use sandpaper or a tile file to smooth any rough edges or imperfections if needed.
Is an Oscillating Tool a Viable Option for Cutting Tile?
Regarding tile cutting, DIY enthusiasts and professionals are always looking for tools that can deliver precision and ease of use. One such tool that has gained popularity in recent years is the oscillating tool. But is an oscillating tool a viable option for cutting tile? Let’s delve into this question and explore the pros and cons.
The Versatility of Oscillating Tools
Oscillating tools, also known as multi-tools, have carved a niche in power tools due to their versatility. These handheld devices are designed to oscillate or move back and forth rapidly, making them ideal for a wide range of tasks such as sanding, grinding, scraping, and cutting.
Choosing the Right Blade
One critical factor determining whether an oscillating tool can effectively cut tile is the choice of blade. Oscillating agencies typically accept a variety of attachments, including cutting blades. To cut tile, you’ll need a specific type of blade known as a diamond-tipped or carbide-tipped blade.
These blades are engineered to handle the hardness of tile materials, including ceramic, porcelain, and natural stone. The diamond or carbide tips ensure durability and precision, making them suitable for intricate tile-cutting tasks.
The Advantages of Using an Oscillating Tool for Tile Cutting
Now that we’ve established the importance of the right blade let’s explore the advantages of using an oscillating tool for cutting tile:
Precision Cutting: Oscillating tools are renowned for making precise cuts. This precision is invaluable when working on projects that require accurate tile dimensions and intricate designs.
Less Dust: Unlike traditional tile-cutting methods that generate substantial dust, oscillating tools produce minimal dust. This keeps your workspace cleaner and reduces the need for elaborate dust control measures.
Ease of Use: Oscillating tools are relatively straightforward, even for individuals with limited experience. The back-and-forth motion of the device allows for smooth and controlled cutting, minimizing the risk of errors.
Versatility: Beyond tile cutting, oscillating tools can be used for many tasks, making them a versatile addition to your toolkit. These tools can handle various home improvement projects, from removing grout to sanding in tight spaces.
Intricate and Curved Cutting
Achieving precision in intricate and curved cutting is a skill that spans various crafts, from woodworking to metalworking and beyond. Precision is the hallmark of exceptional craftsmanship, and mastering the art of intricate and curved cutting opens doors to limitless creative possibilities.
The choice of materials is your first consideration. Wood, metal, plastic, or ceramics demand unique tools and approaches. The scroll saw, a precision wonder, is ideal for woodworking and crafts. With its versatility, the jigsaw can tackle a broader range of materials. For ultimate control,
the coping saw is your handheld companion. Rotary tools like the Dremel offer unparalleled precision, perfect for carving, engraving, and intricate cutting.
Selecting the right blade is paramount. Blades vary in size, tooth pattern, and material compatibility. For intricate and curved cuts, opt for finer blades with more teeth per inch (TPI).
Planning and marking your cuts is fundamental. Use templates or marking gauges to outline your design accurately. Techniques vary depending on your tool of choice. For scroll saws, learn inside cuts and stack cutting. Jigsaws demand guide attachments and speed control. Coping saws require a steady hand, while rotary tools thrive on power.
Safety and maintenance are non-negotiable. Always prioritize safety gear and keep your tools well-maintained.
How do you cut a large tile with an oscillating tool?
Tools and Materials You’ll Need:
- Large tile to be cut
- Measuring tape
- Pencil or marker
- Straightedge or square
- Safety glasses and gloves
- Oscillating tool with a tile-cutting blade (diamond-tipped or carbide-tipped)
- Masking tape (optional for preventing chipping)
Step-by-Step Guide:
1. Measure and Mark:
Begin by measuring the tile and marking the desired cutting lines with a pencil or marker. Ensure the lines are straight and accurately positioned on the tile’s surface.
2. Safety First:
Prioritize safety by wearing safety glasses.
3. Secure the Tile:
Place the large tile on a stable work surface and secure it in place to prevent movement during cutting. You can use clamps or other suitable methods.
4. Prepare the Oscillating Tool:
Attach the appropriate tile-cutting blade to the oscillating tool following the manufacturer’s instructions.
5. Set the Tool Speed:
Adjust the oscillating tool to the desired speed setting. For large tiles, starting at a lower speed is advisable to maintain control.
6. Apply Masking Tape (Optional):
Consider applying masking tape over the marked area to reduce the risk of chipping along the cutting line. This can help protect the tile’s surface and produce cleaner edges.
7. Start Cutting:
Position the oscillating tool’s blade precisely at the beginning of the marked cutting line.
With a firm grip on the tool, gently guide the blade along the marked line while maintaining steady pressure. Let the edge do the work without excessive force.
8. Monitor Progress:
Periodically pause to check your cutting progress. Ensure the blade follows the marked line accurately, and make any necessary adjustments to maintain a straight and precise cut.
9. Complete the Cut:
Once the cut is complete, turn off the oscillating tool and allow the blade to come to a full stop.
10. Inspect and Finish:
Examine the cut edge of the tile to ensure it meets your requirements. Use sandpaper or a tile file to smooth any rough or uneven areas, creating a clean and polished finish.
How do Professionals Master the Art of Cutting Tiles with Oscillating Tools?
In the world of DIY home improvement, the choice of tools can significantly impact the outcome of your project. Precision is critical when it comes to tile work, and that’s where oscillating tools come into play.
These versatile tools have revolutionized how professionals and enthusiasts cut tiles, making the process smoother and more efficient. This comprehensive guide delves into oscillating tools and shows how professionals use them to cut tiles with unmatched precision and finesse.
Understanding Oscillating Tools
Before we dive into the techniques professionals use to cut tiles, it’s essential to grasp the basics of oscillating tools. These tools oscillate or move back and forth at high speeds, allowing for precise cutting, sanding, and scraping. They come with various attachments that can be interchanged depending on the task.
Selecting the Right Blade
The choice of blade plays a pivotal role in achieving a clean and precise tile cut. Professionals often opt for diamond-tipped blades, known for their exceptional durability and sharpness.
The grit of the edge can also vary depending on the type of tile being cut, so it’s essential to choose the appropriate determination for your project.
Safety First
Before we delve into the cutting techniques, we must emphasize safety. Professionals prioritize safety measures to prevent accidents and injuries.
Always wear safety goggles, a dust mask, and hearing protection when working with oscillating tools. Additionally, ensure the workspace is well-ventilated to minimize the inhalation of dust and debris.
Techniques Used by Professionals
Now, let’s explore the techniques professionals employ to achieve flawless tile cuts using oscillating tools.
1. Marking and Measuring
Precision begins with accurate measurements and markings. Professionals meticulously measure the tile. This step ensures that the cut will be exactly where it’s intended, minimizing errors.
2. Secure the Tile
To prevent the tile from moving during the cutting process, professionals use clamps or a non-slip mat to secure it in place. This stability is crucial for achieving a clean and precise cut.
3. Start with a Pilot Hole
Professionals often start by creating a pilot hole near the edge of the marked line. This hole is a starting point for the oscillating tool blade and allows for greater control during the cut.
4. Maintain a Steady Hand
As the oscillating tool is guided along the marked line, professionals ensure a steady hand and a consistent speed. This uniform motion prevents jagged edges and provides a smooth, straight cut.
5. Use a Guide
For intricate cuts or curves, professionals may employ a guide or template. This helps maintain a uniform shape and ensures the oscillating tool stays on course.
6. Cooling and Lubrication
Professionals may use water or a specialized cutting fluid as a coolant to prevent overheating of the blade and the tile. This extends the blade’s life and reduces the risk of chipping.
7. Finishing Touches
After the initial cut, professionals often use sanding attachments to smooth the edges of the tile. This step ensures a polished and professional-looking finish.
Oscillating Tools:Brief Overview
Throughout this comprehensive discussion, we learned that oscillating tools can cut tile effectively, provided that the appropriate blade and technique are employed. Combined with the right edge, their unique back-and-forth oscillating motion allows for precise, clean, and intricate cuts in various tile materials, including ceramic, porcelain, and natural stone.
The advantages of using an oscillating tool for tile cutting are numerous. We have highlighted their precision, ease of use, and versatility as key selling points.
These tools excel in making straight cuts, curved cuts, and intricate designs, making them suitable for a wide range of tile-related projects. Moreover, they offer benefits such as reduced dust generation, ease of control, and compatibility with various attachments, further enhancing their utility.
It is essential to underscore the significance of selecting the correct blade. Diamond-tipped and carbide-tipped blades are specifically engineered to handle the hardness of tile materials, ensuring durability and precision. Choosing the right edge facilitates the cutting process and contributes to the finished project’s overall quality.
Safety has been a consistent theme throughout this discussion. Prioritizing safety is paramount when working with oscillating tools for tile cutting. Protective gear, including safety glasses and gloves, is essential to shield against debris and potential hazards. Securing the tile in place to prevent movement during cutting further enhances safety.
The step-by-step guides provided in previous sections have outlined the process of cutting tile with an oscillating tool in clear and accessible terms. We have covered everything from measuring and marking the tile to securing it properly, selecting the tool’s speed, and executing the cut precisely.
Additionally, we have addressed common questions and concerns, such as whether oscillating tools can cut through large tiles, and discussed alternative methods for cutting tiles without a tile cutter. These insights expand our understanding of the versatility and adaptability of oscillating tools in various tiling scenarios.
In-home improvement and DIY projects, achieving professional-quality tile cuts is invaluable. Oscillating tools have emerged as a game-changer in this regard. They offer precision and control that was once challenging without specialized equipment. As a result, DIY enthusiasts can take on tile-related tasks with confidence, knowing that they have a tool at their disposal that can deliver exceptional results.
Furthermore, oscillating tools have been recognized as a time-saving solution. Their efficient cutting capabilities reduce the amount of labor and time required for tile-cutting projects. This efficiency is particularly beneficial for professionals aiming to increase productivity and meet tight deadlines.
However, it is essential to acknowledge that oscillating tools are valuable in tile cutting. However, they may only be suitable for some scenarios. The tool’s limitations, such as blade length and depth of cut, must be considered when tackling larger or more complex projects. In such cases, alternative cutting tools like wet saws, tile cutters, or angle grinders may be more appropriate.
Conclusion
In conclusion, oscillating tools have carved out a niche as versatile and indispensable tools in tile cutting. By choosing the right blade, adhering to safety measures, and following the step-by-step guides, users can harness the full potential of oscillating tools to achieve exceptional results in their tile-cutting endeavors.
Whether for a home renovation project or a professional tile installation, oscillating tools have proven their worth as reliable companions, offering the power to transform visions into beautifully crafted tile designs.