
Are you ready to tackle your DIY projects with your trusty DeWalt 20V Max drill? You’re in the right place because today, we will show you exactly how to change drill bit on DeWalt 20V Max, making your tasks a breeze.
Whether you’re a seasoned DIY enthusiast or just getting started, learning how to change a drill bit DeWalt 20V Max is a fundamental skill useful for various projects. So, let’s dive in and discover the simple steps to help you effortlessly swap out drill bits on your DeWalt 20V Max drill.
Importance of Safety When Working with Power Tools
Working with power tools, including drills, requires the utmost attention to safety. The consequences of neglecting safety precautions can range from minor accidents to severe injuries or property damage. Prioritizing safety is non-negotiable and should be ingrained in every aspect of the process.
List of Safety Equipment and Measures
You must adhere to a comprehensive set of safety equipment and measures to guarantee a protected workspace while utilizing power tools like drills.
Here’s a list of essential safety precautions:
- Safety Glasses or Goggles: Always wear safety glasses or goggles to shield your eyes from flying debris, dust, and particles generated during drilling. Your eye protection should be rated for impact resistance.
- Hearing Protection: Power drills can produce high noise levels, potentially causing hearing damage over time. Protect your ears with earplugs or earmuffs designed for hearing protection.
- Safety Gloves: Heavy-duty safety gloves protect your hands, offering resistance against sharp edges, heat, and vibration. Choose gloves suitable for the materials you’ll be working with.
- Respirator or Dust Mask: When drilling materials that create dust, fumes, or airborne particles (e.g., wood, masonry, or metals), use a dust mask or respirator to protect your lungs from inhalation hazards.
- Appropriate Clothing: Avoid loose-fitting clothing that could get caught in the drill or other machinery. Wear long sleeves and jeans to safeguard your skin from scratches and burns.
- Non-Slip Shoes: Wear closed-toe shoes with non-slip soles to guarantee solidness and lessen the gamble of slipping or tripping while operating the drill.
- Disconnect the Power Source: Before playing out any upkeep, bit changes, or adjustments on the drill, always disconnect it from the power source, either by unplugging it or removing the battery for cordless drills.
- Secure Workpiece: Ensure your workpiece is securely placed using clamps, a vice, or other appropriate support systems. This prevents movement and minimises the risk of accidents caused by material displacement.
- Proper Lighting: Adequate lighting is essential for accurate and safe drilling. Ensure your work area is well-lit to prevent errors and accidents.
- Two-Handed Operation: Using both hands for better control and stability when operating the drill. Keep one hand on the drill’s handle and the other on the auxiliary handle (if equipped).
- Clear Work Area: Maintain a clean and organised work area to eliminate tripping hazards and distractions that could compromise your focus and safety.
- Training and Familiarisation: Before using a power drill, undergo proper training and familiarise yourself with the drill’s operation. Read and follow the manufacturer’s instructions and recommended safety practices.
- Maintenance and Inspection: Regularly inspect your drill for signs of wear, damage, or malfunction. Address issues promptly and keep the exercise well-maintained for safe and reliable performance.
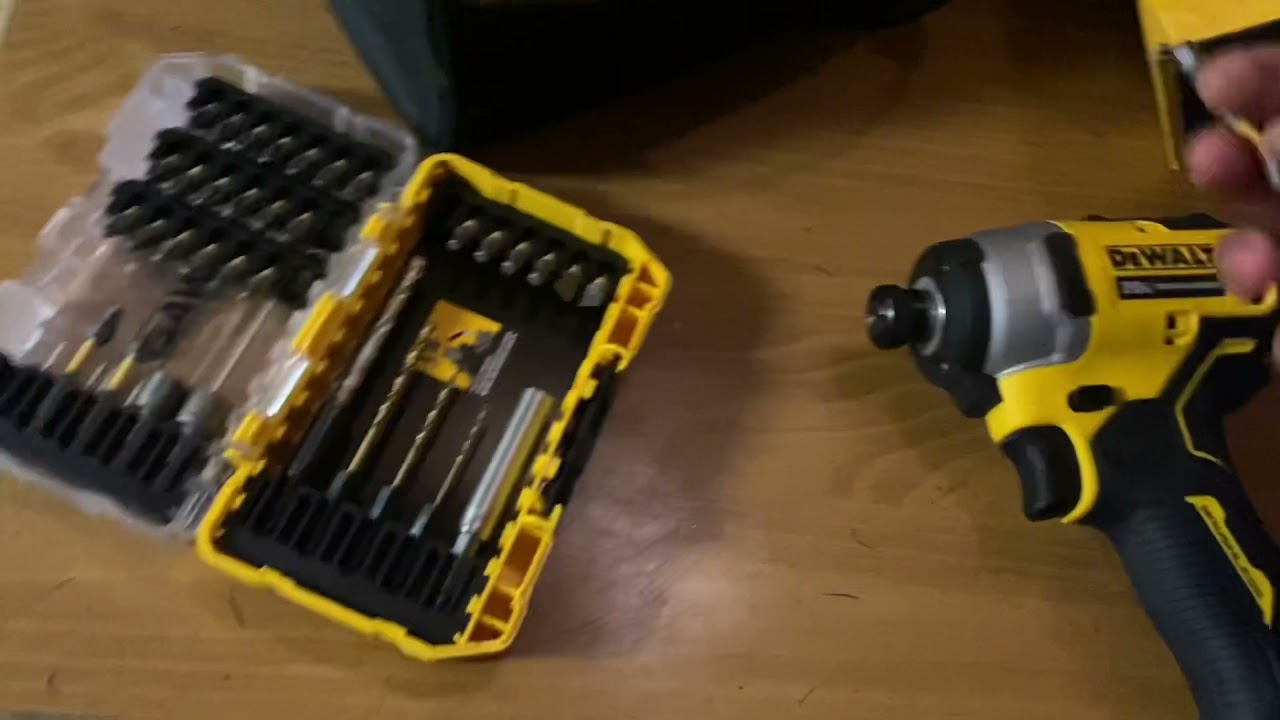
List of Tools and Materials Required for Changing the Drill Bit
To change a drill bit efficiently and safely, you’ll need the following tools and materials:
- Power Drill: The drill is the primary tool for drilling and securing the drill bit.
- Chuck Key (for Keyed Chucks): If your drill has a keyed chuck, you’ll need the appropriate chuck key to loosen and tighten the chuck jaws securely.
- Compatible Replacement Drill Bit: Ensure you have the correct replacement drill bit suitable for your specific drilling task and the material you are working with.
- Work Gloves: Wearing gloves can protect your hands from sharp edges and the heat the drill generates during operation.
Overview of Key Drill Components
Before embarking on changing a drill bit, it’s vital to acquaint yourself with the drill’s fundamental components. The central elements include the chuck, which holds the drill bit, the chuck key (if applicable for keyed chucks), and the drill bit itself.
The chuck can take two forms: either a keyed or keyless chuck. Keyed chucks necessitate a chuck key for manipulation, while keyless chucks can be operated manually.
Preparing the Drill for Bit Replacement
Ensure the drill is entirely powered off to prevent accidental activation during the bit replacement process. This means disconnecting a corded drill from its power source or removing the battery from a cordless drill.
Loosening the Chuck and Removing the Old Drill Bit
The next step involves loosening the chuck to release the old drill bit. The approach varies based on the chuck your drill employs. For keyed chucks, insert the chuck key into one of the holes on the chuck and turn it counterclockwise to open the jaws. Conversely, for keyless chucks, hold the drill firmly with one hand, grasp the chuck sleeve with the other hand, and turn it counterclockwise to release the old bit. Once the jaws are open, you can smoothly eliminate the old boring apparatus from the toss.
Selecting the Appropriate New Drill Bit
When selecting a new drill bit, consider the material you’ll be working with and the specific drilling task. Ensure the bit is compatible with the material and is of the appropriate diameter for your intended hole size.
Inserting and Securing the New Drill Bit in the Chuck
Insert the new drill bit’s shank into the chuck and ensure it’s aligned correctly. If you have a keyed chuck, utilise the chuck key to tighten the jaws around the new bit. Rotate the key clockwise to achieve a snug fit.
Ensuring the Drill Bit is Secure and Aligned Properly
To confirm the new drill bit’s security, gently tug it to check for movement or play within the chuck. There should be none. Additionally, assess the bit’s alignment within the chuck jaws to ensure it is centred, which is crucial for accurate and precise drilling.
Following these steps meticulously ensures that your drill bit is securely in place, aligned correctly, and ready for your drilling tasks with confidence and precision.
Testing and Final Checks
Testing the Drill with the New Bit
Once you’ve installed the new drill bit, it’s essential to test the drill to ensure it functions correctly:
- Secure Workspace: Confirm that your workpiece is securely positioned or clamped, providing stability during drilling.
- Safety Gear: Don your safety gear, including safety glasses, goggles, and work gloves.
- Power On: Reconnect the power source or insert the battery for cordless drills.
- Start Slowly: Start the drill at a low-speed setting and gradually increase the speed to the desired level. This gradual acceleration prevents sudden jerks or unexpected movements.
- Monitor Operation: Observe the drill’s operation closely. Listen for unusual sounds, vibrations, or wobbling, which may indicate issues with the drill bit’s installation or training.
- Test on Scrap Material: First, test the drill bit on a scrap piece of the same material you’ll be drilling into for your project. This allows you to verify that the drill bit is suitable for the task and that it creates clean and accurate holes.
Importance of Double-Checking Bit Tightness and Alignment
After testing, double-check the drill bit’s tightness and alignment within the chuck:
- Tightness: Ensure the bit is securely held in the chuck without noticeable play or movement. Use the chuck key or keyless chuck to tighten it if it feels loose.
- Alignment: Confirm that the drill bit is centred within the chuck jaws. Proper alignment is crucial for accurate drilling and preventing wobbling during operation.
Common Mistakes to Avoid During this Process
- Over-Tightening: While securing the bit firmly is essential, avoid over-tightening, which can damage the chuck or the bit’s shank.
- Insufficient Tightening: Failing to tighten the bit adequately can lead to slippage or ejection during operation, posing safety risks.
- Neglecting Alignment: A misaligned drill bit can result in off-centre holes or wobbling during drilling, affecting the quality of your work.
- Skipping the Testing Phase: Always test the drill with the new bit before starting your project to identify any issues early on. Ignoring this step can lead to unexpected problems during the task.
Demonstrating Chuck Key Usage
When and How to Use the Chuck Key?
Understanding when and how to use the chuck key is crucial for drills equipped with keyed chucks. The chuck key serves various essential functions, primarily for changing the drill bit and securely fastening or releasing the chuck jaws. You should employ the chuck key when modifying the drill bit or ensuring the chuck jaws are adequately tightened or loosened.
Step-by-Step Instructions for Using the Chuck Key to Change the Bit
To effectively utilise the chuck key for changing the drill bit, follow these step-by-step instructions:
- Power Off and Disconnect: Begin by confirming that the drill is powered off and safely disconnected from its power source, a crucial step for your safety.
- Locate the Chuck Key: Retrieve the appropriately matched chuck key corresponding to your drill’s chuck. This key typically features a T or cross-shaped handle.
- Insert the Chuck Key: Insert the toss key into one of the openings on the throw. These holes are meticulously designed to accommodate the chuck key securely.
- Hold the Chuck: With one hand, firmly grasp the main body of the drill, ensuring stability during the bit-changing process.
- Turn Counterclockwise: With the chuck key inserted, proceed to turn it counterclockwise, which is to the left. This action serves to loosen the chuck jaws, consequently opening the chuck and enabling the removal of the old drill bit.
- Remove the Old Bit: Once the chuck jaws have sufficiently opened, gently remove the old drill bit from the chuck.
- Insert the New Drill Bit: Align the shank of the new drill bit, which is the smooth, non-cutting end, with the chuck and insert it into the waiting jaws of the chuck.
- Tighten the Chuck: To secure the new drill bit in its place, use the chuck key once more. This time, turn it clockwise, to the right, while holding the drill bit steady. Continue turning until the chuck jaws grip the new bit firmly, ensuring it is snug and positioned at the centre.
- Remove the Chuck Key: Once the new drill bit is securely in position, gently withdraw the chuck key from the holes in the chuck.
- Test the Bit: Before resuming your work, power on the drill and conduct a brief test to ensure the bit is securely fastened and functions correctly.
Maintenance and Care
Regular Maintenance of the DeWalt 20V Max Drill
Regular maintenance is essential to keep your DeWalt 20V Max drill in optimal condition and extend its lifespan. Here are some maintenance tips:
- Cleaning: After each use, clean the exterior of the drill using a damp cloth or a brush to remove dust, debris, and any residues. Please pay attention to the vents and cooling fans to ensure they’re free from obstruction.
- Chuck Maintenance:
- Periodically inspect the chuck for debris or metal shavings, which can affect its performance.
- Clean the chuck jaws using a wire brush or compressed air.
- Lubricate the chuck occasionally, following DeWalt’s recommendations in the user manual.
- Lubrication: As the manufacturer advises, apply lubrication to the drill’s moving parts. DeWalt may recommend specific lubricants for your drill model. Over-lubrication can attract dust and debris, so use oils sparingly and wipe away excess.
- Battery Care: If you have a cordless drill, maintain the lithium-ion battery by charging it before it fully discharges and storing it in a cool, dry place. Follow the manufacturer’s guidelines for battery care to maximise its lifespan.
- Inspect Cords: For corded drills, regularly inspect the power cord for any damage, including cuts or exposed wires. If you notice any issues, supplant the link promptly to prevent electrical hazards.
Storing the Drill and Bits Properly
Legitimate capacity is vital to expand the life expectancy of your DeWalt 20V Max drill and its accessories:
- Secure Storage: When not in use, store the drill in a clean, dry, and secure location, away from dampness, outrageous temperatures, and direct daylight. Please use a storage case or toolbox to protect it from dust and debris.
- Bit Organization: Store drill bits in a designated container or bit case to keep them organised and prevent damage. Sorting them by type and size can make finding the right bit for your tasks more manageable.
- Battery Maintenance: For cordless drills, if you plan to store the training for an extended period, remove the battery and keep it separately to prevent self-discharge and potential damage.
- Protective Cases: Consider investing in protective cases or organisers for power tools and drill accessories. These cases provide added protection during storage and transport.
- Hang Tools: If space allows, hanging your drill and accessories on a pegboard or wall-mounted tool rack can help keep them organised, accessible, and free from clutter.
Troubleshooting
Common Issues When Changing Drill Bits
Changing drill bits occasionally presents users with everyday challenges. These issues include dealing with a stubborn or stuck old drill bit that refuses to budge from the chuck, encountering difficulties when opening the chuck jaws for bit removal, and finding that the new drill bit doesn’t fit properly or feels loose.
Solutions and Troubleshooting Steps
Stuck or Stubborn Bit:
If you encounter a stubborn old drill bit that won’t release from the chuck, consider applying penetrating oil or lubricant to the chuck threads. Allow it a few minutes to work its way into any corroded or debris-filled areas. Afterwards, try the standard removal method again. If the bit still doesn’t budge, explore alternative approaches for freeing a stuck drill bit, as discussed earlier.
Chuck Won’t Open:
In cases where the chuck jaws refuse to open, prioritise safety by ensuring the drill is powered off and disconnected from its power source. Gently tap the chuck with a rubber mallet to help dislodge any stuck components. If this approach proves ineffective, a strap wrench can manually grip and turn the chuck, facilitating its loosening.
Bit Doesn’t Fit:
Verify that you have the right kind and size of dull tool for your drill and the intended task. Different exercises require specific shank styles, such as round or hexagonal. If the bit doesn’t fit, avoid forcing it, as this could lead to damage. Double-check compatibility and select the appropriate bit for the job.
In all troubleshooting scenarios, safety should be paramount. Disconnect the drill from its power source before attempting any resolution steps. If challenges persist or uncertainty arises, consulting the drill’s user manual or seeking guidance from a professional or the manufacturer’s customer support can help address the issues effectively and safely.
Conclusion
Changing the drill bit on a DeWalt 20V Max drill is a straightforward process that can significantly enhance the versatility and efficiency of your drilling tasks. By following the means framed in this aide, you can confidently swap out drill bits to match your specific project requirements.
Remember to prioritize safety by disconnecting the power source and wearing appropriate safety gear, and always refer to your DeWalt drill’s user manual for manufacturer-specific instructions. With some practice, you’ll become proficient at changing drill bits and be well-equipped to tackle a wide range of drilling tasks efficiently.