
Have you ever found yourself in a situation where you’re wondering how to get the drill bit out of a drill? Whether you’re a seasoned DIY enthusiast or just someone tackling a home improvement project, it’s a common challenge that can leave you scratching your head.
Fear not, because in this guide, we’ll walk you through some simple and effective techniques to help you safely and quickly remove that stubborn drill bit from your drill. So, if you’ve ever been stuck wondering “how to get a drill bit out of the drill,” you’ve come to the right place.
Safety Precautions
Importance of Safety When Working with Power Tools
Safety must be a top priority when using power tools such as drills. Neglecting safety precautions can lead to accidents, injuries, or property damage.
It’s essential to follow these safety guidelines to ensure a safe working environment.
- Training and Familiarization: Acquire the necessary training and familiarize yourself with the operation of the power drill.
- Read Manufacturer’s Instructions: Reading the manufacturer’s instructions and adhering to recommended safety practices is crucial.
- Clean and Organized Workspace: Maintain a clean and organized work area to prevent tripping hazards and distractions.
- Adequate Lighting: Adequate lighting is necessary to see your work clearly and avoid mistakes.
- Secure Workpiece: Secure your workpiece firmly with clamps or appropriate support to prevent unintended movement.
- Two-Handed Grip: Always hold the drill with both hands for better control and stability.
Appropriate Personal Protective Equipment (PPE)
Protective gear is vital when working with power tools. Consider the following personal protective equipment (PPE) to safeguard your well-being:
- Eye Protection: Safety glasses or goggles will shield your eyes from flying debris or particles generated during drilling.
- Hearing Protection: Given the noise level of power drills, it’s essential to use hearing protection, such as earplugs or earmuffs, to prevent potential hearing damage.
- Respiratory Protection: When drilling materials that produce dust or fumes, like wood or masonry, a dust mask or respirator is necessary to protect your lungs.
- Appropriate Clothing: Opt for appropriate clothing, avoiding loose-fitting attire that could get caught in the drill. Closed-toe shoes with non-slip soles enhance safety.
Disconnect the Drill from the Power Source Before Removing the Drill Bit
Always disconnect the drill from the power source before removing the drill bit. This non-negotiable safety measure prevents accidental activation and fundamentally lessens the gamble of serious wounds or damage to the drill. It ensures that the training remains inoperable during maintenance or bit changes, protecting you and those around you from potential harm.
Potential Risks and Injuries Associated with Improper Drill Bit Removal
Improper removal of a drill bit can lead to various risks and injuries. These include electric shocks, which may occur if the drill is not disconnected from the power source, potentially resulting in electrical burns. There’s also the risk of accidental activation if the training is still connected, leading to unexpected bit rotation and injuries.
Moreover, attempting to forcefully remove a jammed drill bit can cause it to slip from the chuck, possibly resulting in hand injuries or damage to the workpiece. Lastly, improper removal procedures can damage the drill’s chuck or components, necessitating costly repairs. To prevent these risks and ensure safe operations, always follow the correct guidelines for removing drill bits while prioritizing safety.
List of Basic Tools and Materials Required for the Process
To perform the drilling and tapping process efficiently and safely, you will need the following essential tools and materials:
- Power Drill: A suitable power drill for drilling holes, preferably with adjustable speed settings.
- Drill Bit: The right drill bit size for creating pilot holes, as determined for the 1/4-20 tap.
- 1/4-20 Tap: The specific tap size required for your project is a 1/4-20 tap for creating threads.
- Tap Handle: A tap handle or wrench designed for securely holding and turning the tap.
Additional Items That May Be Useful
Depending on your specific project and needs, you might also find the following items helpful:
- Pliers: For gripping and turning the tap if you don’t have a tap handle.
- Adjustable Wrench: An adjustable wrench can be an alternative to a tap handle for turning the tap.
- Safety Gloves: Heavy-duty safety gloves can protect your hands from sharp edges and hot metal while tapping.
- Replacement Drill Bit: It’s always a good idea to have a spare drill bit on hand if the primary bit becomes dull or breaks during drilling.
- Cutting Fluid or Lubricant: Cutting fluid or a suitable lubricant can improve the tapping process by reducing friction and prolonging the life of the tap.
- Workbench or Clamps: Depending on your project, a stable workbench or clamps to secure the workpiece can be beneficial.
- Thread Gauge: A thread gauge can help you check the accuracy and quality of the tapped threads.
Ensure you have all the tools and materials ready before beginning the drilling and tapping process to ensure a smooth and efficient operation.
Step-by-Step Process for Removing a Drill Bit
Disconnect the Drill from the Power Source
Always start by unplugging or disconnecting the training from its power source to ensure safety during the bit removal process.
Let the Drill Cool Down
If the drill has been in use and is hot, allow it to cool down to avoid potential burns or handling a hot exercise during removal.
Identify the Type of Chuck
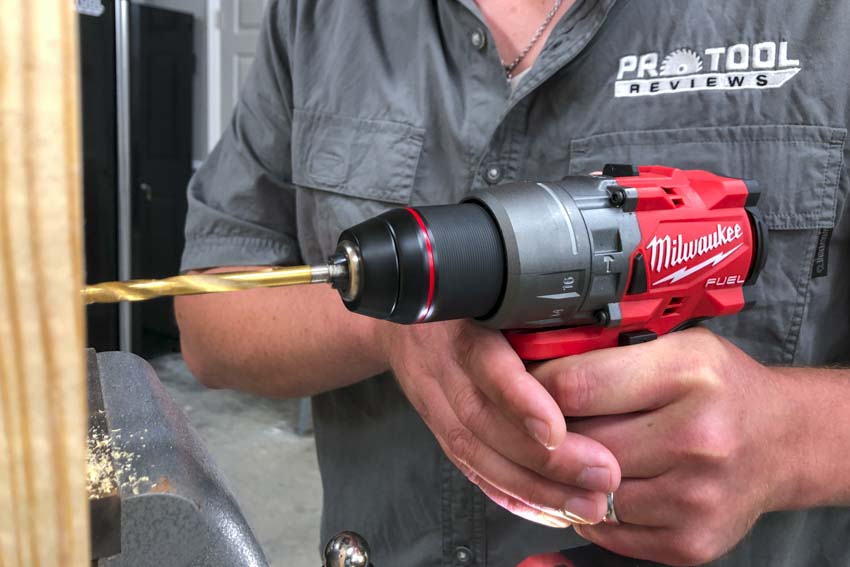
Determine whether your drill has a keyed or keyless chuck.
For Keyless Chucks
- Hold the Drill Firmly: Grasp the drill handle with your dominant hand and ensure a secure grip.
- Use Your Non-Dominant Hand to Grasp the Chuck: Place your non-dominant hand on the chuck, ensuring a firm hold.
- Turn the Chuck Counterclockwise: While holding the chuck securely, turn it counterclockwise (left) to release the drill bit. Continue turning until the bit is entirely free from the chuck.
- For Keyed Chucks
- Insert the Chuck Key: Locate the chuck key that came with your drill. Insert it into one of the holes on the chuck.
- Turn the Key Clockwise: With the key securely inserted, turn it clockwise (right) to loosen and release the drill bit. Continue turning until the bit is entirely detached from the chuck.
Tips for Dealing with Stubborn or Stuck Drill Bits
- Apply Penetrating Oil: If the drill bit is stuck due to rust or corrosion, applying a penetrating oil like WD-40 can help loosen the bond. Allow the oil to penetrate for a few minutes before attempting removal.
- Use Pliers or a Wrench: In cases of extreme stubbornness, you can use pliers or an adjustable wrench to grip the shank of the drill bit and assist in turning it counterclockwise for removal.
- Tap the bit Gently: Lightly tapping the stuck drill bit with a hammer helps break the bond and make turning easier.
- Heat and Cold: In situations where the bit is stuck due to adhesive or thread locker, you can try heating the chuck gently with a heat gun or cooling it with ice to expand or contract the materials, respectively.
Common Issues and Troubleshooting Tips
- Chuck Won’t Turn: If the chuck doesn’t turn, ensure you’ve disconnected the drill from power. If it’s still stuck, consult the manufacturer’s manual for guidance or consider professional assistance.
- Bit Breaks or Snaps: If the drill bit breaks during removal, use pliers or a wrench to grasp the remaining portion and remove it as described. Ensure that the chuck is clear of broken pieces before reusing the drill.
- Damaged Chuck: If the chuck is damaged during removal, it may require replacement. Consult the drill’s manufacturer or a professional technician for repairs.
Alternative Methods for Removing Stubborn or Stuck Drill Bits
In situations where a drill bit proves exceptionally stubborn or stuck within the chuck, and traditional removal methods prove ineffective, alternative approaches can be employed:
Tapping with a Hammer:
- Place a block of wood or a wooden dowel against the shank of the stuck drill bit and gently tap the wood with a hammer. This controlled impact can help break the bit free from the chuck.
- Remember to tap in the counterclockwise direction to facilitate loosening.
Using a Vise Grip or Locking Pliers:
- Disconnect the drill from its power source and adhere to safety protocols.
- Employ vice grip pliers or locking pliers with adjustable jaws.
- Clamp the pliers securely onto the shank of the stuck drill bit as close to the chuck as possible.
- Apply steady and even pressure while turning counterclockwise to release the bit.
- Ensure a firm grip to prevent slipping and potential injuries.
Stubborn Cases and Last Resort Measures
In cases where all previous methods fail, and the drill bit remains immovable, consider these advanced approaches:
Heat Application:
Disconnect the drill from its power source and implement all necessary safety measures when working with heat. Utilize an intensity firearm or a propane light to apply heat directly to the chuck, focusing on where the drill bit is stuck. The expansion caused by heat can facilitate loosening. After heating, attempt to turn the chuck counterclockwise to free the bit.
Drilling Out the Bit
This method should be employed as a last resort, as it carries inherent risks and potentially damages the chuck. Selecting a dull tool is significantly more comprehensive than the stuck drill bit. Drill directly into the centre of the stuck bit, aiming to create a hole through its core.
Apply steady and gentle pressure while drilling. Once a hole is completed, insert a screwdriver or a similar tool into the hole and attempt to turn the bit counterclockwise for removal. Exercise extreme caution throughout this process to prevent damage to the chuck threads.
How Regular Maintenance Can Prevent Drill Bit Jamming?
Regular maintenance is essential for preventing drill bit jamming and ensuring the longevity of your power drill. Here’s how it helps:
- Cleanliness: Keeping your drill and chuck clean ensures that debris, dust, or old lubricants don’t accumulate and interfere with the drill bit’s smooth operation.
- Lubrication: Regularly applying lubricant to the chuck and moving parts reduces friction, preventing excess wear and tear that can lead to jamming.
- Inspection: Routine inspection allows you to identify and address any issues, such as a loose chuck or worn-out components, before they worsen and cause jamming.
- Proper Storage: Storing your drill in a clean, dry, and protected environment prevents dust and moisture from compromising performance.
Tips for Keeping Your Drill and Chuck Clean and Well-Lubricated
- Clean After Use: After every use, wipe down the drill and chuck with a clean, dry cloth to remove dust and debris. Pay attention to the chuck threads and jaws.
- Regular Lubrication: Apply a small amount of appropriate lubricant to the chuck threads and moving parts periodically, as specified in the drill’s manual. Be sure to use oils recommended by the manufacturer.
- Chuck Maintenance: Inspect the chuck periodically for any wear or damage. If you notice issues like wobbling or excessive play, consult the manual or a professional technician for maintenance or replacement.
- Store Properly: Store your drill in a clean, dry place, preferably in a case or on a shelf. Avoid exposing it to extreme temperatures, dampness, or direct sunlight. Consider using a case or cover for added protection.
The Importance of Using the Correct Drill Bit for Your Project
Choosing the correct bore for your task is crucial for several reasons:
- Efficiency: Using the right drill bit ensures efficient drilling, reducing the risk of overheating or damaging the material.
- Clean Holes: Proper bit selection results in pure and precise holes, preventing splintering or jagged edges.
- Safety: Using the correct bit minimizes the risk of accidents, such as bit breakage or the drill grabbing and causing injury.
- Longevity: When the right bit is used, there’s less wear and tear on both the bit and the drill, prolonging their lifespan.
- Project Success: Ultimately, the correct bit choice contributes to the success and quality of your project, ensuring that screws fit securely and threads are correctly formed.
Post-Removal Inspection
Checking the Drill Chuck for Damage
After removing a drill bit, it’s crucial to inspect the drill chuck for any indications of damage or wear. Start with a visual examination, scrutinizing the chuck for visible issues like cracks, chips, or deformities, with particular attention to the chuck jaws and threads. To ensure proper functionality, operate the chuck by opening and closing it, noting any unusual play or wobbling.
Test the tightening mechanism by inserting and securing a new drill bit to confirm it holds securely without slipping. If the chuck appears dry or lacks lubrication, apply a recommended lubricant to the threads and moving parts.
Additionally, be vigilant for signs of wear, such as excessively worn chuck jaws or lines. Consider replacing the chuck or seeking professional maintenance if significant wear is observed.
Cleaning and Maintaining the Drill
Maintaining your drill is essential for its longevity and optimal performance. Begin by wiping down the exterior of the training with a clean, dry cloth to remove dust and debris. Pay special attention to the chuck jaws and threads, brushing away accumulated dirt or metal shavings.
Apply a small amount of appropriate lubricant to the chuck threads and moving components, adhering to the manufacturer’s recommendations. Inspect the power cord for any damage or exposed wires, replacing it if wear or damage is apparent.
Ensure the ventilation openings are free from obstructions to prevent overheating during operation. When storing the drill, choose a clean, dry location and shield it from extreme temperatures, moisture, and direct sunlight. Consider using a case or cover for added protection.
Inspecting the Removed Drill Bit for Reuse
A thorough inspection is essential before considering the reuse of a removed drill bit. Begin with a visual examination, searching for visible damage, including chipped or bent edges, wear, or deformities.
Assess the sharpness of the drill bit’s cutting edges; replacing the bit is advisable for optimal drilling performance if they appear significantly worn or dulled. Ensure the bit is clean and debris-free, mainly if used in materials that produce dust or residue.
Verify that the drill bit is the correct size and type for your intended application, as using a worn or incorrect bit can result in subpar drilling results. Safety remains a paramount concern; if the bit displays signs of damage or excessive wear, avoid its reuse, which can compromise drilling quality and pose safety risks. Dispose of damaged bits by proper disposal procedures.
Conclusion
Removing a stuck drill bit from a drill can be frustrating and challenging. Still, it is essential to approach it with patience and caution to avoid damaging the exercise or injuring yourself.
By following the steps outlined in this guide, including penetrating lubricants, pliers, vice grips, or a tap and hammer method, you can increase your chances of successfully extracting the stuck drill bit.
Remember to prioritize safety, wear appropriate protective gear, and seek professional assistance if you encounter difficulties beyond your capabilities. You can rapidly resolve this common issue with the proper devices and strategies and return to your drilling tasks.