
Unlocking the potential of your Craftsman drill is like unleashing a powerful tool magician. But what happens when the magic trick is over, and you’re left wondering, “How to remove drill bit from Craftsman drill?”
Fear not as we embark on a journey through the labyrinth of drill bit extraction. Whether you’re a seasoned DIY enthusiast or just starting your power tool adventure, understanding this fundamental skill will ensure your projects run smoothly.
So, let’s dive into the secrets of releasing that stubborn drill bit from your trusty Craftsman drill, empowering you to conquer your tasks effortlessly.
What is a craftsman drill?
A Craftsman drill typically refers to a power drill or cordless drill manufactured and branded by Craftsman, a well-known American brand specializing in hand tools, power tools, and other equipment for DIY enthusiasts and professionals.
Craftsman drills come in various corded and cordless models. They are designed for drilling holes and driving screws into various materials like wood, metal, plastic, and more. They are known for their durability, performance, and ease of use, making them a popular choice among homeowners, DIYers, and professionals for various drilling and fastening tasks.
These drills often feature keyless or keyed chucks for securing drill bits and variable speed control to adjust the drilling or driving speed as needed. Craftsman drills are available in different voltages and power levels to suit applications and user preferences.
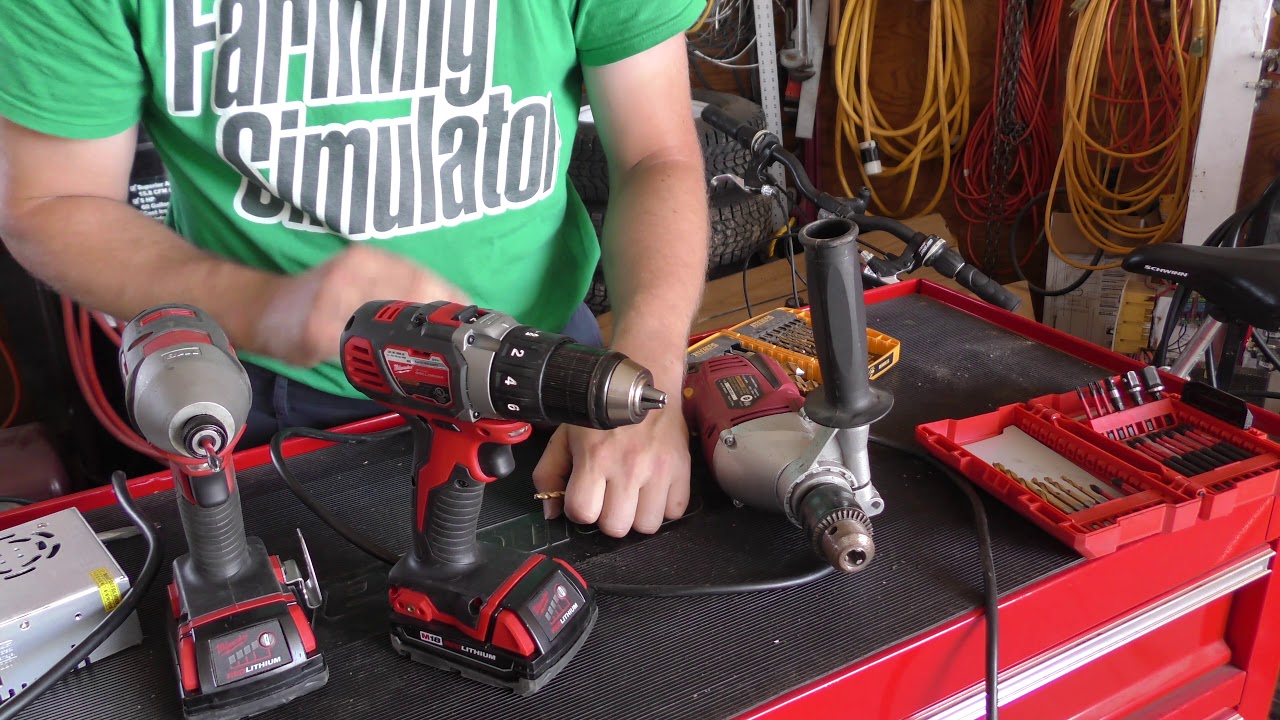
How to remove drill bit from craftsman drill?
Removing a drill bit from your Craftsman drill is a straightforward process, and I’ll guide you through it step by step.
What You’ll Need
Safety Gear: Before you begin, wear safety glasses and work gloves to protect yourself.
Craftsman Drill: Ensure your drill is turned off and unplugged (if it’s corded) or the battery is removed (if it’s cordless).
Chuck Key (if applicable): Some Craftsman drills have a chuck key for removing bits. If your drill has one, make sure you have it on hand.
Step 1: Identify the Chuck Type
Craftsman drills typically have either a keyless chuck or a keyed chuck. Knowing which type you have is essential for the removal process.
Keyless Chuck: If your drill has a keyless chuck, you can proceed to the next step.
Keyed Chuck: If your drill has a keyed chuck, locate the chuck key and insert it into one of the holes on the side of the chuck. Turn the key counterclockwise to loosen the jaws of the chuck.
Step 2: Release the Bit
For both keyless and keyed chucks:
Hold the drill firmly with one hand, and with your other hand, grasp the collar of the chuck (the part closest to the drill body).
Turn the chuck collar counterclockwise (to the left) while holding the drill bit with your fingers. This will loosen the chuck and release the bit.
Types of chucks in Craftsman Drill
Craftsman drills typically feature two main types of chucks: keyless chucks and keyed chucks. These chucks hold the drill bits securely in place and allow for easy bit changes. Here’s a brief overview of each type:
Keyless Chuck
Description: A keyless chuck is the most common type in modern Craftsman drills. It doesn’t require a chuck key for bit changes, making it very convenient.
Operation: To change the drill bit, hold the chuck collar (the part you can grip) with one hand while turning it counterclockwise (to the left) with your other hand. This action loosens the chuck jaws, allowing you to insert or remove the bit.
Advantages: Keyless chucks are quick and easy to use, making them popular for tasks that require frequent bit changes.
Keyed Chuck
Description: Some older Craftsman drills or more specialized models may feature a keyed chuck. This type of chuck requires a chuck key for bit changes.
Operation: To change the drill bit in a keyed chuck, insert the chuck key into one of the holes on the side of the chuck. Then, turn the key clockwise to tighten the jaws and secure the bit or counterclockwise to loosen them for bit removal.
Advantages: Keyed chucks can provide a firmer grip on the bit, benefiting heavy-duty drilling tasks. However, they require the extra step of using a chuck key.
Tools and Materials required
- To remove a drill bit from a Craftsman drill, you will need the following tools and materials:
- Craftsman Drill: The drill from which you want to remove the drill bit.
- Chuck Key (if applicable) – Some Craftsman drills have keyed chucks that require a chuck key for removal. Make sure you have the correct chuck key for your drill.
- Safety Glasses – Safety goggles or glasses to protect your eyes from debris and potential accidents.
- Optional Pliers: A pair of pliers can provide extra grip and leverage if the drill bit is stuck or difficult to remove.
- Lubricating Oil (if needed) – Lubricant can help loosen a stubborn drill bit or prevent future sticking. It’s optional but can be helpful in some situations.
Step-by-Step Guide
Craftsman drill
Step 1: Safety Precautions
Put on your safety glasses to protect your eyes. Wear work gloves to safeguard your hands from sharp edges and potential injuries. Make sure the drill is powered off and disconnected from any power source.
Step 2: Identify the Type of Chuck
Determine whether your Craftsman drill has a keyed chuck or a keyless chuck.
- Keyed chuck: Requires a chuck key for removal.
- Keyless chuck: This doesn’t require a chuck key.
Step 3: Prepare the Chuck
Inspect the chuck for any debris, dirt, or obstructions. Clear it if necessary. If the chuck is stiff or sticky, apply a small amount of lubricating oil to help loosen it. This step is optional but helpful if the chuck needs to move smoothly.
Step 4: Removing the Drill Bit (Keyed Chuck Method)
Turn the chuck key counterclockwise (lefty loosey) to loosen the chuck jaws. Keep turning until the jaws are wide enough to release the drill bit. Remove the drill bit from the chuck jaws.
Step 5: Removing the Drill Bit (Keyless Chuck Method)
If your drill has a keyless chuck, hold the drill with one hand, and with the other hand, grasp the chuck firmly. Rotate the chuck counterclockwise (lefty loosey) to release the drill bit. Continue turning until the jaws release the drill bit. Remove the drill bit from the chuck.
Step 6: Safety Checks
After removing the drill bit, ensure that the chuck is fully closed. If it’s a keyless chuck, tighten it securely. Recheck the chuck for any remaining debris or obstructions, and clean if necessary.
Step 7: Properly Store the Drill Bit
Store the removed drill bit safely, preferably in its original packaging or a designated storage container.
Step 8: Troubleshooting
If the drill bit is stuck or the chuck is not releasing, you may need to use pliers for extra grip and leverage. Be careful not to damage the chuck or drill bit in the process.
Step 9: Maintenance Tips
Regularly inspect and clean the chuck to prevent future issues. Consider periodically applying a small amount of lubricating oil to keep the chuck functioning smoothly.
Troubleshooting
Troubleshooting can be necessary if you encounter difficulties removing a drill bit from your Craftsman drill. Here are some common issues and solutions:
1. Stuck Drill Bit
Problem: The drill bit is firmly stuck in the chuck, and you can’t loosen it.
Solution
Apply penetrating oil: Spray or apply a penetrating oil (e.g., WD-40) to the chuck and allow it to sit for a few minutes. This can help loosen the grip of the chuck on the bit. Use pliers:
If the chuck key or hand-turning isn’t working, carefully use pliers to grip the drill bit and gently rotate it counterclockwise to release it. Be cautious not to damage the bit or chuck in the process.
2. Stripped Chuck
Problem: The chuck jaws are stripped, making it difficult to grip or release the drill bit.
Solution
Replace the chuck: If the chuck jaws are severely stripped, it may be necessary to replace it entirely. Consult the Craftsman drill’s user manual or contact customer support for guidance on obtaining a replacement chuck.
3. Chuck Won’t Close or Tighten
Problem: After removing the drill bit, the chuck won’t close or tighten appropriately.
Solution
Check for debris: Inspect the chuck for any debris or obstructions. Clear any foreign material that might be preventing it from closing correctly. Lubricate if needed: If the chuck is stiff, apply a small amount of lubricating oil to the threads and moving parts to improve its function. Seek professional help: If the chuck is still not functioning correctly, it may require professional servicing or replacement.
4. Chuck Key Misplacement
Problem: You can’t find the chuck key needed to loosen the chuck jaws.
Solution
Look for a spare: Some drills come with a spare chuck key stored on the drill itself. Check for any hidden compartments or storage areas on your drill.
5. Chuck is Damaged
Problem: The chuck itself is damaged or broken.
Solution
Consult the user manual: Refer to the manual for your specific Craftsman drill model to see if they guide repairing or replacing a damaged chuck. Contact customer support: Contact Craftsman’s customer support for assistance obtaining replacement parts or repair guidance.
Maintenance Tips
Maintaining your Craftsman drill properly can extend its lifespan and ensure it continues to perform efficiently. Here are some maintenance tips to keep your drill in excellent working condition:
Pay particular attention to the chuck area, as debris in the chuck can affect its grip and performance.
1. Chuck Maintenance
Inspect the chuck regularly for signs of wear, damage, or corrosion.
If you notice any issues with the chuck, address them promptly to prevent further damage.
2. Lubrication
Apply a small amount of lubricating oil to the chuck threads and moving parts periodically. This helps maintain smooth operation. Check the manufacturer’s recommendations for the type of lubricant and frequency of application.
3. Battery Care (if applicable)
If your Craftsman drill is cordless, properly maintain the rechargeable batteries. Charge the batteries before they are entirely depleted to prolong battery life.
4. Storage
Use the provided case or a dedicated storage container to protect the drill from dust and potential damage.
6. Chuck Key Storage
If your drill has a keyed chuck, store the chuck key in a convenient and easily accessible location to prevent misplacement.
7. Inspection
Periodically inspect the power cord (if applicable). Replace damaged cords promptly. Check the drill’s grip or handle for any loose or damaged components. Tighten screws or replace parts as needed.
8. Safety Checks
Before each use, inspect the drill for any visible damage or loose parts. Verify that the chuck is secure and the drill bit is gripped correctly before use.
9. Professional Servicing
If you encounter any major issues or if your drill requires significant repairs, it’s advisable to seek professional servicing or contact the manufacturer’s customer support for guidance.
Safety Precautions
Safety should always be prioritized when using power tools like a Craftsman drill. Here are essential safety precautions to follow:
1. Wear Personal Protective Equipment (PPE):
- Hearing Protection: Use earplugs or earmuffs if your drill generates loud noise.
- Work Gloves: Prevent cuts and abrasions and provide a secure grip.
- Dust Mask: If drilling materials like concrete or wood that produce dust, wear a mask to avoid inhaling particles.
- Appropriate Clothing: Avoid loose-fitting clothing and wear closed-toe shoes with slip-resistant soles.
2. Read the User Manual:
Familiarize yourself with the user manual that came with your Craftsman drill. It contains essential safety information, operating instructions, and maintenance guidelines.
3. Choose the Right Drill Bit:
The wrong bit can cause damage, overheating, or accidents.
4. Inspect the Drill:
Before each use, check the drill for any visible damage, loose parts, or frayed cords. If you find any issues, address them before operating the drill.
5. Power Off and Unplug:
Ensure the drill is powered off and unplugged or the battery removed before performing any maintenance, bit changes, or adjustments.
6. Secure Workpieces:
Secure the workpiece properly to prevent it from moving or spinning unexpectedly during drilling.
7. Keep Hands Clear:
Keep your hands and body away from the drill bit and moving parts. Never attempt to adjust the chuck or drill bit while the drill is powered on.
8. Maintain Balance and Control:
Maintain a balanced stance while operating the drill. Use both hands to control the drill and maintain stability.
9. Start Slowly:
Begin drilling at a low speed, especially when using a new bit or working with unfamiliar materials. Gradually increase speed as needed.
11. Work in a Well-Ventilated Area:
Work in a well-ventilated area or use appropriate dust extraction equipment when drilling materials that produce dust or fumes.
13. Store Tools Safely:
When not in use, store your drill in a secure location, out of reach of children, and away from moisture and extreme temperatures.
14. Keep Chuck Guards in Place:
Ensure the chuck guard is in good condition and properly adjusted to cover the chuck and drill bit during operation.
15. Do Not Force the Drill:
If the drill encounters resistance, do not force it. Release the trigger and assess the situation before continuing.
16. Disconnect Power During Bit Changes:
When changing drill bits, always disconnect the power source to prevent accidental starts.
17. Follow Manufacturer’s Recommendations:
Adhere to any specific safety guidelines provided by the Craftsman drill’s manufacturer
Conclusion
Knowing how to remove a drill bit from your Craftsman drill is a fundamental skill that ensures your equipment’s safety and longevity. You can successfully and safely complete this task by following the outlined steps and safety precautions.
Remember to prioritize safety by wearing appropriate personal protective equipment, reading the user manual, and adhering to all recommended safety measures. Troubleshooting common issues and seeking professional help are essential for responsible drill ownership.