
Welcome to our beginner’s guide on How to Put a Drill Bit in a Craftsman Drill. If you’ve recently acquired a Craftsman drill and are eager to start your DIY projects, you’ve come to the right place.
Learning how to insert a drill bit properly is one of the fundamental skills every DIY enthusiast should master. In this step-by-step tutorial, we’ll walk you through the process, ensuring you can confidently tackle your drilling tasks easily.
Tools and materials required
To put a drill bit in a Craftsman drill, gather the following tools and materials:
- Craftsman Drill: Ensure you have the specific Craftsman drill you intend to use. Different Craftsman drill models may have variations in chuck design and operation.
- Drill Bit: Select the fitting boring apparatus for your project. The type and size of the bit will depend on the material you are drilling into and the hole size you need.
- Chuck Key (if applicable): Depending on your Craftsman drill model, you may need a chuck key to tighten and loosen the chuck. If your drill has a keyed chuck, ensure you have the chuck key on hand.
With these tools and materials, you’ll be well-prepared to safely and effectively install a drill bit in your Craftsman drill for your drilling or driving tasks.
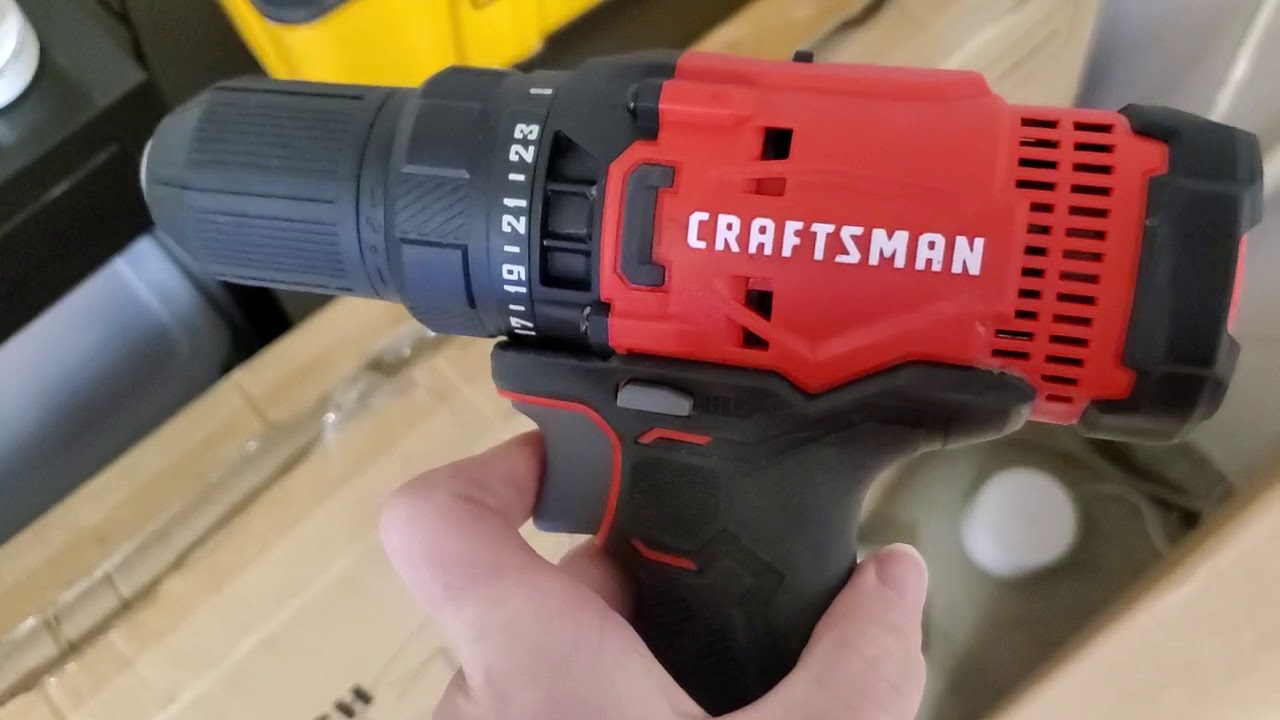
Understand Your Craftsman Drill
Understanding your Craftsman drill is crucial for its safe and effective operation. Craftsman offers a variety of drill models, each with unique features and specifications. Here’s a general guide to understanding your Craftsman drill:
Drill Type
Identify the type of Craftsman drill you have. Craftsman offers corded drills, cordless drills, impact drivers, and hammer drills, each designed for specific tasks and equipped with different features.
Power Source
- Corded Drill: If you have a corded Craftsman drill, it requires a constant electrical power source through a power cord.
- Cordless Drill: Cordless Craftsman drills are powered by rechargeable batteries. Pay attention to the battery type and voltage, which affect the drill’s power and runtime.
- Chuck Type
- Determine the chuck type on your Craftsman drill:
- Keyless Chuck: Many Craftsman drills feature keyless chucks, which allow you to tighten and loosen the chuck without a chuck key.
- Keyed Chuck: Some models have keyed chucks that require a chuck key to secure the drill bit.
Drill Bit Compatibility
Check the chuck capacity to see what range of drill bit sizes your Craftsman drill can accommodate. Ensure your drill bits match the chuck size.
Speed Settings
Most Craftsman drills offer variable speed settings. Learn how to adjust the speed to match your task. Lower rates are suitable for driving screws, while higher speeds are used for drilling.
Torque Settings (if applicable)
Some Craftsman drills come with adjustable torque settings. These settings allow you to control the force applied when driving screws to prevent over-tightening or stripping.
Direction Switch
Locate the direction switch near the trigger. It allows you to switch between forward (drilling or driving) and reverse (removing screws or backing out drill bits) motions.
Accessories
Take note of any included accessories or features, such as built-in LED work lights, belt clips, or bit holders.
Prepare Your Workspace
A clean and well-lit workspace is essential when using power tools like your Craftsman drill. It contributes significantly to both safety and productivity. Ensure your work area is free from clutter, debris, and any obstacles that impede your movements. A tidy workspace minimizes the risk of accidents and allows for better organization.
Proper lighting is equally critical. Sufficient lighting can lead to mistakes, reduced precision, and potential hazards. Ensure you have adequate illumination to see your work, the drill, and any markings or measurements. Use additional lighting sources such as task lights or work lamps to brighten up your workspace if necessary.
Ensure a stable surface for working
A stable work surface is fundamental for precise and safe drilling or driving tasks. Before you begin, confirm that your workbench, table, or any other surface you plan to use is secure and level. If you’re working on a project that requires drilling into a wall or ceiling, ensure that the character is structurally sound and can support the weight and force the drill applies.
If your workpiece is particularly large or heavy, consider using clamps or a vise to secure it firmly. This prevents unintended movement during drilling, which can lead to inaccurate holes or safety hazards.
By emphasizing the importance of a clean, well-lit workspace and a stable work surface, you create the ideal conditions for safely and efficiently using your Craftsman drill. These preparations enhance your work quality and contribute to a more enjoyable and hassle-free DIY experience.
Remove Any Existing Bit
How to remove any previously installed drill bit safely?
Removing a previously installed drill bit from your Craftsman drill is a straightforward process that should be done with care to ensure safety. Follow these steps:
Locate the Chuck
Identify the chuck on your Craftsman drill. The hurl is the part that holds the boring apparatus.
Open the Chuck
For Keyless Chuck
- Hold the drill firmly with one hand, and rotate the chuck counterclockwise (left) to open the jaws with your other hand. Continue turning until the chuck is fully open.
For Keyed Chuck
- If your Craftsman drill has a keyed chuck, insert the chuck key into one of the holes on the side of the chuck.
- Turn the key counterclockwise (left) to loosen and open the jaws.
- Keep turning until the chuck is fully open.
Remove the Drill Bit
With the chuck open, carefully slide the drill bit out of the chuck jaws. Be cautious not to touch the sharp cutting edges of the bit.
Close the Chuck
Once the old bit is removed, close the chuck by turning it clockwise (right) until it’s snug. This ensures the chuck is ready to hold the next drill bit securely.
Importance of turning off the drill and disconnecting it from power
Turning off the drill and disconnecting it from the power source, whether a cord or a battery, is crucial when removing or installing drill bits. This step is a fundamental safety measure that helps prevent accidental starts and potential injuries. Even a momentary lapse in power control can lead to unexpected tool activation, which can be dangerous.
Before removing or replacing a drill bit, double-check that it is entirely powered off and disconnected from its power source. Unplug the corded drills from the electrical outlet, and remove the battery pack for cordless drills.
This simple but critical action ensures that the training remains inoperative during bit changes, diminishing the gamble of mishaps and establishing a more secure workplace. Safety should always be a top priority when using power tools like your Craftsman drill.
Select the Correct Drill Bit
Choosing the right dull tool is fundamental for accomplishing your desired results when using a drill. Here are the key steps to follow when selecting the fitting boring apparatus for your venture:
Determine Your Project Needs
Identify the type of material you’ll be drilling into (e.g., wood, metal, concrete). Consider the errand you want to achieve (e.g., drilling a hole, driving a screw, creating a countersink). Refer to Material Compatibility
Various materials require various sorts of dull tools. Here are some common examples:
- Wood: For wood, use wood drill bits, also known as twist bits or brad-point bits.
- Metal: HSS (High-Speed Steel) drill bits are suitable for drilling into metal.
- Concrete or Masonry: Masonry or concrete bits, often made of carbide or tungsten, are designed for these complex materials.
- Plastic: Standard twist bits work well for plastic.
- Tiles or Glass: Use specialized tile or glass drill bits for fragile materials like tiles or glass. Determine the Bit Size
The diameter of the hole you need will dictate the size of the drill bit required. Measure and mark the desired hole size on your workpiece. Consider Bit Length
For deep holes or drilling through thick materials, ensure the drill bit is long enough to reach the desired depth without running out of bit. Choose the Right Bit Type
- Twist Bits: These are versatile and suitable for various materials, including wood, metal, and plastic. Brad-point bits are a type of twist bit designed for wood, providing clean and precise holes.
- Spade Bits: Ideal for fast drilling of larger holes in wood.
- Masonry Bits: Designed for drilling into concrete, brick, and stone.
- Auger Bits: Suitable for deep holes in wood and are commonly used in woodworking.
- Hole Saw Bits: Used for cutting larger-diameter holes in wood, plastic, or metal.
- Forstner Bits: Ideal for drilling flat-bottomed holes in wood and are commonly used in cabinetry. Consider Bit Coatings and Treatments
Some drill bits come with coatings or treatments that enhance durability and reduce friction. Examples include TiN (Titanium Nitride), TiCN (Titanium Carbonitride), and TiAlN (Titanium Aluminum Nitride) coatings. Check Compatibility with Your Drill
Ensure the selected drill bit is compatible with your drill’s chuck size and type (keyless or keyed). The bit’s shank should fit securely into the chuck.
Inserting the Drill Bit
Embedding a bore into a drill is a fundamental process that ensures safe and efficient drilling. First, prioritize safety by clearing your work area of clutter and wearing safety glasses to shield your eyes from potential debris.
Next, ensure the drill is powered off; if it’s a corded drill, disconnect it from the power source, or for cordless drills, remove the battery to prevent accidental activation. Locate the chuck, which holds the drill bit, typically found at the front of the training. Open the chuck either by rotating it counterclockwise for keyless chucks or using a chuck key for keyed chucks.
Implanting a drag into a drill is a must to ensure it’s compatible with your training and the chuck type. Gently insert the drill bit into the chuck, holding it by the smooth shank, and align it with the open jaws. Tighten the chuck securely, turning it clockwise for keyless chucks or using the chuck key for keyed chucks.
Confirm the tightness by giving the drill bit a gentle tug to ensure it’s firmly held. Close the chuck if you have a keyless chuck by turning it clockwise.
Finally, you can power on the drill and proceed with your drilling or driving task confidently, knowing that the drill bit is correctly and securely installed. Always prioritize safety and proper tool handling when using power drills to ensure a successful and hazard-free operation.
Securing the Drill Bit
Securing the drill bit is pivotal in ensuring safe and effective drilling or fastening with your drill. First, prioritize safety by clearing your work area and wearing safety glasses for eye protection. Ensure the training is powered off, disconnecting it from the power source for corded drills or removing the battery for cordless ones to prevent accidental activation.
Locate the chuck, responsible for holding the drill bit, typically at the front of the drill. Open the chuck – for keyless chucks, grip the training and turn the chuck counterclockwise to open the jaws; for keyed chucks, insert the chuck key and turn it counterclockwise to loosen and open the jaws.
Choose the right drill bit for your task, compatible with your drill and the chuck type. Insert the drill bit gently, holding it by the smooth shank, and align it with the open jaws. Securely tighten the chuck by turning it clockwise for keyless chucks or using the chuck key for keyed chucks. Confirm the tightness by giving the drill bit a gentle tug to ensure it’s securely held.
Close the chuck if you have a keyless chuck by turning it clockwise. Finally, you can power on the drill and proceed with your work, confident that the drill bit is correctly and firmly installed. Prioritizing safety and meticulous attention to these steps will ensure a safe and efficient drilling experience with your power drill.
Testing the Setup
How to conduct a safety check before starting any drilling?
Before commencing any drilling or driving tasks, it is vital to play out a well-being check to guarantee a hazard-free work environment. Begin by reiterating the importance of safety gear, including safety glasses and, if necessary, hearing protection. Emphasize the need to clear the work area of potential hazards, ensuring it is clutter-free and well-illuminated. Remind users to wear appropriate clothing and avoid loose-fitting attire that could get caught in the drill.
Additionally, encourage readers to investigate the power rope or battery pack for any indications of harm, such as frayed cords or visible wear and tear. Check the drill’s controls, including the power switch and direction switch, to confirm they function correctly. Lastly, advise users to have a clear plan for their drilling or driving task, including the location of the holes or fasteners and any necessary measurements or markings.
B. Ensure the drill bit is seated correctly and secure
To ensure a protected and productive monotonous cycle, confirming that the drill bit is correctly seated and securely held in the chuck is essential. Reiterate the need to double-check the tightness of the bit within the chuck by giving it a gentle tug to ensure it remains firmly in place. Any wobbling or movement should be addressed immediately.
Emphasize that a loose or improperly seated drill bit can lead to inaccuracies in drilling, potential damage to materials, and safety hazards. Encourage users to re-tighten the chuck if any issues are detected during this check.
By advising readers to conduct a thorough safety check before beginning any drilling task and ensuring the drill bit’s proper seating and security, you promote a safer and more successful drilling experience with their power drill.
Troubleshooting
Common issues readers might encounter when installing drill bits
When installing drill bits in your power drill, several common issues may arise that can hinder your work. It’s essential to be aware of these problems to address them effectively.
- Bit Slippage: Sometimes, the drill bit may slip or spin inside the chuck, making it difficult to tighten correctly.
- Chuck Won’t Open: The chuck may not open to allow bit insertion, especially in keyed chucks.
- Chuck Won’t Tighten: The chuck may not tighten securely around the bit, causing wobbling during operation.
- Bit Won’t Stay Put: The drill bit doesn’t stay in place and keeps falling out of the chuck.
- Incompatible Bit: Attempting to use a drill bit that doesn’t fit the chuck or is not designed for the intended material.
B. Suggest solutions to these problems
To prevent bit slippage, insert the bit fully into the chuck and then tighten it securely. Hold the chuck with one hand while tightening to ensure a firm grip.
Chuck Won’t Open:
- If the chuck doesn’t open, check if you’ve fully released the chuck’s locking mechanism or removed the chuck key if applicable.
- Ensure the drill is powered off.
- If it still won’t open, consult your drill’s manual for explicit guidelines or look for proficient help.
Chuck Won’t Tighten:
- If the chuck doesn’t tighten securely, check for debris or obstructions inside the chuck jaws.
- Clean the chuck if necessary and try again.
- If the issue persists, inspect the chuck for damage and consider replacing it if needed.
Bit Won’t Stay Put:
Ensure you use the right size and bore for your task and drill model. If the bit keeps falling out, it may be damaged or have worn shank edges. Replace the bit if it shows signs of wear or damage.
Incompatible Bit:
Always use drill bits compatible with your drill’s chuck size and the material you’re working with. Using the wrong bit can lead to difficulties and subpar results.
By addressing these common issues and following the suggested solutions, readers can troubleshoot problems effectively when installing drill bits in their power drills, ensuring a smoother and safer drilling experience.
Conclusion
Learning how to put a drill bit in a Craftsman drill is fundamental for any DIY enthusiast or professional. It’s a relatively simple process that significantly enhances your ability to tackle various projects effectively and efficiently.
By following the means framed in this aide, you can ensure a secure and proper fit for your drill bit, minimizing the risk of accidents and maximizing the precision of your work.
Make sure to focus on well-being in the interim, and with practice; you’ll become more confident in your ability to change drill bits quickly and effectively, making your drilling tasks smoother and more productive.