
Welcome to the world of DIY woodworking, where precision meets creativity. You’re in the right place if you’ve ever wondered how to use a jigsaw to cut plywood effectively.
Plywood is a versatile material used in various projects, from crafting furniture to constructing cabinets. With its ability to make intricate curved cuts and straight lines, the Jigsaw is a handy tool in your woodworking arsenal.
In this guide, we’ll walk you through the steps and techniques to master using a jigsaw to cut plywood precisely and confidently. Whether you’re a beginner or an experienced woodworker looking to improve your skills, you’ll find valuable tips and insights here. So, let’s get started and unlock the potential of the Jigsaw in your plywood projects.
Using a Jigsaw to Cut Plywood
Tools and Materials
Cutting plywood with a jigsaw is a common woodworking task that requires a few tools and materials to ensure a clean and precise cut. Here’s a list of what you’ll need:
Tools:
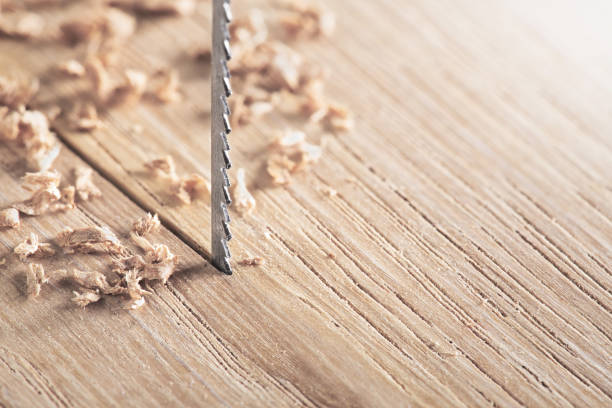
- Jigsaw: The Jigsaw is the primary tool for cutting plywood. Ensure it is in good working condition with a sharp blade suitable for cutting plywood.
- Safety Gear: Safety should be a priority. Wear the following safety gear:
- Well-being glasses or goggles to shield your eyes from debris.
- Hearing protection, as jigsaws can be noisy.
- Dust cover or respirator to forestall inward breath of sawdust.
- Clamps: Use clamps to secure the plywood to a stable work surface. This prevents the plywood from moving during the cut, ensuring accuracy and safety.
- Measuring Tools: Have measuring tools like a tape measure, straightedge, or carpenter’s square to mark the cutting lines accurately on the plywood.
- Pencil or Marking Tool: Use a pencil or another marking tool to draw the cutting lines on the plywood based on your measurements and desired cut.
- Workbench or Sawhorses: A stable work surface, such as a workbench or sawhorse, provides a secure platform for cutting the plywood.
Materials:
- Plywood: The sheet of plywood you intend to cut to your desired dimensions.
- Sawhorses or Scrap Plywood (optional): If you’re cutting the plywood on a surface you don’t want to damage, consider using sawhorses or scrap plywood as a sacrificial surface to protect your work area.
- Sandpaper (optional): Depending on the project, you may need sandpaper to smooth the cut edges of the plywood after cutting for a clean finish.
These instruments and materials will assist you with accomplishing precise and safe cuts when using a jigsaw to cut plywood. Always follow safety precautions and ensure your Jigsaw is appropriately set up and adjusted before making any cuts.
Preparing the Workspace
Preparing your workspace is crucial in any DIY project, including cutting plywood with a jigsaw. A well-organized and safe workspace can significantly impact the quality of your work and ensure your safety. Here’s how to prepare your workspace for cutting plywood with a jigsaw:
Choose an Appropriate Location
Select a clean, well-lit, and well-ventilated area for your workspace. Work in a dedicated workshop or garage where you can control dust and debris.
Clear the Area
Remove any clutter, obstacles, or unnecessary items from the workspace. A clutter-free area reduces the risk of accidents and gives you more room to maneuver.
Set Up a Stable Work Surface
Place your plywood sheet on a stable work surface, such as a workbench or sawhorse. Ensure that the work surface is level and can support the weight of the plywood without sagging.
Protect the Work Surface (Optional)
To prevent damage to your work surface, consider using scrap plywood pieces or sawhorses under the plywood sheet. These sacrificial materials can take the brunt of the jigsaw blade and protect your work surface.
Secure the Plywood
Use clamps to secure the plywood sheet to the work surface. This prevents the plywood from shifting or vibrating during cutting, ensuring clean and accurate cuts. Place the clamps away from the cutting path to avoid interference.
Measure and Mark
Measure and mark the cutting lines on the plywood using a measuring tape, straightedge, pencil, or marking tool. Double-check your measurements to guarantee they are exact.
Plan for Offcuts
Consider the direction of the jigsaw blade and the path it will take while cutting. Ensure ample space for the offcuts (the parts you cut away) to fall without getting in the way.
Gather Safety Gear
Wear safety gear, including Well-being glasses or goggles to shield your eyes from debris, hearing protection to reduce noise, and a Dust cover or respirator to forestall inward breath.
Prepare Your Jigsaw
Ensure that your Jigsaw is in good working condition with a sharp blade suitable for cutting plywood. Check the saw’s safety features, including the blade guard and switch.
Clear the Workspace
Remove any additional tools, materials, or debris from your immediate work area to minimize distractions and ensure safety.
Arrange Tools and Materials
Have all your tools and materials within arm’s reach so that you can access them quickly while working. This includes your Jigsaw, clamps, measuring tools, and other items.
Plan for Dust Collection (Optional)
If available, set up a dust collection system or connect your Jigsaw to a vacuum to minimize dust and maintain a cleaner workspace.
Significance of Selecting the Correct Jigsaw Blade
Selecting the correct jigsaw blade is critical to achieving successful and efficient cuts in various materials. The choice of blade impacts the quality of your cuts, the speed of your work, and even your safety. Here’s the significance of selecting the right jigsaw blade:
Material Compatibility
Different jigsaw blades are designed for specific materials. Choosing the correct blade ensures it can effectively cut through the material without excessive heat, wear, or damage. Using the wrong blade can result in slow progress, uneven cuts, or even blade breakage.
Cut Quality
The right blade ensures smooth cuts with minimal splintering or tear-out. For example, when cutting wood, a blade with fine teeth and a sharp edge will produce cleaner cuts, while a blade with more prominent teeth may be better for faster but rougher cuts.
Efficiency
Proper blade selection improves cutting efficiency. A blade matched to the material will cut more quickly, reducing the time and effort required for the task. This can be particularly significant in proficient settings or when working on large projects.
Longevity
Selecting the right blade extends the lifespan of the blade and the Jigsaw itself. Using a blade designed for a specific material reduces wear and tear on the blade teeth and the Jigsaw’s motor, ultimately saving you money on replacements and repairs.
Versatility
Having a variety of blades on hand allows your Jigsaw to be more versatile. You can easily switch between blades to tackle different materials and tasks, such as wood, metal, plastic, or laminate, without needing multiple saws.
Precision
Some blades are designed for intricate and detailed cuts, while others are better suited for rough cuts. Selecting the appropriate blade ensures you can achieve the precision required for your project.
Cost Savings
By choosing the right blade initially, you avoid the expense of replacing damaged blades or correcting mistakes caused by using the wrong blade.
To select the correct jigsaw blade, consider the following factors:
- Material: Identify the material you’ll be cutting (e.g., wood, metal, plastic) and choose a blade designed for that material.
- Tooth Configuration: Different blade teeth configurations (e.g., TPI – per inch) suit specific materials and cutting styles. More teeth generally result in finer cuts, while fewer teeth are better for rough cuts.
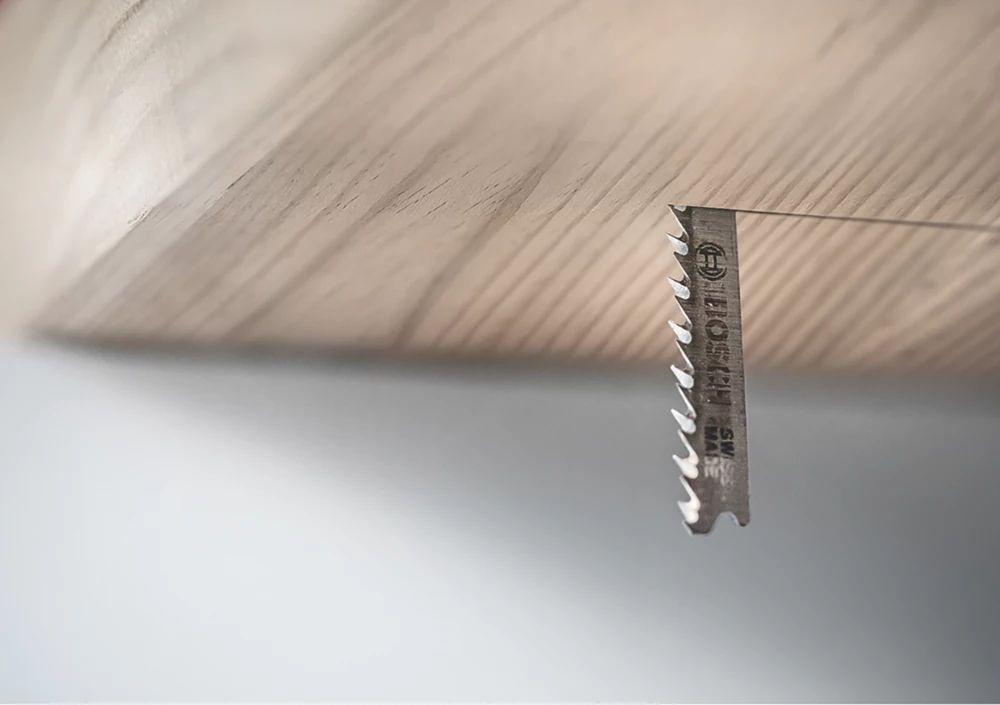
- Blade Length: Ensure the blade length is compatible with the thickness of the material you’re cutting.
- Tooth Style: Blades may have varying tooth styles, such as regular, reverse, or progressive. The style can affect the cutting performance in specific applications.
Marking and Measuring
Measuring and marking the cutting lines on plywood accurately is a crucial step in any woodworking or DIY project involving this material. Proper measurements and markings ensure that your cuts are precise and that your project turns out as intended. Here’s how to measure and mark cutting lines on plywood:
Tools and Materials:
- Plywood sheet
- Measuring tape or ruler
- Carpenter’s square or straightedge
- Pencil or marking tool
- Safety gear (optional)
Steps:
- Layout Planning: Plan your cuts carefully before marking them. Consider the dimensions required for your project and the layout of your cuts on the plywood sheet. This planning will help minimize waste and ensure that you make the most efficient use of the plywood.
- Measure the Plywood:
- Utilize an estimating tape or ruler to quantify the dimensions on the plywood sheet.
- Measure from the edge of the sheet to the point where you want to make your cut.
- Make sure your measurements are accurate, and double-check them to avoid mistakes.
- Marking: With the measurements in mind, use a pencil or marking tool to make minor, clear marks on the surface of the plywood. You can mark directly on the face that will be cut or on the backside to reduce the visibility of the markings on the finished surface, especially if the project requires a clean appearance.
- Use a Straightedge or Square: To ensure straight and accurate lines, place a carpenter’s square or straightedge along the marks you’ve made. Align the edge of the square or straightedge with your marks and hold it firmly in place.
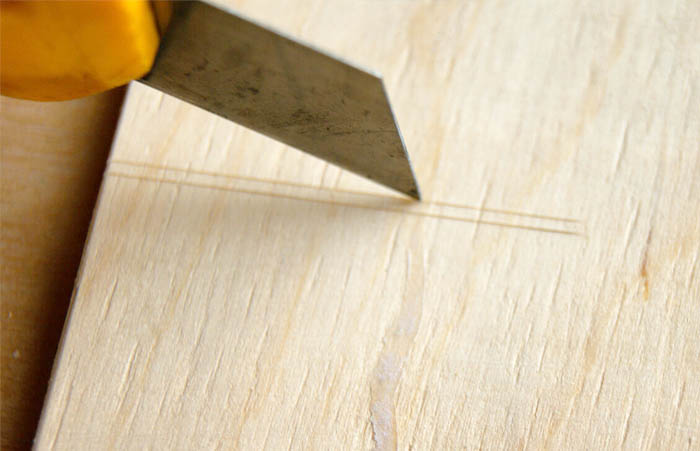
- Draw Cutting Lines: Trace along the edge of the square or straightedge with your pencil or marking tool to create the cutting lines on the plywood. Apply steady and even pressure to get clean, straight lines. Ensure that the lines are continuous and well-defined.
- Double-Check: Double-check your measurements and markings to ensure accuracy after drawing your cutting lines. Mistakes in this stage can lead to incorrect cuts and wasted materials.
- Label or Indicate Waste: If your project involves multiple cuts on the plywood sheet, it’s helpful to label or indicate which sections will be wasted and which will be usable. This helps avoid confusion during the cutting process.
Cutting Techniques while using a jigsaw
Using a jigsaw effectively requires mastering various cutting techniques to achieve clean, precise, and safe results. Whether you’re cutting curves, straight lines, or making intricate cuts, these techniques will help you get the most out of your Jigsaw:
Straight Cuts:
- Start by marking the cutting line on your material using a straightedge or a chalk line.
- Place the Jigsaw’s base plate firmly on the material, aligning the blade with the cutting line.
- Hold the Jigsaw securely with both hands, one on the handle and the other on the body or auxiliary handle for stability.
- Trigger the saw to start cutting and maintain a consistent speed as you follow the cutting line.
- Ensure the blade remains perpendicular to the material to prevent angled cuts.
Curved Cuts:
- Use a pencil or a compass to draw the curved line on the material.
- Start the Jigsaw near the edge of the material and align the blade with the curved line.
- Begin cutting slowly, following the curve as accurately as possible. Avoid forcing the saw; instead, let the blade do the work.
- To navigate tight curves, pivot the material as needed while keeping the blade on the line. You can also use relief cuts (explained below) for sharper turns.
Bevel Cuts:
- Adjust the Jigsaw’s base plate to the desired bevel angle using the bevel adjustment mechanism.
- Mark the angle cut line on the material.
- Begin cutting, ensuring that the bevel adjustment is maintained throughout the cut.
- Be cautious when making bevel cuts, as they can be less stable than straight cuts.
Plunge Cuts:
- Plunge cuts start a cut in the middle of the material rather than at the edge.
- Position the Jigsaw over the marked starting point of the cut.
- Slowly lower the blade into the material by releasing the plunge lock or lever, ensuring the blade is perpendicular to the material.
- Once the blade is fully inserted, move the Jigsaw along the desired cutting path.
Scrolling Cuts:
- Scrolling cuts are intricate cuts that often require frequent turning and repositioning of the material.
- Start by drilling a pilot hole near where you want to make the scrolling cut.
- Insert the jigsaw blade into the pilot hole and start cutting along the scrolling pattern, adjusting the material as needed.
Relief Cuts:
- When making tight curves, relief cuts can help relieve stress on the blade and make the turning process smoother.
- Start by making a straight cut from the edge of the material to the point where the curve begins.
- Then, pivot the material and continue cutting along the curved line. This technique prevents the blade from binding or breaking during tight turns.
Safety Precautions
Using a jigsaw safely is paramount to prevent accidents and injuries while working on woodworking or DIY projects. Here are essential safety precautions to follow when using a jigsaw:
- Read the User Manual: Familiarize yourself with Jigsaw’s user manual and follow the manufacturer’s operation, maintenance, and safety guidelines.
- Wear Appropriate Safety Gear:
- Safety Glasses or Goggles: Shield your eyes from flying trash, wood chips, or other hazards.
- Hearing Protection: Jigsaws can be loud, so wear ear protection to prevent hearing damage.
- Dust Mask or Respirator: If cutting materials generate dust or fumes, wear a mask to avoid inhalation.
- Appropriate Clothing: Avoid loose-fitting clothing, jewelry, or accessories that could get caught in the Jigsaw.
- Inspect the Jigsaw:
- Before each use, inspect the Jigsaw for loose or damaged parts, including the blade, blade clamp, handles, and cord (if corded).
- Guarantee that the edge is sharp and appropriately introduced.
- Secure the Workpiece:
- Use clamps or other appropriate methods to secure the workpiece to a stable surface. This prevents the material from moving during cutting.
- Check the Blade Clearance: Ensure adequate clearance between the blade and the work surface before starting the Jigsaw. This prevents the blade from binding or causing kickback.
- Position Yourself Safely:
- Stand to the side of the Jigsaw, not directly behind it, to avoid potential kickback.
- Maintain a stable and balanced stance while operating the Jigsaw.
- Maintain a Clear Workspace:
- Remove any obstacles, tools, or debris from the workspace to prevent tripping hazards.
- Keep the work area well-lit to enhance visibility.
- Use the Right Blade:
- Select the appropriate jigsaw blade for your cutting material (e.g., wood, metal, plastic).
- Ensure the blade’s TPI (teeth per inch) suits the task (e.g., fine teeth for wood, coarse teeth for metal).
- Set the Correct Speed: Adjust the Jigsaw’s speed or orbital action to match the material and the type of cut you are making. Slower speeds are generally used for cutting metals, while faster speeds are suitable for wood.
- Keep Hands Clear: Keep your hands and fingers away from the blade path. Always use the Jigsaw’s handles to guide the tool.
- Follow the Cut Line: Stay on the marked cut line while guiding the Jigsaw. Avoid deviations that could lead to inaccurate cuts.
- Use Gentle Pressure: Let the jigsaw blade do the cutting. Applying excessive force can lead to blade deflection and less accurate cuts.
- Turn Off When Not in Use: Always turn off the Jigsaw and unplug it (if corded) or remove the battery (if cordless) when not in use.
- Please wait for the Blade to Stop: After completing a cut, release the trigger and trust that the edge will reach a standstill before eliminating it from the workpiece.
- Store Safely: Store the Jigsaw in a secure location, out of reach of children and away from moisture and extreme temperatures.
- Keep the Blade Guard Down: Ensure that the jigsaw blade guard functions correctly and remains down while cutting.
Following these safety precautions when using a jigsaw can limit the gamble of mishaps and help you work more confidently and efficiently on your projects. Always prioritize safety to ensure a safe and productive woodworking or DIY experience.
Troubleshooting
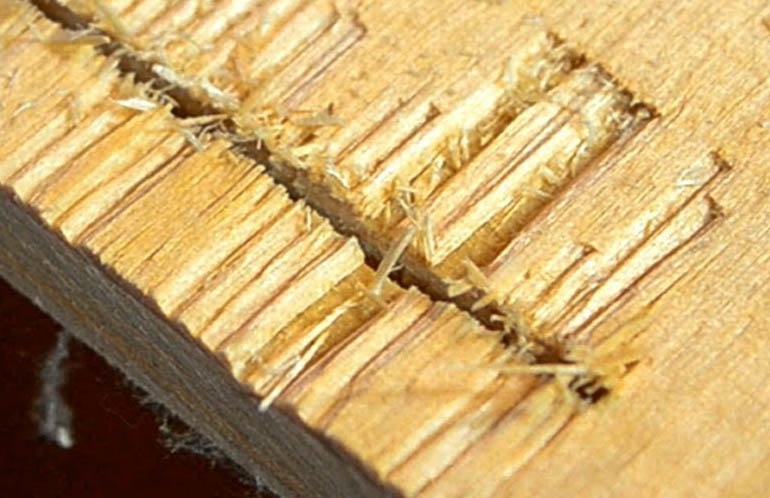
When cutting plywood with a jigsaw, several common issues can arise, but they can be effectively addressed with the proper techniques. Splintering is a common concern, particularly on the top surface of the plywood. To mitigate this, select a sharp, fine-toothed blade designed for plywood, apply painter’s tape along the cutting line, and use a sacrificial backing board underneath.
Ensuring accuracy in your cuts is essential. Measure and mark your cutting lines meticulously, use a straightedge or carpenter’s square as a guide, and maintain a steady hand while cutting. Blade deflection, where the blade bends during cutting, can lead to off-course cuts. Opt for a blade with more teeth or a thicker blade and apply gentle, consistent pressure.
Binding or stalling of the Jigsaw can occur significantly when cutting thicker plywood, so use the appropriate blade speed setting and cut at a moderate pace. Tear-out, where wood fibers tear away from the top surface, can be minimized with a sharp blade, painter’s tape, and by cutting with the good side of the plywood facing down.
Prevent overheating by taking breaks, using a blade designed for prolonged use, and applying blade lubricant. Lastly, prioritize safety by wearing the necessary protective gear and following safety guidelines. With these solutions and practice, you can address common challenges and achieve clean and precise cuts when working with plywood and a jigsaw.
Finishing and Sanding
Finishing and sanding are vital in woodworking and DIY projects, ensuring a polished and refined final product. Start by choosing the appropriate finish based on wood type, intended use, and aesthetic goals, such as paint, stain, varnish, or oil-based finishes. Prepare a clean, well-ventilated workspace, and ensure your wood surface is perfect and dry before applying the finish.
Apply thin, even coats, allowing each to dry before adding the next. Softly sand the surface between covers with fine-coarseness sandpaper for a smoother finish. Allow the finish to fully dry and cure according to the manufacturer’s instructions.
On the other hand, sanding begins with coarse-grit sandpaper to eliminate rough spots and surface irregularities, followed by progressively finer grits to achieve a smoother surface. Always sand with the grain, remove dust between grits, and inspect for imperfections, repeating the process as needed.
Finally, round edges and corners for a polished look, and finish with the finest grit for a silky surface. These meticulous steps ensure your woodworking project is aesthetically pleasing and ready for staining, painting, or sealing, reflecting the care and attention to detail you put into your craftsmanship.
Conclusion
Using a jigsaw to cut plywood is a versatile and practical choice for various woodworking projects. Its ability to make intricate cuts, curves, and straight lines makes it an indispensable tool for beginners and experienced artisans.
By following proper safety precautions, selecting the right blade, and mastering cutting techniques, you can achieve clean and precise cuts in plywood, bringing your woodworking creations to life with confidence and precision.
Whether you’re building furniture, crafting intricate designs, or tackling DIY home improvement projects, the Jigsaw’s flexibility and ease of use make it an invaluable addition to any workshop..