
A crosscut sled is an indispensable tool that ensures accurate and safe cuts, elevating your woodworking projects to new heights. Following the detailed instructions given below, you will learn How to make a Crosscut Sled for a Table Saw? Say goodbye to guesswork and hello to precise and consistent cuts.
How to make a Crosscut Sled for a Table Saw?Tools Required
Before building a crosscut sled for a table, saw, let’s gather the necessary tools.
- Table saw: The primary tool for making the cuts and assembling the crosscut sled.
- Safety equipment: Prioritize safety by wearing goggles, ear protection, and a dust mask.
- Tape measure: Essential for taking accurate measurements.
- Pencil or marking tool: Used to mark measurements and lines on the wood.
- Miter gauge: We needed to create initial cuts for the crosscut sled.
- Screwdriver or drill: Depending on your preference and the type of screws, you’ll need a screwdriver or a drill to secure the sled’s components.
- Clamps: Helpful for holding pieces together during assembly.
- Square: Ensures your cuts and angles are accurate.
- Router or Dado blade (optional): If you want to add additional features or enhancements to your crosscut sled, a router or Dado blade may be used.
- Sandpaper or sanding block: Used to smooth out rough edges and surfaces.
- Ruler or calipers: Useful for measuring precise distances and dimensions.
- Combination square: Helps ensure cuts and angles are square and accurate.
- Chisel: Needed for making adjustments and fine-tuning certain parts of the sled.
- Safety push sticks or blocks: Assist in safely guiding the workpiece through the table saw.
- Clamping tools: If you need to secure pieces together during the construction process, clamps will come in handy.
Ensure all the tools are in good working condition and follow safety guidelines. Having the right tools will make the construction process smoother and more efficient.
Materials Required
You will need various materials to construct a crosscut sled for a table saw.
- Plywood: Settle on top-notch plywood with a thickness of no less than 1/2 inch (12 mm).
- Hardwood or Plywood for the Fence: Choose durable hardwood like maple or oak. If hardwood is not readily available, you can utilize another sheet of plywood.
- T-track (optional): Consider installing a T-track to incorporate accessories or attachments into your crosscut sled. A T-track allows you to secure stops, hold-downs, or other jigs to the sled.
- Screws: Select screws suitable for woodworking, such as #8 or #10 wood screws. The screw length will vary based on the plywood thickness and the components being joined.
- Wood Glue: Employ high-quality wood glue to reinforce joints and enhance the sled’s stability.
- Sandpaper: Obtain sandpaper of varying grits to smooth out surfaces and edges during construction.
- Clear Finish (optional): Applying a clear finish to the sled can safeguard the wood and improve its aesthetic appeal.
Ensure that you acquire the appropriate materials, considering the dimensions and specifications of your intended crosscut sled. Double-check your measurements and requirements before purchasing the materials. You can construct your custom crosscut sled for the table saw with these materials.
Project step-by-step (6)
- Install T-Tracks
- Attach Miter Sliders to the Sled
- Glue the Bridge to the Sled Base
- Make the Kerf
- Align the Fence to the Blade
- Attach the T-Track to the Fence
1. Install T-Tracks
Installing T-tracks on a crosscut sled can expand its functionality and versatility. Follow these steps to install T-tracks securely:
Step 1: Determine T-track placement
Decide where you want to position the T-tracks. Consider their placement for attaching accessories or stop blocks. Use a pencil to mark the desired locations on the sled’s base.
Step 2: Mark screw whole positions
Using the T-track as a guide, mark the positions for the screw holes along the length of the T-track. Ensure the screw holes align with the marked locations on the sled’s base.
Step 3: Pre-drill screw holes
Use an appropriately sized drill bit to pre-drill pilot holes at the marked positions on the sled’s base.
Step 4: Attach the T-tracks
Position the T-track over the pilot holes on the sled’s base, aligning the screw holes on the T-track with the pre-drilled pilot holes. Secure the T-track to the sled’s base by driving screws through the T-track and into the pilot holes. Repeat this process for each T-track.
Step 5: Test the T-tracks
Ensure the T-tracks are firmly attached to the sled’s base by gently tugging them. They should not move or wobble. Check that the T-tracks are level and aligned with each other.
Step 6: Trim excess T-track (if necessary)
If the T-tracks extend beyond the edges of the sled’s base, use a saw or an appropriate cutting tool to trim them to match the dimensions of the sled.
2. Attach Miter Sliders to the Sled
Attaching miter sliders to your crosscut sled allows for smooth and precise miter cuts. Follow these steps to securely attach the miter sliders:
Step 1: Determine miter slider placement
Measure the width of the crosscut sled’s base and determine where you want to position the miter sliders. Consider the desired location for smooth miter cuts and mark the placements on the sled’s base using a pencil.
Step 2: Mark screw hole positions
Using the miter sliders as a guide, mark the positions for the screw holes along the length of the sliders. Ensure the screw holes align with the marked locations on the sled’s base.
Step 3: Pre-drill screw holes
Pre-drill pilot holes for the screws at the marked positions on the sled’s base using an appropriately sized drill bit.
Step 4: Attach the miter sliders
Position the miter sliders over the pilot holes on the sled’s base, aligning the screw holes on the sliders with the pre-drilled pilot holes. Secure the sliders to the sled’s base by driving screws through the sliders and into the pilot holes. Repeat this process for each miter slider.
Step 5: Test the miter sliders
Ensure that the miter sliders are firmly attached to the sled’s base by applying gentle pressure and sliding them back and forth. They should move smoothly without any wobbling or resistance.
Step 6: Check alignment and make adjustments
Verify that the miter sliders are aligned parallel to each other and perpendicular to the sled’s base. If adjustments are needed, slightly loosen the screws, align the sliders, and then tighten the screws again.
3. Glue the Bridge to the Sled Base
Gluing the bridge to the sled base is a crucial step in ensuring the stability and durability of your crosscut sled. Follow these steps to properly glue the bridge to the sled base:
Step 1: Prepare the surfaces
Ensure that the sled base and the bridge piece are clean and free from dust or debris.
Step 2: Position the bridge
Place the bridge piece on top of the sled base, aligning it carefully with the desired location. Use a measuring tape to ensure accurate placement. Lightly mark the position with a pencil if necessary.

Step 3: Apply Glue (wood)
Apply a thin layer of Glue (wood) to the bottom surface of the bridge piece. Use your finger or brush to spread the Glue evenly, covering the entire surface that will come into contact with the sled base.
Step 4: Press and secure
Carefully position the bridge piece onto the sled base, aligning it with the marked position. Apply gentle pressure to ensure proper contact between the two surfaces.
Step 5: Clamp the assembly
Place clamps across the bridge and sled base to securely hold them together. Ensure that the clamps are evenly distributed along the length of the bridge. Gradually tighten the clamps, exerting sufficient pressure to create a strong bond without causing excess Glue to squeeze out.
Step 6: Allow the Glue to cure
Follow the recommended drying time specified by the wood glue manufacturer.
Step 7: Remove excess Glue (optional)
If any excess glue is squeezed out during clamping, wait until it partially dries and then carefully remove it using a chisel or scraper. Take care not to damage the wood surfaces.
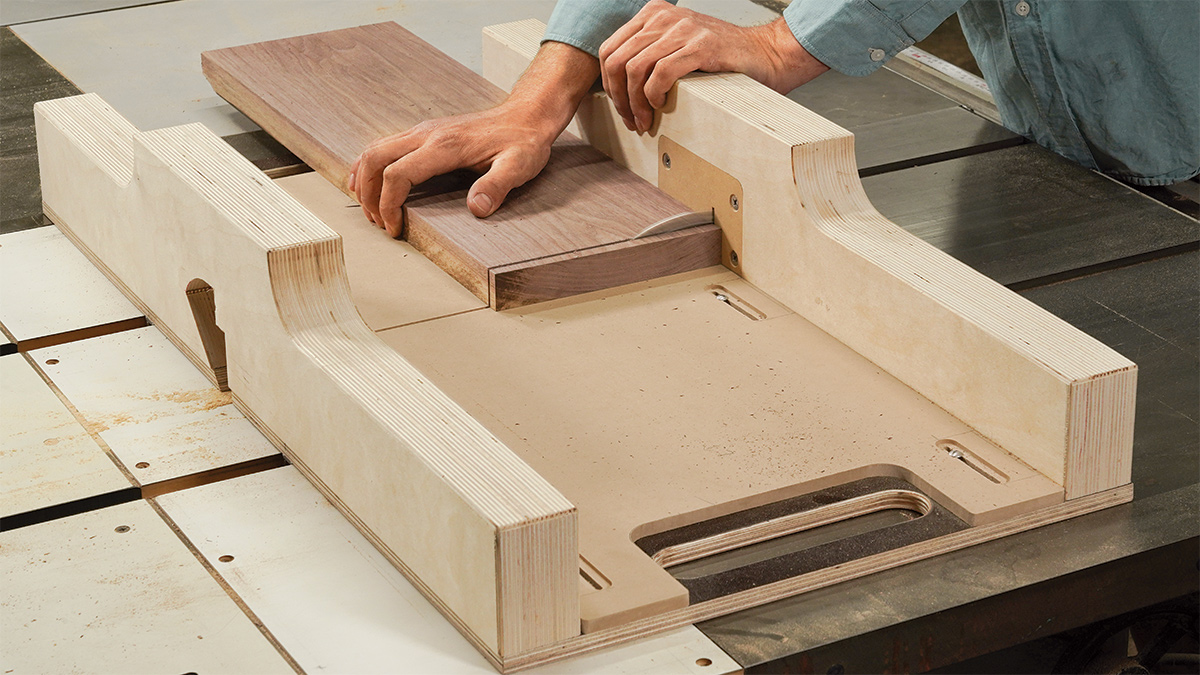
4. Make the Kerf
Creating the kerf, or the slot in the sled that accommodates the table saw blade, is crucial in building a crosscut sled. Follow these steps to make the kerf:
Materials needed
- Crosscut sled
- Table saw
- Safety equipment (goggles, ear protection, etc.)
Ensure the table saw is properly set up and adjusted for precise cuts. Check that the blade is correctly aligned and set to the desired cutting height. Position the sled on the table saw, aligning the marked kerf line with the blade. Ensure that the sled’s fence is securely locked in place. Turn on the table saw and gently push the sled forward, allowing the blade to cut through the sled’s base along the marked line.
Maintain a steady and controlled motion while feeding the sled through the blade. Exercise caution and wear safety equipment during the cutting process. After completing the cut, verify that the kerf is wide enough to accommodate the blade without any obstruction. The blade should move smoothly within the kerf without binding or excessive play.
By following these steps, you will successfully create the kerf in your crosscut sled, allowing for precise and controlled cuts with your table saw. Remember to prioritize safety and take necessary precautions when working with power tools.
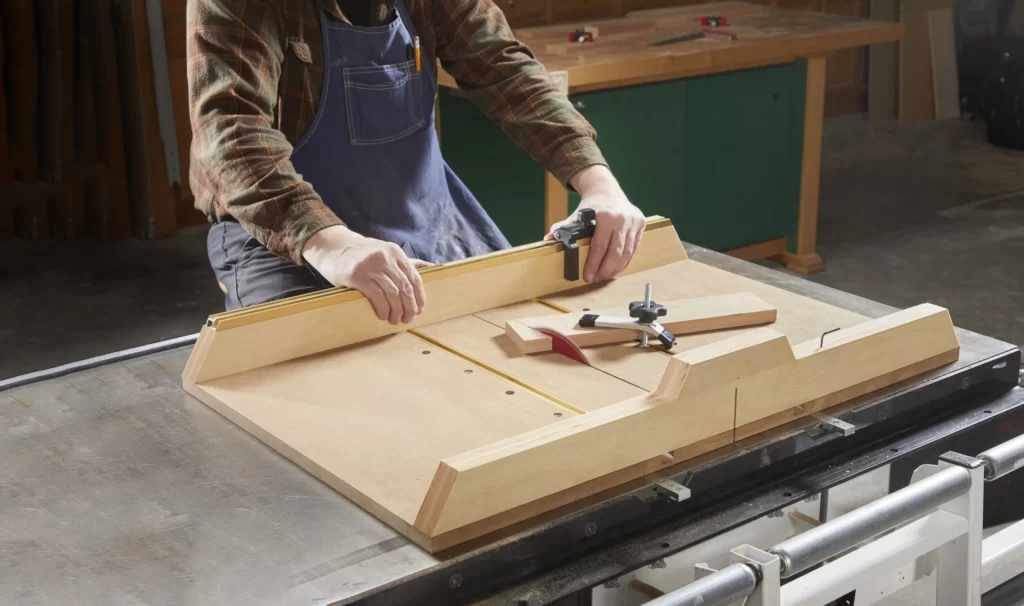
5. Align the Fence to the Blade
Aligning the fence to the blade is critical in achieving accurate and precise cuts with a crosscut sled. Follow these steps to align the fence properly:
Materials needed
- Crosscut sled
- Table saw
- Measuring tape
- Square
Ensure that the crosscut sled is securely positioned on the table saw. Check that the sled’s base is flat against the table surface and that the sled’s fence is locked in place. Take note of these measurements. Decide on the desired offset between the blade and the fence. This offset typically equals the desired width of the cut you intend to make.
Calculate the difference between the front and rear measurements from step 2. You must adjust the fence position if the rear measurement is smaller than the front. Use a square to ensure the fence is perpendicular to the sled’s base. Once aligned, tighten the screws or bolts to secure the fence.
Double-check the alignment of the fence. The measurements should match the desired offset you calculated in Step 3. Adjust the fence as needed to achieve the desired alignment. To confirm the accuracy of the alignment, make test cuts on scrap material. Check that the cuts are parallel and accurate, indicating that the fence is properly aligned with the blade.
These steps will successfully align the fence to the blade on your crosscut sled. This alignment ensures precise and consistent cuts in your woodworking projects. Remember to periodically check and readjust the alignment as needed.
6. Attach the T-Track to the Fence
Attaching the T-track to the fence of your crosscut sled can enhance its versatility and functionality. Follow these steps to securely attach the T-track to the fence:
Using a measuring tape, determine the desired location for the T-track on the fence. Mark the positions for the screw holes along the length of the T-track on the fence using a pencil. Ensure the marks are evenly spaced and aligned. Pre-drill pilot holes at the marked positions on the fence using an appropriately sized drill bit.
Place the T-track over the pre-drilled pilot holes on the fence, aligning the screw holes on the T-track with the corresponding pilot holes on the fence. Make sure the T-track is straight and parallel to the fence.
Using screws suitable for woodworking, drive them through the screw holes on the T-track and into the pre-drilled pilot holes on the fence. Tighten the screws firmly to securely attach the T-track. Repeat this process for each screw hole along the length of the T-track.
Ensure the T-track is securely attached to the fence by gently tugging. It should not move or wobble. Verify that the T-track is level and aligned parallel to the fence. To confirm the functionality of the T-track, insert accessories or attachments into the T-track and test their movement. They should slide smoothly and securely within the T-track.
Size of my Crosscut Sled
The size of your crosscut sled depends on various factors, including the dimensions of your table saw and your specific woodworking needs. While there isn’t a standard size, consider the following points to determine the appropriate dimensions for your crosscut sled:
Measure the width and depth of your table saw’s table surface. Your crosscut sled should fit comfortably within these dimensions to ensure stability and proper alignment during use.
Your crosscut sled should be large enough to accommodate the length and width of the workpieces you commonly work with. It should provide ample support and stability for accurate and safe cutting. Evaluate the space in your workshop or work area. Ensure that the size of the crosscut sled allows for easy maneuverability and doesn’t hinder other operations or storage. Take into account any space constraints or limitations.
Consider the types of projects you frequently undertake. A larger crosscut sled may be beneficial if you often work with larger or longer stock. Conversely, a smaller sled may suffice if your projects involve smaller or more precise cuts.
As a general guideline, a crosscut sled that measures around 2 to 3 feet in width and 1 to 2 feet in depth is suitable for many woodworking applications. However, adjust these dimensions based on your specific needs and available space.