
Are you interested in discovering the art of how to use a circular saw without a table? Whether you’re a devoted DIY enthusiast or a seasoned professional in the realm of carpentry, there may arise occasions when you need a suitable table or workbench to provide the necessary support for your cutting materials.
Thankfully, with the proper techniques and safety measures, wielding a circular saw without a table is feasible, ensuring precision and security. This comprehensive guide will delve into various methods and invaluable tips, enabling you to execute precise cuts and complete your projects quickly.
If you’re eager to unravel the secrets of employing a circular saw without a table, join us as we embark on this enlightening journey.
CONSIDERATIONS WHEN SETTING UP A CIRCULAR SAW
SUPPORTING THE MATERIAL
When setting up a circular saw, one of the essential considerations is providing proper support for the material you’ll be cutting.
Adequate support ensures stability, accuracy, and safety throughout the cutting process. In this section, we will explore various factors to remember when supporting the material, providing detailed explanations and practical tips to help you set up your circular saw effectively.
Workbench or Table: Securing your circular saw on a sturdy workbench or table is crucial. Ensure the surface is level and reliable to prevent unwanted movement or vibration while cutting. Use clamps or mounting brackets to firmly attach the circular saw to the workbench or table, creating a stable base for your cutting operations.
Workpiece Support: Supporting the workpiece, or the material you’re cutting, is vital to prevent it from sagging, shifting, or falling during the cutting process. More support can lead to accurate cuts and potential safety hazards. Consider the following support options:
a. Sawhorses: Sawhorses are a popular choice for supporting longer or larger workpieces. They offer a stable and elevated platform, allowing you to work comfortably and safely. Ensure the sawhorses are level, and securely position the workpiece on top.
b. workpiece Supports: Depending on the size and shape of the workpiece, you may require additional support. Strategically position these supports to provide continuous support along the length or width of the material.

c. Outfeed Support: When working with long workpieces, it’s crucial to have outfeed support to prevent the material from sagging or causing the saw blade to bind. This support can be an extension table or an additional sawhorse at the cut material’s end.
Marking and Measuring: Before making any cuts, it’s essential to mark and measure the material accurately. This ensures precise cutting lines and helps you align the material properly. Use measuring tools such as a tape measure, square, or ruler to mark your desired cut lines. This step is crucial for achieving accurate cuts and reducing errors.
Clamping: For smaller or irregularly shaped workpieces, using clamps to secure them in place is necessary. Clamping the material to a stable surface or workbench prevents it from moving or shifting during cutting, enhancing accuracy and safety.
Personal Protective Equipment (PPE): Safety should always be a priority when setting up a circular saw. It’s crucial to wear appropriate personal protective equipment (PPE). This includes safety goggles or glasses to protect your eyes from debris, ear protection to reduce noise levels, and gloves to provide a secure grip while handling the material.
Properly supporting the material is crucial when setting up a circular saw. It ensures stability, accuracy, and safety throughout the cutting process. By securely attaching the circular saw to a sturdy workbench or table, providing adequate support for the workpiece, accurately marking and measuring the material, using clamps when necessary, and wearing appropriate personal protective equipment, you can create a safe and efficient cutting environment.
SUPPORT THE CUT LINE
Providing adequate support for the cut line is essential when setting up a circular saw. Proper support ensures accurate and precise cuts while reducing the risk of material splintering or shifting. This section will explore various considerations and techniques to support the cut line when using a circular saw effectively. Detailed explanations and practical tips will help you set up your circular saw for optimal results.
Marking the Cut Line: Before focusing on supporting the cut line, it is crucial to mark it accurately on the material. Use a pencil, marking gauge, or other suitable tools to draw a clear, precise line representing the desired cut. Take your time to ensure the line is straight and aligns with your intended cutting path.
Material Support: Proper support for the material is essential to support the cut line effectively. Consider the following methods:
a. Cutting Table or Workbench: Place the material on a stable cutting table or workbench. Ensure the surface is level and sturdy, minimizing vibrations during cutting. This support helps maintain the material’s stability and ensures accurate cuts.
b. Sacrificial Backing: Sacrificial backing can provide additional support for materials prone to splintering, such as plywood or veneered boards. This backing prevents tear-out and ensures clean, splinter-free cuts.
c. Sawhorses and Workpiece Supports: If you work with longer or more extensive materials, using sawhorses or specialized workpiece supports can provide additional stability. Position the sawhorses or supports strategically to support the material along its length, ensuring the cut line is fully supported.
d. Clamping: Sometimes, clamping the material to the cutting table or workbench can be beneficial. This method is beneficial when working with smaller or irregularly shaped materials. Use clamps to secure the material firmly in place, ensuring it remains stable throughout the cutting process.
Zero-Clearance Inserts: Zero-clearance inserts are accessories that can be installed in the base of the circular saw. These inserts feature a narrow slit that closely matches the width of the saw blade, providing additional support to the material being cut. Zero-clearance inserts minimize tear-out and help maintain the material’s stability along the cut line.
Guiding Aids: To support the cut line and improve cutting accuracy, you can use guiding aids. These aids can include a straightedge or a guide rail system that runs parallel to the cut line. Align the circular saw with the guiding aid to ensure a straight and precise cut.
Featherboards: Featherboards are devices that exert pressure on the material being cut, helping to keep it firmly against the support and preventing it from moving during the cut. These devices are handy when making long, rip cuts. Position the feather boards to apply pressure against the material, guiding it along the cut line.
Providing adequate support for the cut line is crucial for achieving accurate and precise cuts when using a circular saw. By accurately marking the cut line, ensuring proper material support using cutting tables, sacrificial backings, sawhorses, and clamps, utilizing zero-clearance inserts, and employing guiding aids and feather boards, you can enhance the stability and accuracy of your cuts.
These techniques and considerations ensure clean, splinter-free cuts and minimize the risk of material shifting or splintering during the cutting process, resulting in high-quality woodworking outcomes.
SPACE FOR THE SAWBLADE
When setting up a circular saw, providing adequate space for the blade is crucial for safe and effective cutting. Sufficient clearance around the blade helps prevent binding, kickback, and damage to the workpiece. This section will explore considerations and techniques to ensure proper space for the saw blade when using a circular saw.
Blade Depth Adjustment: Adjust the blade depth to the appropriate level for your cutting needs. The blade should extend slightly below the cut material, typically around 1/8 to 1/4 of an inch (3-6 mm).

Blade Guard Position: Check the position of the blade guard on your circular saw. Ensure the blade guard moves freely and remains in the correct position during cutting. This helps maintain proper clearance around the saw blade.
Material Placement:
- When setting up the material for cutting, ensure it is positioned on the cutting table or workbench in a way that allows enough space for the saw blade.
- Ensure the material is flat and securely positioned to prevent shifting during cutting.
- Avoid overhanging or unsupported sections of the material that could interfere with the blade’s path.
Cutting Area Clearance: Clear the cutting area of any obstacles or debris that may impede the movement of the saw blade. This includes removing clutter, tools, or other materials from the path of the saw blade.
Rip Fence Positioning: If using a rip fence or guide, ensure it is properly aligned and positioned to allow sufficient space for the saw blade. The rip fence should be set parallel to the cut line and positioned in a way that does not obstruct the blade’s path. Double-check the clearance between the rip fence and the saw blade to prevent binding or kickback.
Test Cuts: Before starting a full-cutting operation, it is advisable to make test cuts on scrap material. This allows you to verify enough clearance for the saw blade and identify potential issues before working on the material.
Ensuring adequate space for the saw blade is essential for safe and effective cutting when using a circular saw. By adjusting the blade depth, checking the position of the blade guard, correctly placing the material, clearing the cutting area, positioning the rip fence correctly, and conducting test cuts, you can ensure enough clearance for the saw blade to operate smoothly without interference.
OPTIONS FOR USING A CIRCULAR SAW WITHOUT A TABLE
SHEET OF FOAM INSULATION
It requires careful handling to achieve clean and accurate cuts without causing damage to the foam. In this section, we will explore various techniques and tips for effectively using a circular saw to cut a sheet of foam insulation without the aid of a table.
Safety Precautions
Prioritizing safety is crucial before cutting foam insulation with a circular saw. It is essential to wear appropriate personal protective equipment (PPE) such as safety goggles, a dust mask, and gloves to safeguard oneself against potential hazards.
Marking the Cut Line
Start by marking a clear and precise cut line on the foam insulation sheet to begin the cutting process. Measure the desired dimensions and use a straight edge or ruler to draw an accurate line.

Selecting the Right Blade
Choosing the appropriate blade for cutting foam insulation is paramount in achieving clean and smooth cuts. Opt for a fine-toothed blade specifically designed for cutting foam or insulation materials. The fine teeth on the blade help minimize tearing and ensure cleaner edges.
Adjusting the Saw Depth
It is essential to adjust the cutting depth of the circular saw to prevent any accidental cuts or damage. Set the depth slightly more profound than the thickness of the foam insulation sheet. This ensures the blade does not extend beyond the material, reducing the risk of unwanted cuts.
Providing Adequate Support
Proper support is crucial for stability while cutting foam insulation without a table. Place the sheet on a sturdy work surface, such as a sawhorse or a workbench, to keep it steady and prevent unintended movement during cutting.
Cutting Techniques
There are several cutting techniques you can employ when using a circular saw to cut foam insulation without a table:
a. Freehand Cutting: If you possess experience and confidence in your cutting skills, you can guide the circular saw along the marked cut line while holding the foam insulation sheet in place with your other hand. Proceed slowly and maintain a steady motion to prevent deviations from the desired cutting path.
b. Straight Edge Guide: Consider using a straight edge guide for enhanced stability and precision. Secure a straight and rigid board or metal ruler along the marked cut line, allowing the circular saw’s base plate to ride against it as you cut. This technique helps maintain a consistent and straight cut.
c. Jig or Homemade Guide: Another option is to create a custom-made guide or jig tailored to your specific cutting needs. This can be fashioned using scrap wood or other suitable materials. Attach the guide securely to the foam insulation sheet, ensuring it follows the desired cut line. Then, guide the circular saw along the guide to achieving accurate cuts.
Cutting a foam insulation sheet without a table using a circular saw requires careful planning and execution. You can achieve clean and precise cuts by following safety precautions, accurately marking the cut line, selecting the appropriate blade, adjusting the saw depth, providing proper support, and employing suitable cutting techniques. It is crucial to work slowly and attentively, ensuring the stability of the foam insulation sheet throughout the cutting process.
STRUCTURAL LUMBER
Structural lumber is wood used for framing and load-bearing purposes in buildings and structures. Accurate cutting of structural lumber is crucial to ensure proper fit and maintain structural integrity. This section will explore techniques and tips for effectively using a circular saw to cut structural lumber without relying on a table.
Safety Precautions
Prioritizing safety is paramount when cutting structural lumber with a circular saw. It is essential to wear appropriate personal protective equipment (PPE), including safety goggles, hearing protection, and gloves, to safeguard against potential hazards.
Marking the Cut Line
Start by marking the cut line on the structural lumber to achieve precise cuts. Utilize a measuring tape, square, or straight edge to mark the desired length or angle. Double-check the measurements to minimize errors.
Choosing the Right Blade
Selecting the appropriate blade is critical for cutting structural lumber cleanly and accurately. Opt for a carbide-tipped or rip-cut blade with a high tooth count for cutting wood. Such blades are specifically designed to cut through thick lumber efficiently.
Adjusting the Saw Depth
This prevents the blade from extending beyond the material, reducing the risk of accidents and ensuring a clean cut.
Supporting the Lumber
Proper support is essential when cutting structural lumber without a table. Place the lumber on a stable work surface such as a sawhorse or a workbench. Ensure the lumber is securely supported and does not wobble during cutting.
Techniques of Cutting
a. Freehand Cutting: If you possess experience and confidence in your cutting skills, you can guide the circular saw along the marked cut line while holding the lumber securely.
b. Straight Edge Guide: Consider utilizing a straight edge guide for enhanced precision. Clamp a straight and rigid board or metal ruler along the marked cut line, allowing the circular saw’s base plate to ride against it as you cut. This technique ensures consistent and straight cuts.
c. Circular Saw Guide: Another option is using a circular saw guide specifically designed for straight cuts. These guides attach to the circular saw’s base and provide a straight edge to follow along the marked cut line. This method is beneficial for cutting more extended lengths of structural lumber.
Cutting structural lumber without a table using a circular saw requires adherence to safety precautions, accurate marking of the cut line, selection of an appropriate blade, adjustment of the saw depth, and proper support for the lumber.
Whether utilizing freehand cutting, a straightedge guide, or a circular saw guide, it is imperative to work diligently and maintain a steady hand to achieve clean and precise cuts. Remember to prioritize safety and take your time to ensure the structural integrity of the lumber.
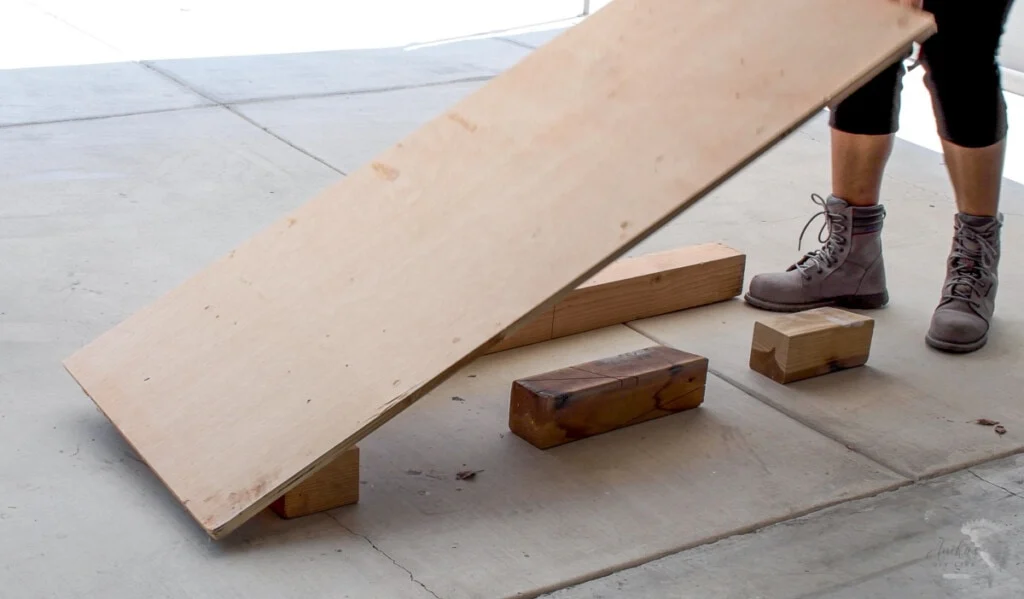
SAWHORSES
Sawhorses are indispensable for supporting materials during various construction tasks, including cutting. They offer a stable, elevated surface that is useful when using a circular saw without a table.
Benefits of Sawhorses
Sawhorses provide several advantages when working with a circular saw without a table:
a. Stability: One of the primary benefits of sawhorses is their ability to offer stability. They provide a solid and secure platform for supporting materials during cutting, minimizing the risk of accidents or movement.
b. Elevation: Sawhorses elevate materials to a comfortable working height, reducing strain on the back and improving visibility while cutting with a circular saw.
c. Accessibility: By utilizing sawhorses, you create an open workspace that allows for easier maneuvering of the circular saw around the material. This facilitates better control and precision during the cutting process.
Proper Setup of Sawhorses
To ensure optimal performance and safety, follow these guidelines when setting up sawhorses:
a. Level Ground: Place the sawhorses on a level surface to prevent instability or wobbling while in use.
b. Equal Height: Adjust the height of each sawhorse to ensure a level working surface. Use a measuring tape or level to achieve uniformity.
c. Secure Legs: Verify that the legs of each sawhorse are securely locked in place to prevent collapse or shifting during operation.
d. Spacing: Position the sawhorses at an appropriate distance apart, depending on the length of the material being cut. This ensures proper support and balance.
Using Sawhorses for Cutting
When utilizing sawhorses for cutting materials with a circular saw, follow these steps:
a. Placement: Position the material to be cut on the sawhorses, ensuring it is centered and balanced. Ensure that the sawhorses fully support the material to prevent tipping or movement.
b. Marking the Cut Line: Use a measuring tape, square, or straight edge to measure and mark the desired cut line on the material. This serves as a guide during the cutting process.
d. Cutting Process: Hold the circular saw firmly and align the blade with the marked cut line. Start the saw and, with a steady hand, guide the blade along the cut line in a smooth and controlled motion. Avoid applying excessive pressure or forcing the saw.
e. Safety Precautions: Always prioritize safety by wearing appropriate personal protective equipment (PPE) such as safety goggles, hearing protection, and gloves. Maintain a clear workspace and keep bystanders safe during the cutting process.
Sawhorses are invaluable tools when using a circular saw without a table. They offer stability, elevation, and accessibility, enhancing control, accuracy, and safety while cutting materials. Following proper setup techniques and utilizing sawhorses as a support system can optimize your cutting experience and achieve precise results.
MAKING A STRAIGHT CUT
Making a straight cut is a fundamental skill when using a circular saw. Whether engaged in woodworking projects or construction tasks, achieving clean and accurate cuts is crucial for obtaining professional-looking results. This section will explore techniques and tips for making straight cuts with a circular saw.
Marking the Cut Line
Before initiating a straight cut, marking the desired cut line on the material is essential. Use a measuring tape, square, or straight edge to ensure the line is straight and accurately positioned. It is crucial to double-check your measurements to avoid any errors.
Choosing the Right Blade
Selecting the appropriate blade for making straight cuts is paramount. A carbide-tipped or combination blade with a high tooth count is suitable for general-purpose cutting.
Setting the Saw Depth
Proper adjustment of the cutting depth of the circular saw is crucial. Set the blade depth slightly more profound than the material’s thickness to prevent excessive blade extension beyond the material’s surface.
Supporting the Material
Providing adequate support to the cut material is essential for achieving straight cuts. Place the material on a stable work surface or sawhorse, ensuring it is fully supported and devoid of any wobbling during the cutting process. Consider employing clamps or guides to secure the material if necessary.
Aligning the Saw
Before commencing the cut
- Align the circular saw’s blade with the marked cut line.
- Ensure the saw’s base plate is parallel to the line, allowing for a straight and accurate cut.
- Take your time to verify the alignment before proceeding.
Guiding the Saw
Maintaining a firm grip on the circular saw with both hands when cutting. Maintain your focus on the cut line, ensuring the saw remains aligned throughout the process. Move the saw at a consistent pace, allowing the blade to perform the cutting action.
Using a Straight Edge Guide
For enhanced stability and precision, consider utilizing a straightedge guide. Secure a straight and rigid board or metal ruler along the marked cut line, allowing the circular saw’s base plate to ride against it as you cut. This technique facilitates maintaining a straight and consistent cutting path.
Safety Precautions
Prioritizing safety is of utmost importance when working with a circular saw. Developing proficiency in making straight cuts with a circular saw is essential for achieving professional and accurate results in various projects.
You can consistently attain straight and clean cuts by adhering to the proper techniques, including marking the cut line, selecting the appropriate blade, setting the saw depth, supporting the material, aligning the saw, and utilizing a straight edge guide when necessary. Remember to prioritize safety and exercise patience to ensure precise outcomes.