
Acquiring the knowledge of how to use a table saw is a crucial skill that you must develop. A table saw is an incredibly versatile and powerful tool that makes you effortlessly make precise cuts in various materials.
The guide below will equip you with all the instructions to operate a table confidently saw and achieve outstanding results. So, let’s delve into the details and explore how to use a table saw to unlock your creative potential and elevate your woodworking expertise.
Importance of understanding how to use a table saw safely
Understanding how to use a table saw safely is incredibly important for individuals working with this powerful tool. Table saws are commonly utilized in woodworking projects and can pose significant risks if not operated correctly. Prioritizing safety is crucial to prevent accidents and injuries.
Get acquainted with the equipment: Before operating a table saw, it is essential to read the manufacturer’s user manual thoroughly. Familiarize yourself with the different parts and components of the table saw, including the blade, rip fence, miter gauge, and power switch. Becoming familiar with the equipment will enable you to operate it confidently and safely.
Utilize appropriate safety gear: Always wear personal protective equipment (PPE) when working with a table saw.
Establish a safe work environment:
- Ensure your work area is well-lit and tidy.
- Remove any clutter or obstacles that may impede your movement or cause accidents.
- Maintain a clear space around the table saw, allowing ample room for materials and yourself.
- Utilize a stable and level work surface to minimize vibrations or instability during operation.
Employ proper technique and positioning:
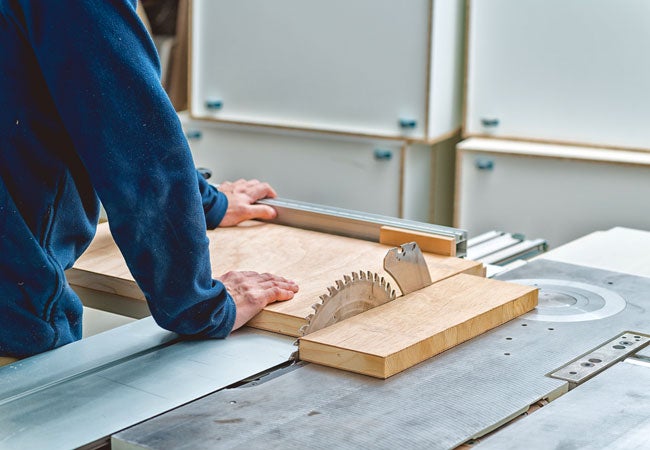
- When operating a table saw, it is crucial to maintain correct body positioning.
- Stand to the side of the blade and slightly behind it to reduce the risk of injury from kickback or flying debris.
- Use both hands to control the workpiece and guide it through the blade.
- Avoid reaching over the blade or standing directly in line with it.
Adjust the blade height and angle carefully: Before commencing work, adjust the blade height to be slightly above the thickness of the cut material. This helps mitigate the risk of kickbacks. Similarly, if angled cuts are necessary, adjust the blade angle accordingly. Ensure the blade is securely tightened before operating the saw.

Utilize appropriate safety features: Table saws are equipped with various safety features to minimize the risk of accidents. These may include blade guards, splitters, anti-kickback pawls, and riving knives. Always use these safety features as intended, and refrain from removing or disabling them unless absolutely necessary. They provide an additional layer of protection during operation.
Synopsis of the heading/topic: Understanding how to operate a table saw safely is crucial due to the potential risks associated with working with such a powerful tool. By becoming familiar with the equipment, utilizing appropriate safety gear, establishing a safe work environment, employing proper techniques and positioning, adjusting the blade carefully, and utilizing the available safety features, the likelihood of accidents and injuries can be minimized.
Ensuring the safe use of a table saw should always be a top priority for individuals working with this tool. Adhering to the recommended safety guidelines can safeguard yourself and others from potential hazards. Maintain vigilance, focus, and stay informed about the best practices for table saw operation to ensure a safe and productive woodworking experience.
Safety Precautions
Safety precautions are paramount when using a table saw to minimize the risk of accidents and injuries. Table saws are powerful tools that require careful handling and adherence to safety guidelines.
Read the user manual: Start by thoroughly reading the user manual provided by the manufacturer. The manual contains essential safety information specific to the table saw’s model. Understanding the instructions, warnings, and precautions outlined in the manual is crucial before operating the saw.
Personal Protective Equipment (PPE): Always wear the appropriate personal protective equipment (PPE) when using a table saw. Additionally, consider wearing a dust mask to prevent inhalation of sawdust particles.
Maintain a clean and organized workspace:
- Clear away any unnecessary objects or clutter from the table and surrounding area.
- Ensure the floor is free of tripping hazards and sufficient lighting for a clear view of the workpiece and the saw blade.
Secure the workpiece properly: Before making any cuts, ensure that the workpiece is securely positioned and stable. Use clamps or other appropriate methods to secure the material to the table or fence firmly. This will prevent the workpiece from shifting or moving during the cutting process, reducing the risk of kickback.
Use the blade guard and other safety features: Table saws have safety features such as a blade guard, splitter, anti-kickback pawls, and a riving knife. These features are designed to protect the user during operation. The splitter, anti-kickback pawls, and riving knife help prevent kickback, which occurs when the workpiece is forcefully propelled back toward the operator.
Maintain a safe distance:
- Maintain a safe distance from the blade while operating the table saw.
- Never reach over the blade or make cuts with the body directly in line with the blade.
Synopsis of the heading/topic: Safety precautions are critical when using a table saw to create a safe working environment. By reading the user manual, wearing appropriate personal protective equipment, maintaining a clean workspace, securely positioning the workpiece, utilizing safety features like the blade guard, and maintaining a safe distance from the blade, individuals can significantly reduce the risk of accidents and injuries.
Proper safety precautions are essential when using a table saw to mitigate the potential hazards associated with its use. By following the safety guidelines, wearing the appropriate protective gear, and maintaining a clean and organized workspace, individuals can establish a safe environment for operating a table saw. Remember, prioritizing safety is paramount to prevent accidents and ensure a productive, injury-free woodworking experience.
Essential Components of a Table Saw
A table saw consists of several essential components that work together to facilitate the cutting and shaping of wood. Understanding these components is essential for effectively operating a table saw and achieving accurate results.
Tabletop: The tabletop is the flat surface where the wood is placed and supported during cutting. Ensuring precise cuts is essential to ensure the tabletop is smooth and level.
Blade: The blade is the primary cutting tool of the table saw. Table saw blades are available in various sizes and types, each suitable for different cutting tasks. Proper selection, alignment, and tightening of the blade are crucial before use.
Rip Fence: The rip fence is a guide that assists in positioning and guiding the workpiece parallel to the blade during rip cuts. The rip fence ensures accurate and uniform cuts by providing a consistent reference point.
Miter Gauge: The miter gauge makes angled or crosscuts on a table saw. The miter gauge slides in a slot on the tabletop and allows the user to set precise angles for cutting wood at different angles or slopes.
Blade Guard: Its purpose is to prevent accidental contact with the blade, reducing the risk of injuries. Typically, the blade guard includes a transparent shield that allows visibility of the cutting area while providing protection.
Power Switch: The power switch is the control mechanism responsible for turning the table saw on and off. The power switch should be easily accessible and equipped with a prominent emergency shut-off feature for quick power interruption in emergencies.

Synopsis of the heading/topic: Understanding the essential components of a table saw is vital for operating the tool effectively. The tabletop provides a stable surface for the workpiece while the blade performs the cutting action.
The rip fence and miter gauge assist in positioning and guiding the workpiece for accurate cuts and angled or crosscuts. The blade guard enhances safety by covering the exposed blade, and the power switch controls the saw’s operation.
A table saw consists of several fundamental components that work harmoniously to enable precise and efficient woodworking. By familiarizing yourself with the tabletop, blade, rip fence, miter gauge, blade guard, and power switch, you can confidently operate a table saw and achieve accurate results in your woodworking projects.
Getting Started
Getting started with a table saw can be an exciting endeavor, but it is essential to approach it with the proper knowledge and preparation.
Read the user manual: Before using your table saw, thoroughly read the user manual provided by the manufacturer. The manual contains essential information about the specific model of the table saw, including its features, setup instructions, and safety guidelines. Understanding the manual will help you become familiar with the tool and its proper usage.
Select the appropriate workspace: Choose an appropriate location for your table saw. Ideally, place it in a well-ventilated area with sufficient lighting. Ensure ample space around the saw for maneuvering and handling materials.
Setting up the table saw may involve assembling various components, adjusting the blade height and angle, and installing necessary accessories. Pay attention to safety features such as the blade guard, splitter, and anti-kickback pawls, ensuring they are correctly in place.
Prepare the work area:
- Before beginning any cutting, prepare the work area.
- Clear away any clutter or debris from the table and the surrounding space.
- Keep the area well-organized and ensure sufficient room for maneuvering the workpiece.
Wear personal protective equipment (PPE): Always wear the appropriate personal protective equipment (PPE) when using a table saw. This includes safety glasses or goggles, hearing protection, and sturdy gloves. Wearing PPE will help safeguard you from potential hazards.
Practice basic cutting techniques:
- Before tackling complex projects, practice basic cutting techniques on scrap wood.
- Familiarize yourself with the controls, such as adjusting the blade height and angle, and learn how to make straight and accurate cuts.
- Start with simple cuts and gradually progress to more advanced techniques as you gain confidence and proficiency.
Synopsis of the heading/topic: Starting with a table saw requires careful preparation and knowledge. By reading the user manual, selecting an appropriate workspace, setting up the table saw correctly, preparing the work area, wearing personal protective equipment, and practicing basic cutting techniques, you can begin your table saw journey with confidence and safety in mind.
Starting your table saw journey on the right foot is crucial for a safe and successful woodworking experience. Remember to prioritize safety and take precautions to protect yourself and others in the workshop environment.
Basic Techniques
Mastering basic techniques is essential for effectively using a table saw and achieving accurate and precise cuts. By understanding and practicing these fundamental techniques, you can enhance your woodworking skills and improve the quality of your projects.
Straight Cuts: Making straight cuts is one of the most common techniques used with a table saw. Begin by aligning the workpiece parallel to the rip fence. Utilize the rip fence as a guide, firmly grasp the workpiece, and gradually feed it through the blade while maintaining a consistent pace. Maintain control throughout the cut to achieve a straight and accurate result.
Crosscuts: Crosscuts involve cutting the workpiece perpendicular to its grain. To execute a crosscut:
- Employ a miter gauge or a crosscut sled.
- Set the desired angle or position on the gauge or sled, align the workpiece against it, and securely hold it.
- Push the workpiece steadily through the blade, ensuring a smooth and controlled motion.
- Ensure proper support for the workpiece to prevent binding or kickback.
Ripping Narrow Strips:
- Begin by setting the rip fence at the desired width, ensuring the distance between the fence and the blade is appropriate for the strip’s width.
- Position the workpiece against the rip fence, apply pressure with the push stick or block, and steadily feed it through the blade.
- Maintain control and be cautious of potential kickbacks.
Bevel Cuts: Bevel cuts involve tilting the blade to create angled cuts on the workpiece. Set the rip fence and miter gauge accordingly for proper positioning. Securely hold the workpiece against the fence or miter gauge and guide it carefully through the blade, ensuring a smooth and controlled motion. Pay attention to the cut angle and make necessary adjustments to achieve the desired slope.

Dado Cuts: Dado cuts create wide and shallow grooves in the workpiece. To make a dado cut, use a dado blade set or a stacked dado blade set specifically designed for this purpose. Set the width of the dado by adjusting the blades accordingly. Securely hold the workpiece against the rip fence and gradually feed it through the blade, making multiple passes if necessary to achieve the desired width. Exercise caution and maintain control throughout the process.
Synopsis of the heading/topic: Mastering basic techniques is essential for using a table saw effectively.
Understanding and practicing basic techniques on a table saw is vital for improving your woodworking skills and achieving high-quality results. By mastering straight cuts, crosscuts, ripping narrow strips, bevel cuts, and dado cuts, you can expand your capabilities and confidently tackle a wide range of projects.
Advanced Techniques
You can advance to more complex and specialized cuts once you have mastered using a table or saw. These advanced techniques require additional skills and knowledge but can significantly enhance the quality and intricacy of your woodworking projects.
Miter Cuts: Miter cuts involve angled cuts across the face of the workpiece. Employ a miter gauge or a miter sled to achieve precise miter cuts. Configure the desired angle on the gauge or sled, align the workpiece against it, and firmly secure it. Push the workpiece through the blade while maintaining a controlled and smooth motion. Miter cuts are commonly utilized for constructing frames, trim, and decorative elements.
Compound Miter Cuts: Compound miter cuts encompass angled cuts across the face of the workpiece’s face and bevel cuts along its edge. This technique is often employed in intricate joinery, such as crown molding or picture frames. Adjust the miter gauge and the bevel angle on the table saw to achieve the desired compound angle. Carefully position and secure the workpiece before executing the cut.
Rabbets and Dadoes: Rabbets and dadoes are grooves or channels cut into the edge or face of a workpiece to accommodate other pieces of wood or joinery. A rabbet is a groove created along the edge of the workpiece, while a dado is a wider groove cut across the face or edge. Utilize a dado blade or a dado set for accurate and consistent results. Measure and mark the location of the rabbet or dado, adjust the blade width accordingly and carefully feed the workpiece through the blade.
Box Joints and Finger Joints: They consist of interlocking rectangular fingers or pins that fit together tightly. Employ a dado blade or a box joint jig on the table saw to fabricate box joints or finger joints. Configure the appropriate width and spacing, secure the workpiece, and cautiously guide it through the blade, making multiple passes to complete the joint.
Tapered Cuts: Tapered cuts involve gradually reducing the width or thickness of a workpiece along its length. They are frequently employed to fashion angled legs or decorative elements. To execute tapered cuts, employ a tapering jig or a sled designed for this purpose. Set the desired angle and position on the jig or sled, securely hold the workpiece, and guide it through the blade, maintaining control and a consistent feed rate.
Synopsis of the heading/topic: Advanced techniques in table saw usage allow for more complex and specialized cuts. Miter cuts, compound miter cuts, rabbets and dadoes, box joints and finger joints, and tapered cuts are advanced techniques that can elevate your woodworking projects’ intricacy and aesthetic appeal.
Once you have mastered using a table or saw, exploring advanced techniques opens up new avenues for creativity and craftsmanship. Miter cuts, compound miter cuts, rabbets and dadoes, box joints and finger joints, and tapered cuts are advanced techniques that enhance your woodworking skills.
Remember to practice these techniques cautiously, prioritize safety, and continue expanding your knowledge and expertise with the table saw. You can achieve remarkable results and create intricate woodworking projects with dedication and practice.
Troubleshooting and Maintenance of Table Saw
Proper troubleshooting and regular maintenance are vital for ensuring your table saw’s optimal performance and longevity. You can keep your table saw in excellent working condition by addressing common issues and performing routine upkeep.
Blade Alignment: One common issue that table saw users encounter is blade misalignment, which can result in inaccurate cuts. Use a combination square or a specialized alignment tool to ensure the blade is parallel to these reference points. If adjustment is required, consult the user manual for instructions on properly aligning the blade.
Blade Sharpness: Dull blades can lead to burning, splintering, and rough cuts. Regularly examine the condition of your blade and sharpen or replace it as necessary. Follow the manufacturer’s recommendations for sharpening or replacing the blade, and always utilize the appropriate tools and safety precautions. A sharp blade enhances the quality of your cuts, reduces strain on the motor, and improves overall efficiency.
Dust Collection: Sawdust and debris can accumulate around the blade, motor, and other parts of the table saw, affecting its performance and potentially creating a fire hazard. Maintain a clean work environment using a dust collection system or connecting a vacuum to the saw’s dust port. Routinely clean the saw’s interior, including the blade guard, throat plate, and motor housing. This helps prevent dust buildup and promotes better airflow, ensuring the saw operates optimally.
Lubrication: Proper lubrication is crucial for the smooth operation of the table saw’s moving parts. Refer to the user manual for recommendations on specific lubrication points and the appropriate lubricants to use. Apply lubricant to the arbor, trunnions, gears, and other designated areas as instructed. Regular lubrication helps reduce friction, extends the lifespan of the components, and ensures smooth and accurate cutting.
Belt and Belt Tension: Some table saws utilize belts to transfer power from the motor to the blade. Over time, belts can wear out or become loose, impacting the saw’s performance. Inspect the belt for wear or damage and adjust the tension if necessary. Consult the user manual for instructions on adequately tensioning or replacing the belt. Proper belt tension ensures efficient power transfer and prevents slipping or excessive vibrations.
Synopsis of the heading/topic: Troubleshooting and maintenance are essential for preserving your table saw’s optimal performance and longevity. Addressing common issues such as blade alignment, sharpness, dust collection, lubrication, and belt tension helps ensure accurate and safe operation.
Proper troubleshooting and regular maintenance are essential aspects of responsible table saw ownership. You can keep your table saw in excellent working condition by addressing common issues such as blade alignment and sharpness, maintaining a clean work environment, lubricating moving parts, and inspecting and adjusting the belt tension. Regular maintenance not only ensures accurate and safe cutting but also extends the lifespan of your equipment.